Christmas crafts for adults that turn the fabric, yarn and candle stubs already in your craft room into gifts for every name on your list, the men included, each with the yardage, wick size or sealer that keeps it from falling apart.
The gift nobody sees coming is at #1, and it starts with one old snapshot.
The list is on the back of an envelope by the sewing machine, and it got longer again. You know who’s easy. The other names make you put the pen down: the ones who’d never wear a hand-knit scarf and already own one of everything. A crafter on TikTok said what you’re thinking: “My luck I would spend 3x as much on the craft supplies than if I had just bought them.” The fix is mostly in your own closet, plus one finishing step that most tutorials leave out.
Who gets what, at a glance – The cook or baker: the apron (#17), napkins (#14) or cookie-cutter jar (#13) – A long list on a short budget: soap (#11), dishcloths (#12) or magnets (#5) – The man who has everything: a hobby ornament (#2) – Someone who shares your history: the shirt hoop (#9) or the remade ornament (#1)
#17 Sewn aprons in every print and size
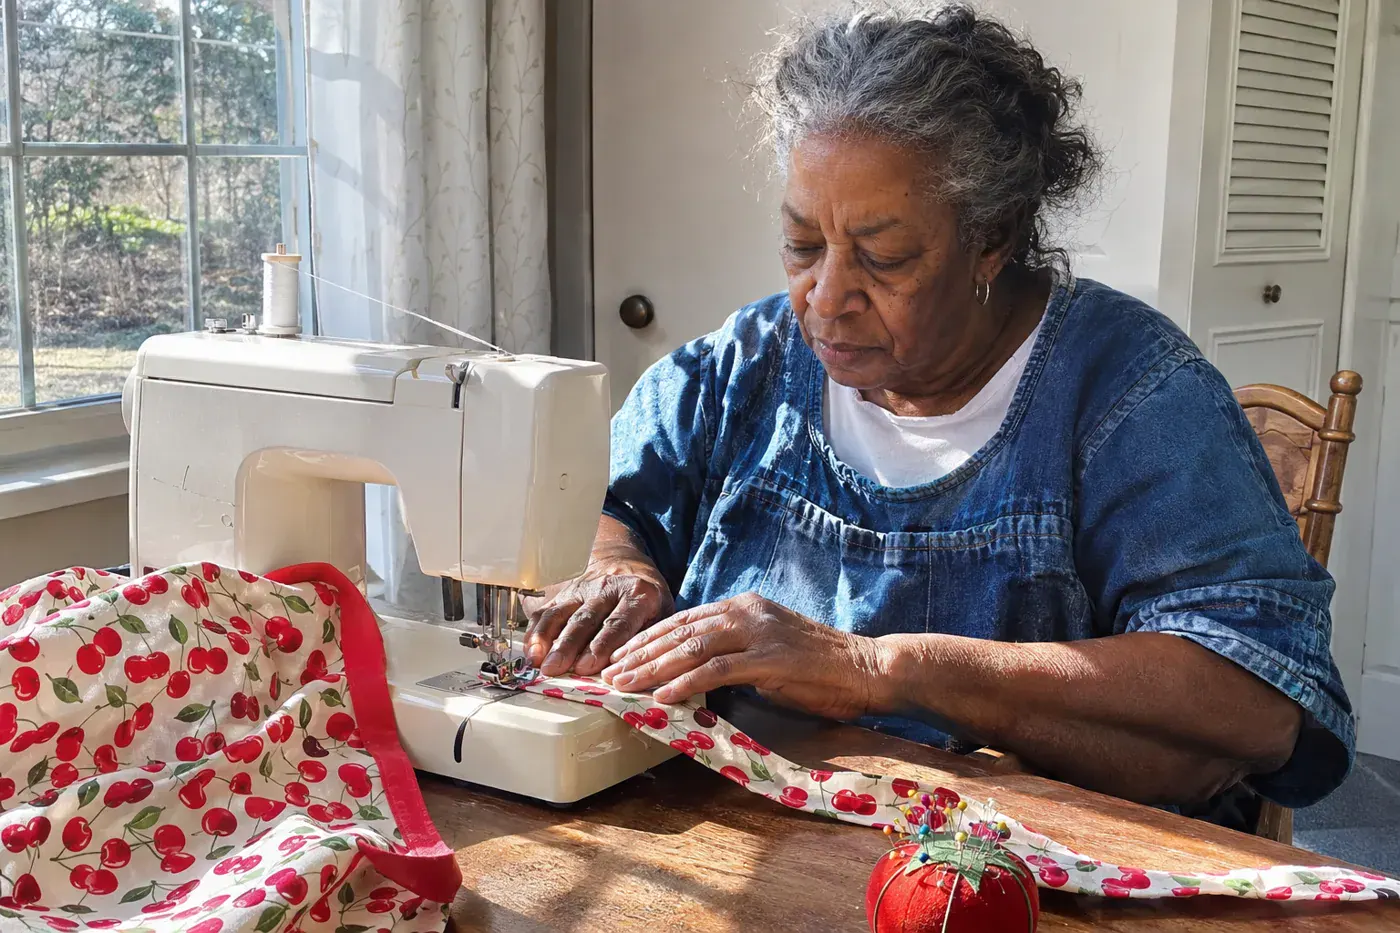
One yard of 44-inch quilting cotton makes a full adult apron, with the ties cut from the leftover width. That’s the math from Missouri Star Quilt Co.. Their buyer’s guide puts quilting cotton “starting around $7 to $9 per yard,” so the fabric for one apron costs about $7 to $9. Thread is extra, and you already have thread.
Most aprons take an afternoon. A half apron, the waist kind, takes about half a yard. Missouri Star’s Better Together pattern gets a matching adult apron and child apron out of a single yard, which is the cheapest way to make two people happy in one gift.
The one place it goes wrong is the ties. Cut adult ties at about 30 inches each and trim later. Missouri Star calls short ties “the number one apron regret,” and you’ll understand why the first time one won’t stretch into a bow.
“I vote for the aprons. I’ve made them in all sizes and prints and they were always a hit.” A sewer who has made many aprons, on Reddit’s r/Frugal
In those same threads, aprons keep coming up as the handmade gift that’s hard to get wrong, along with embroidered towels and holiday napkins. Pick a print that sounds like the person: cherries for the pie baker, a dark plaid for whoever runs the grill.
#16 Teacup candles poured from old stubs
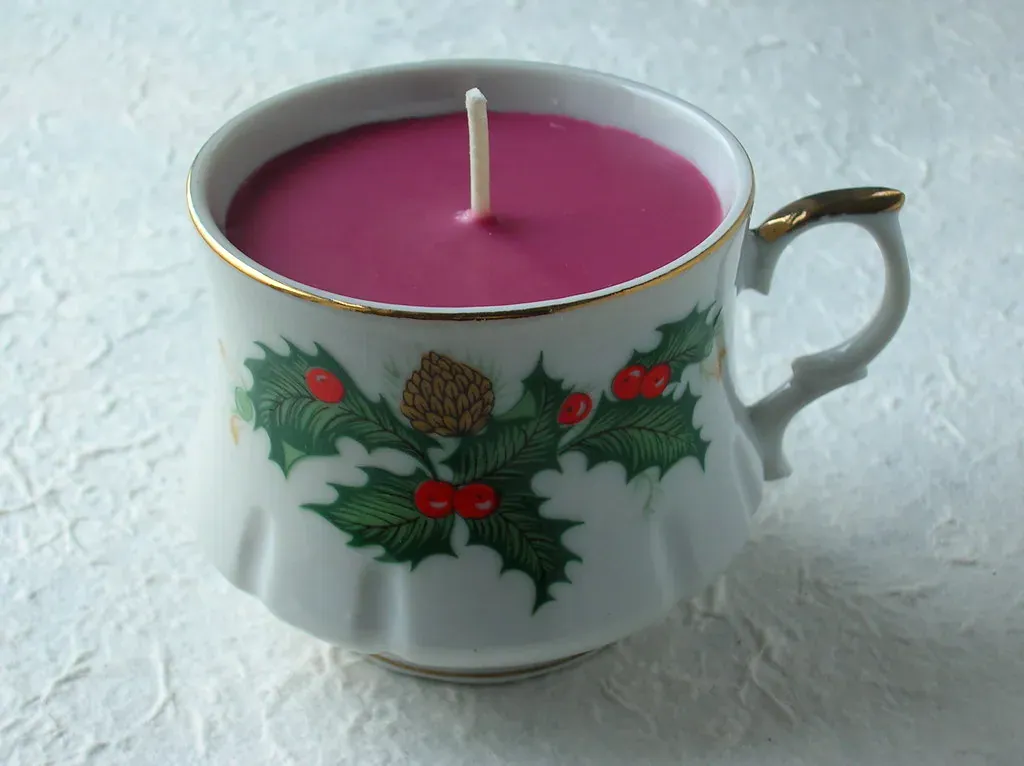
Find a thrifted teacup, measure straight across the inside of the rim, and choose your wick before you melt anything. Wick size is the part that decides whether the candle burns down evenly or tunnels a hole down the middle.
| Inside of the cup | Wick to start with |
|---|---|
| 3.5 to 3.75 inches | CD-14 |
| 3.75 to 4 inches | CD-16 |
Those sizes come from Lone Star Candle Supply’s wicking chart. If your cup is narrower than 3.5 inches, CandleScience’s wick guide covers cups as small as 1.75 inches across. If your stubs are soy, go up one to three sizes. Their test is simple: on a long burn, the melted pool “should reach the container wall within two to four hours.” If it doesn’t, give the next cup a bigger wick.
For melting, Life on Summerhill sets a glass bowl inside a pot with water about a quarter of the way up, kept at “a low rolling boil.” The wax sits in the bowl and never touches the burner. Pour it into the cup, then leave it alone for at least four hours.
Sherry of Canterbury Cottage, a former high school English teacher, ran a consignment-store booth from 2018 through 2022. Candles were a steady seller there at Christmas, she says, especially in a one-of-a-kind jar. A thrift-shop teacup with its saucer is about as one-of-a-kind as a container gets.
On the tag, write: burn it the first time until the wax melts all the way to the edge.
#15 Crocheted snowflakes in sets of six
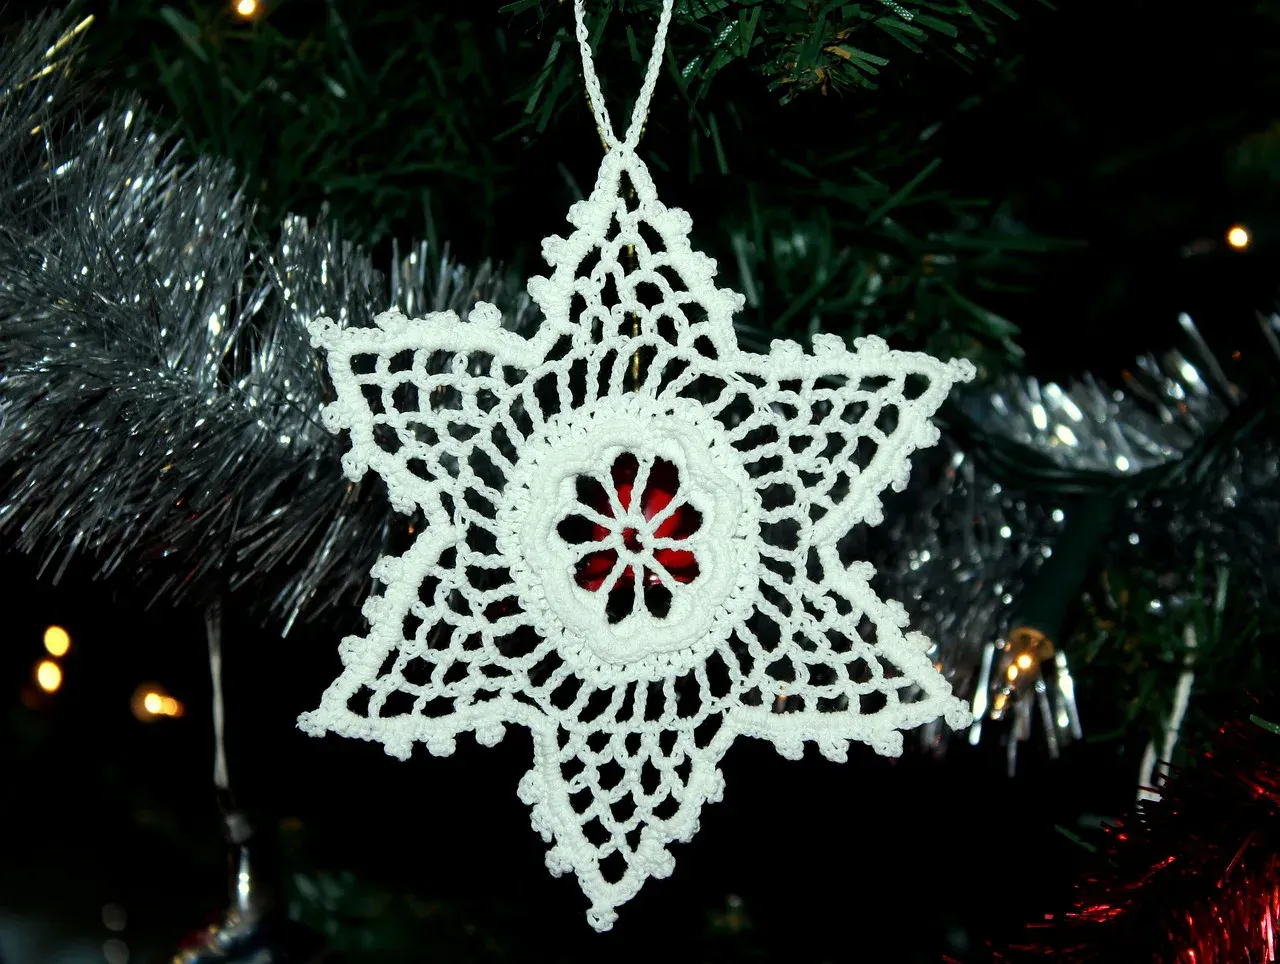
You can work a snowflake during one episode of anything, which is why it’s among the easy Christmas crafts for adults that still look like you fussed. When the list runs long, makers on Reddit say they pick one item and make it in bulk, and sets of six crocheted snowflakes are one of the things they name.
Thread size sets the snowflake size. The Crochet Architect uses size 10 cotton thread for flakes 3.5 to 4 inches across. Sizes 20 to 30 make small ones. Sizes 3 to 5 make big ones.
For stiffening, she uses either Aleene’s Fabric Stiffener & Draping Liquid or Crafter’s Pick Fabric Stiffener. “They both work well.” The catch is the clock. Drying takes “up to 24 hours, so don’t plan to give them as gifts the same day.”
Tie one flat on top of each present in place of a bow. Whoever opens it gets an ornament off the box before they even get to the gift.
#14 Mitered-corner cloth napkins from one yard
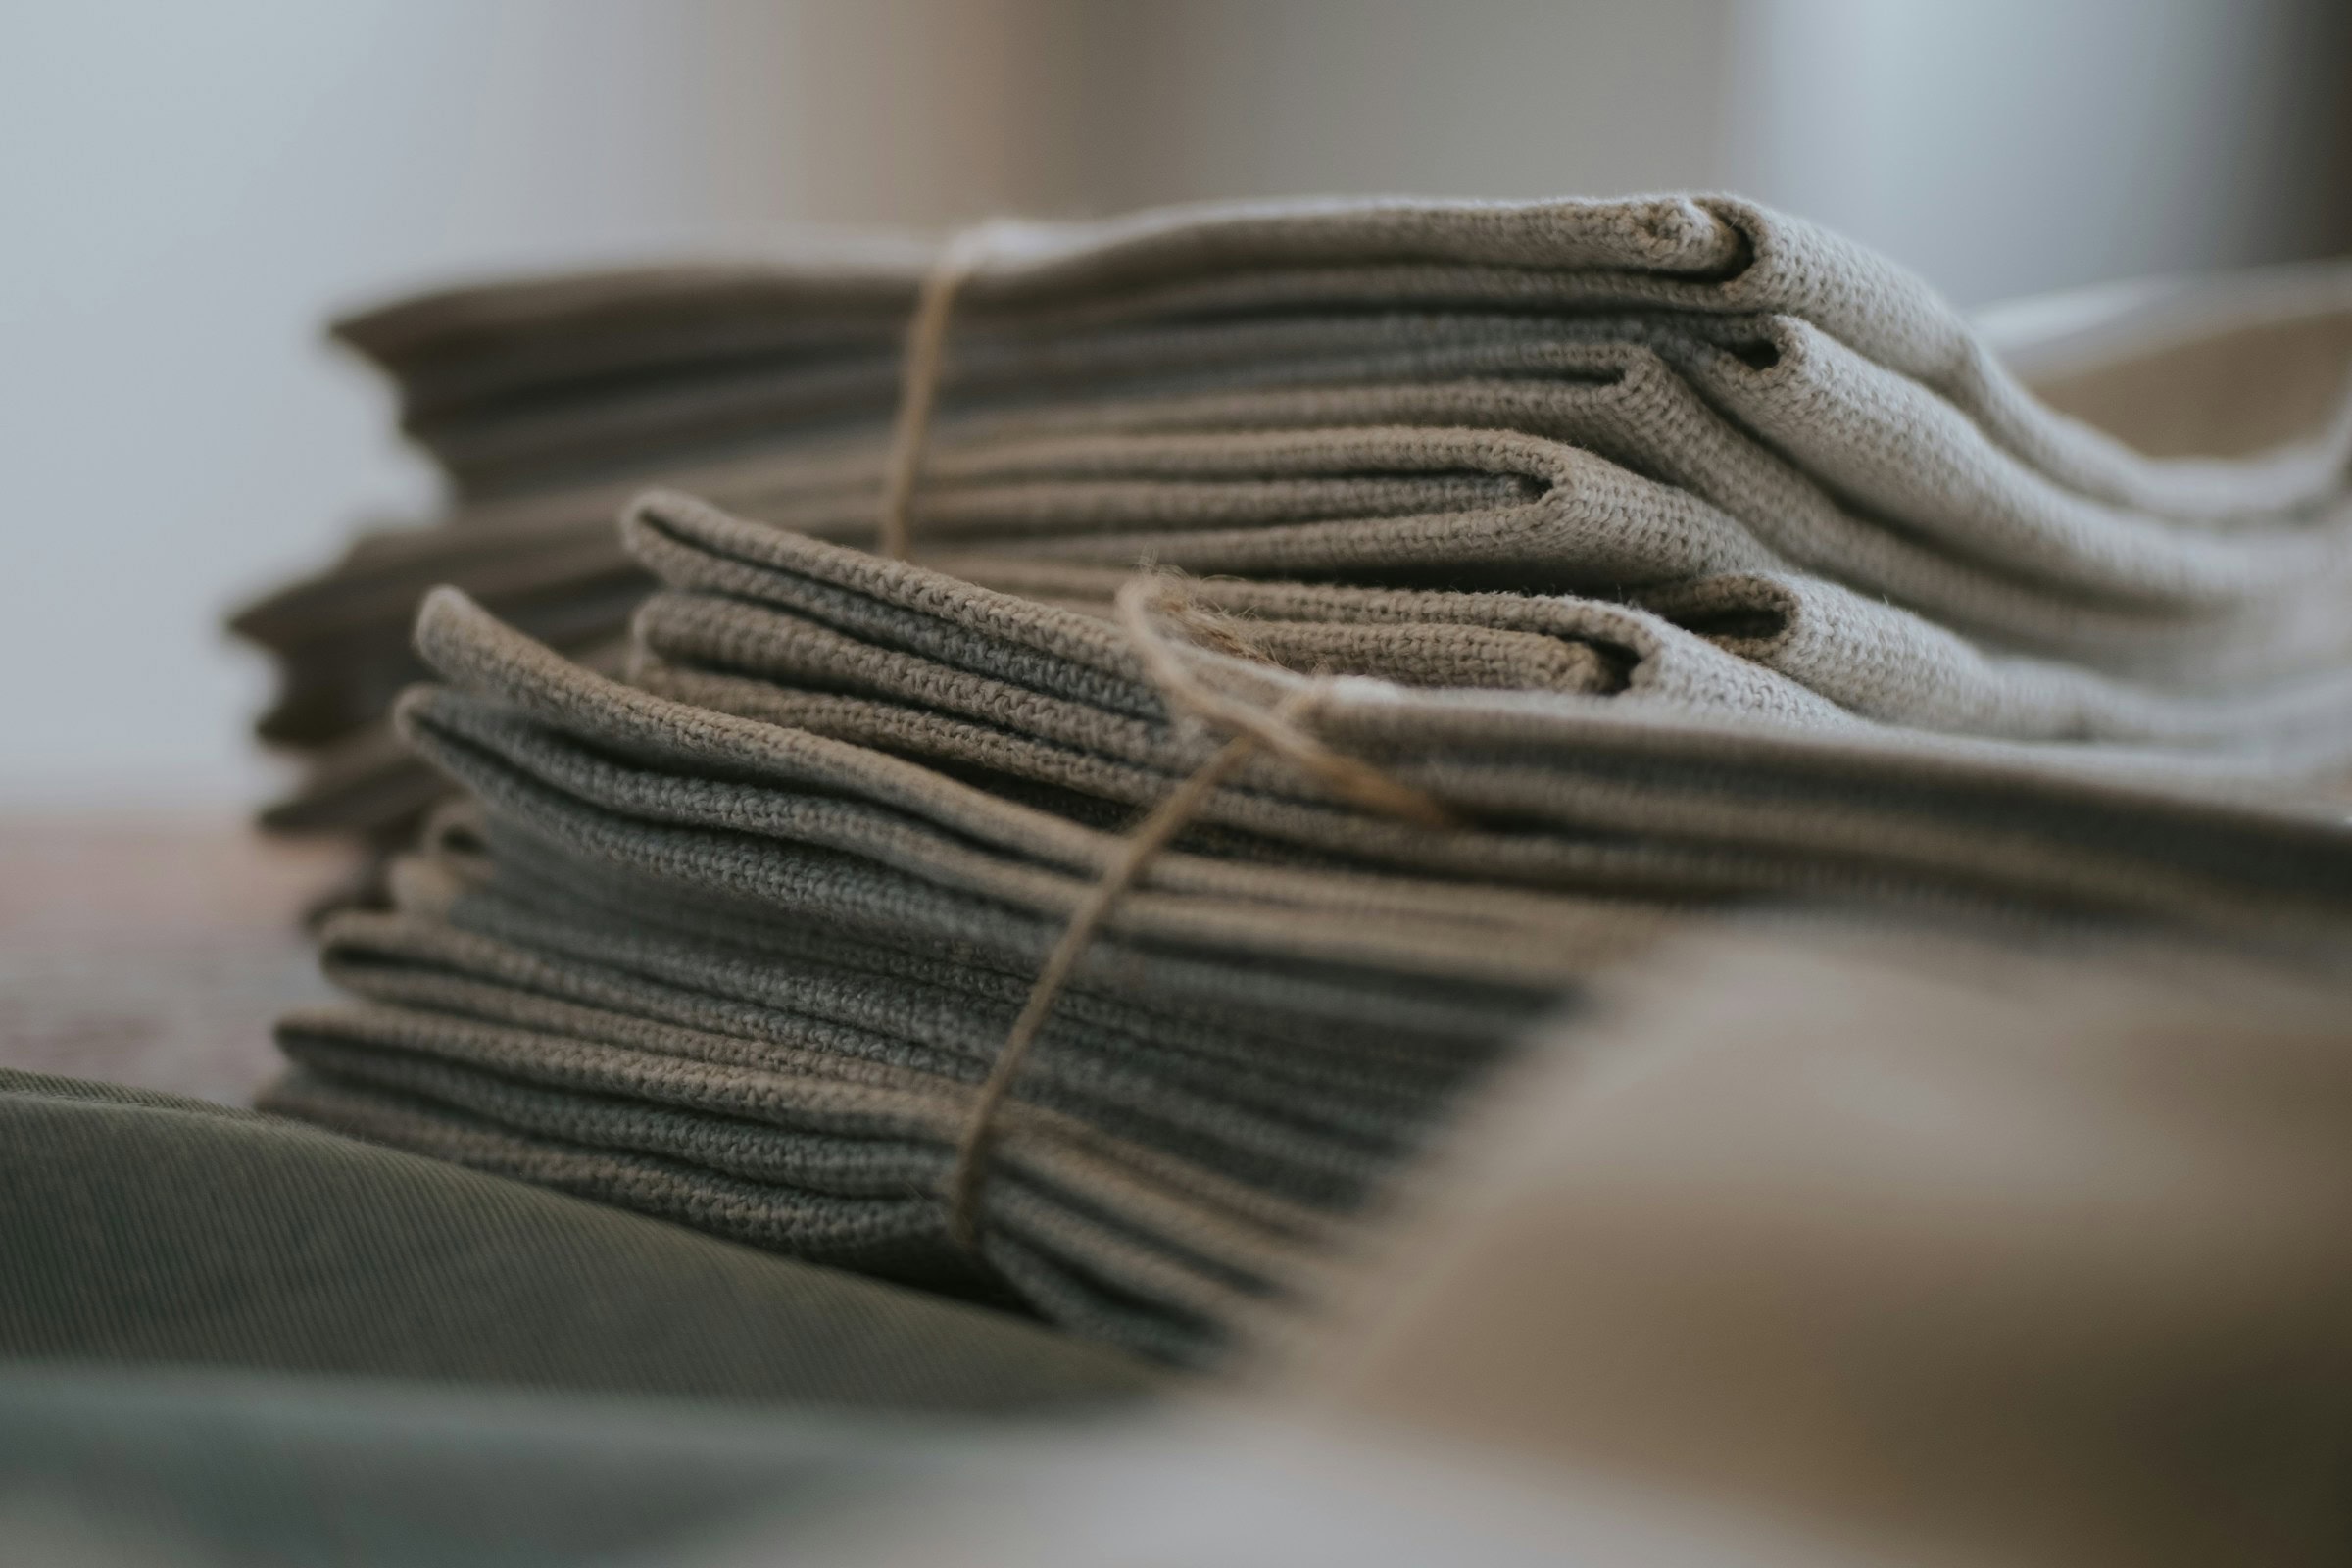
One yard of fabric makes four napkins. Fat Quarter Shop’s tutorial cuts “four 18″ x 18″ squares” from it. At $7 to $9 a yard, a set of four costs $7 to $9, or about $1.75 to $2.25 a napkin. That’s a hostess gift you can tie with ribbon and hand over at the door.
Mitered corners are what make them look store-bought:
- Fold and press ½ inch on every side.
- Fold each corner right sides together, draw a 90-degree line at the point, and sew it with a backstitch.
- Clip about ¼ inch from the seam, turn the corner out and press.
- Stitch ⅛ inch from the inner folded edge all the way around.
The finished napkin is about 17 inches square. Buy two yards in a holiday print and you have one set to give and one set for your own table.
#13 A jar of thrifted cookie cutters
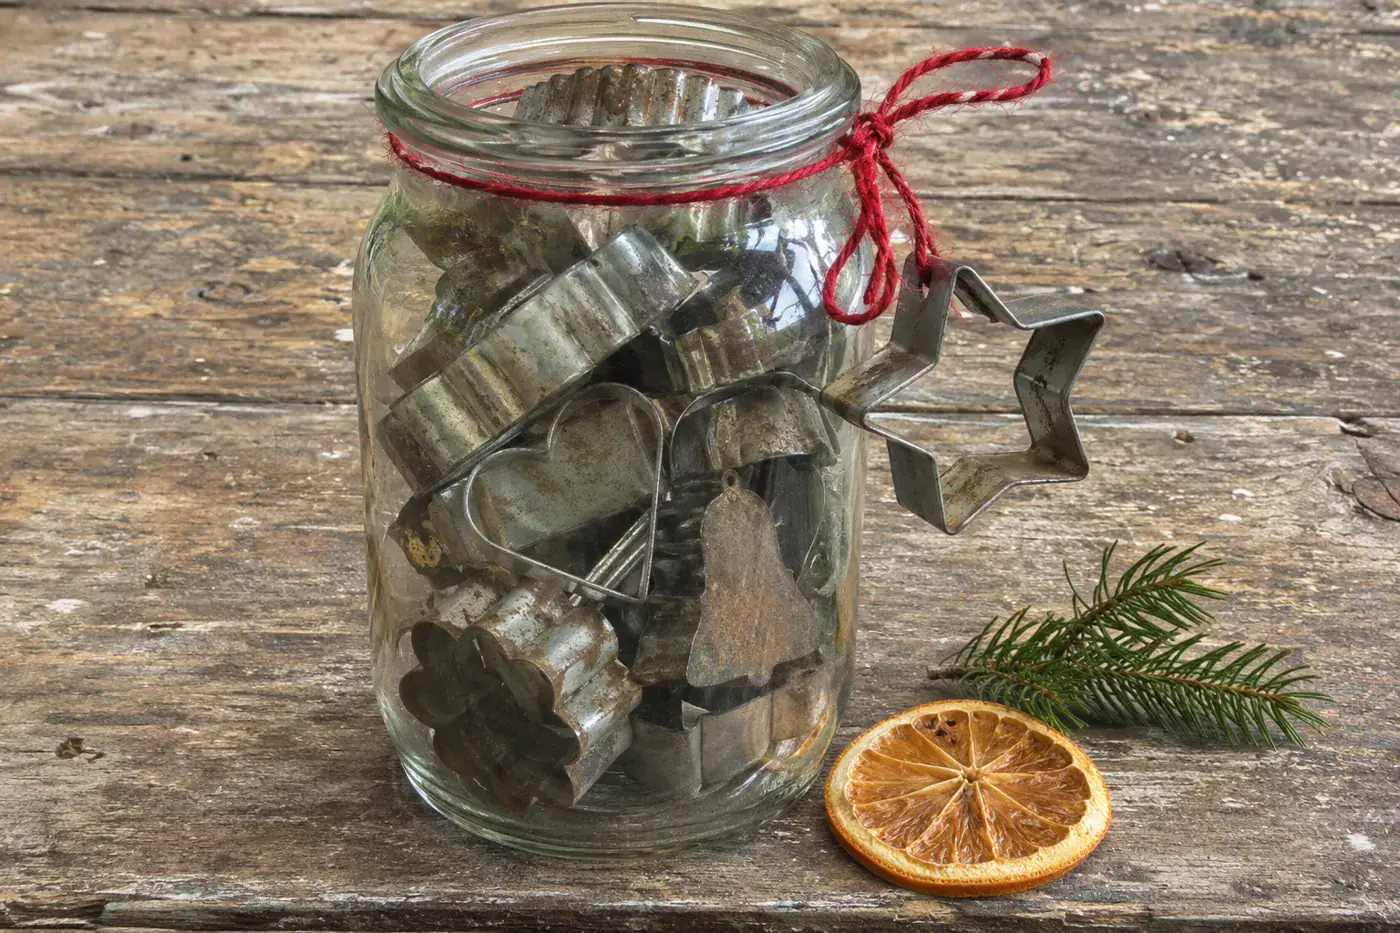
Sherry spends the year picking up cookie cutters at thrift shops, then fills a big glass jar with them: “I fill the jars with Cookie Cutters that I’ve thrifted throughout the year.” One cutter hangs on the outside like an ornament, next to a vintage recipe card. She gets the jars free by asking a local restaurant for its empty olive and pickle jars.
Mason jar gifts are everywhere. This one is better because it’s full of something the person will use every December.
The restaurant label is the only hard part. America’s Test Kitchen’s paste is ½ cup baking soda, ¼ cup vegetable oil and 6 drops of citrus essential oil. Leave it on the glue for 10 minutes, rub for a minute with a damp towel, and wash. If you’re out of oil, soak a cloth in white vinegar, lay it over the label for at least 20 minutes and scrape.
For the card, King Arthur’s PJ Hamel picks Holiday Butter Cookies for cutout shapes because it “held its shape better.” Add her rolling note at the bottom: ⅛ inch for light, fragile cookies, ¼ inch for ones that have to travel.
#12 A knitted dishcloth tied around soap
Is a dishcloth really a gift? The research says yes. A 2014 study reported by Yale found that “givers think fancier gifts will cause them to be more liked… but receivers actually think practical gifts will cause this.”
The yarn decides whether it gets used. Mary Maxim points out that cotton absorbs water and holds up to machine washing, while acrylic “doesn’t absorb water too well, making the dishcloth practically unusable.” Use worsted-weight cotton. That leftover acrylic in your stash is meant for something else.
A ball of Lily Sugar’n Cream costs $3.99 at Yarnspirations. Lily’s own Raindrop Dishcloth uses 99 yards, one ball of the solid colors, on US 7 needles, and finishes about 9 inches square. That works out to about $3.99 of yarn per cloth. Crochet it if you’d rather; cotton is still the rule.
Fold the cloth around a bar of soap, ideally one from the next item, and tie it with baker’s twine.
#11 A big batch of spiced soap bars
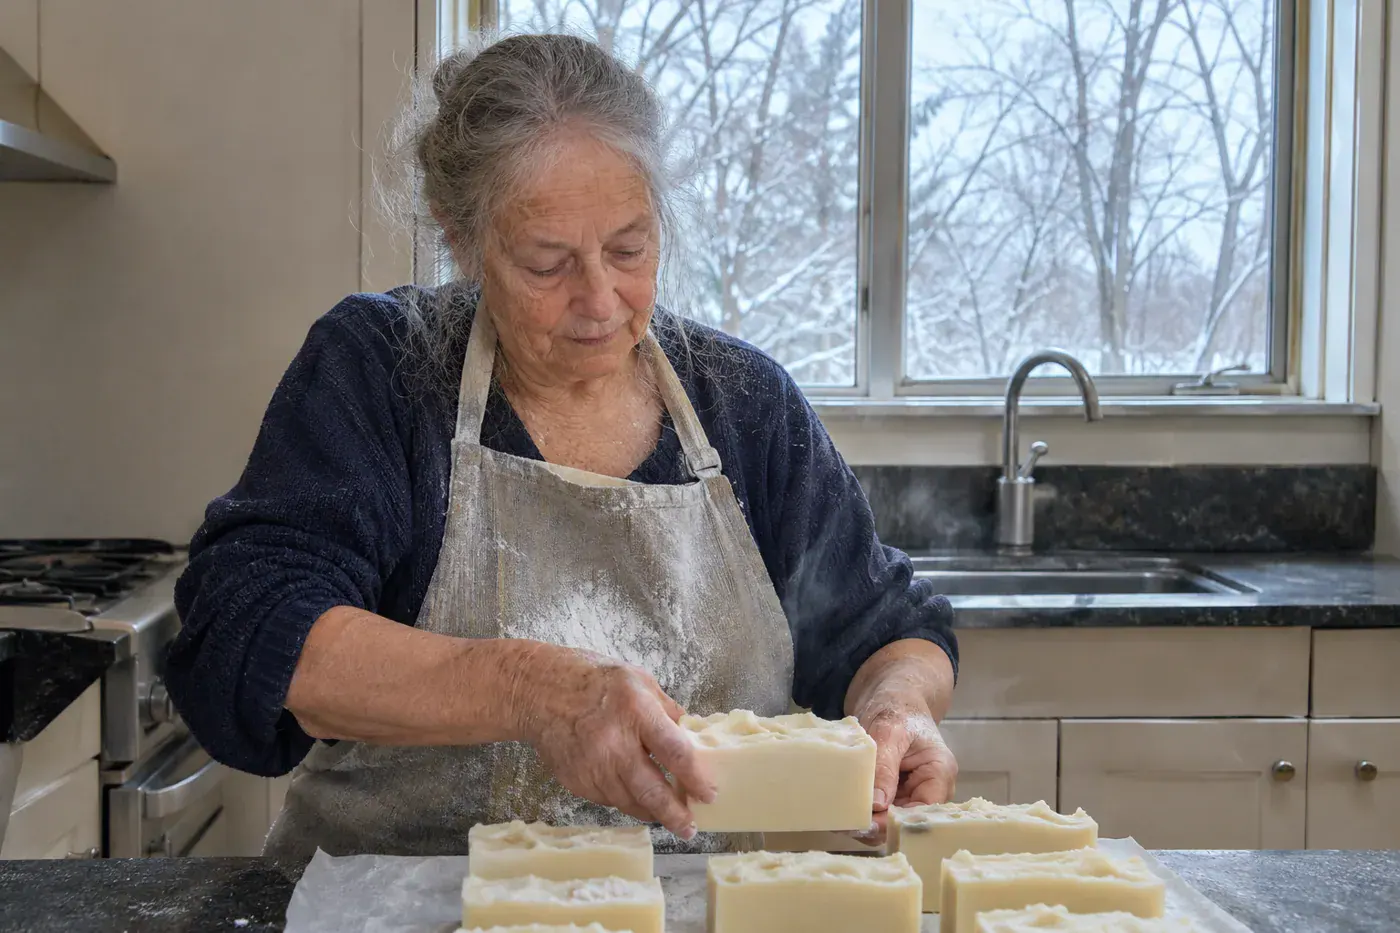
Sometimes the answer is one gift, made over and over, in a big batch of spiced soap bars.
Choose the method before you buy anything. Soap Queen says cold-process soap “takes about 4-6 weeks to cure” and uses lye, which “can be dangerous when handled incorrectly.” A batch poured in mid-November could still be curing on Christmas Eve. Melt-and-pour “does not need to cure,” and because you aren’t handling lye, you don’t need safety gear.
The cost is easy to work out. Nature’s Garden sells a 2-pound goat’s milk base for $8.24; if you pour it into 4-ounce bars (the size is up to you), that’s eight bars, or about $1.03 of base per bar. At that same 4-ounce size, a hundred bars takes about 25 pounds of base, roughly $103 before fragrance and shipping.
Melt the base in the microwave in 30-second bursts, since it can burn if it gets too hot. Stir in ½ to 1 tablespoon of body-safe fragrance oil per pound, choosing a spice scent sold for use on skin. Melt-and-pour can sweat little beads of glycerin, and that doesn’t mean you did anything wrong.
What the other gifts cost in materials – Cloth napkin: about $1.75 to $2.25 each – Cotton dishcloth: about $3.99 of yarn – Sewn apron: about $7 to $9 of fabric – Thread, ribbon, fragrance and shipping are extra on all of them
#10 A ten-minute mini photo album
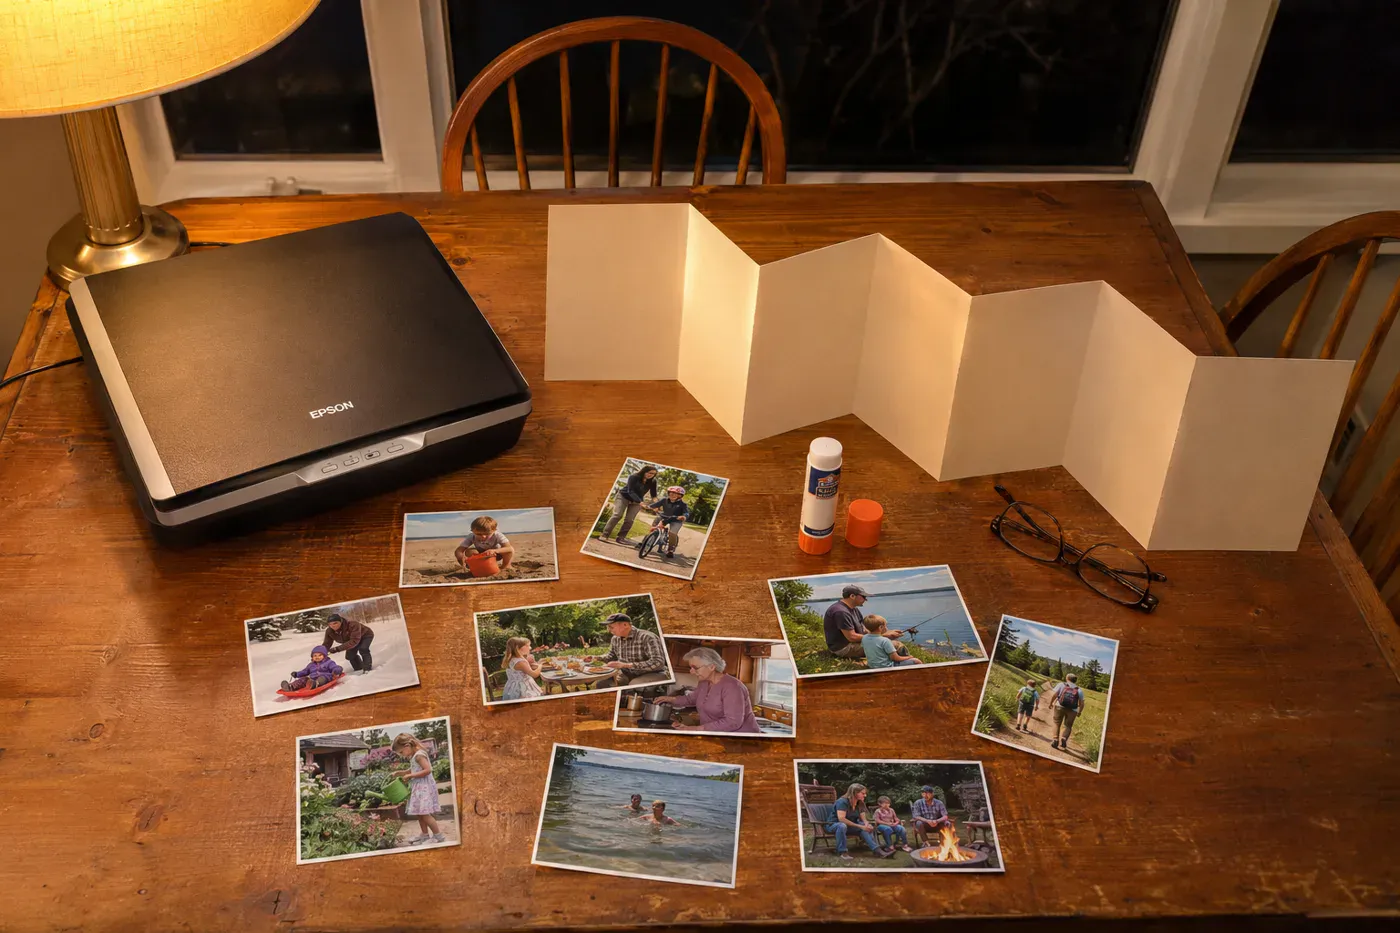
Somewhere there’s a shoebox of prints that only one person has looked through in years. Scan six of them and they turn into a keepsake that fits in a coat pocket.
Your scanner setting matters, and it’s measured in dpi, dots per inch, the amount of detail the scanner picks up. The Library of Congress says 300 to 400 dpi is enough for ordinary snapshots, even if you enlarge them to 8×10. Those tiny old prints with scalloped edges are different: scan them at around 1,400 to 1,500 dpi so a copy can be printed bigger than the original.
The album needs no sewing. Crafting With Donna folds a 3×4-inch accordion with four panels that holds six wallet photos. One 12×12 sheet of 80 to 110 lb cardstock makes three. Score every fold before you fold it and use an acid-free tape runner. She says it takes about 10 minutes once you know the steps, so let the first one take longer.
Since one sheet makes three, everyone who was in those pictures can get the same six.
#9 A hoop ornament from a loved one’s shirt
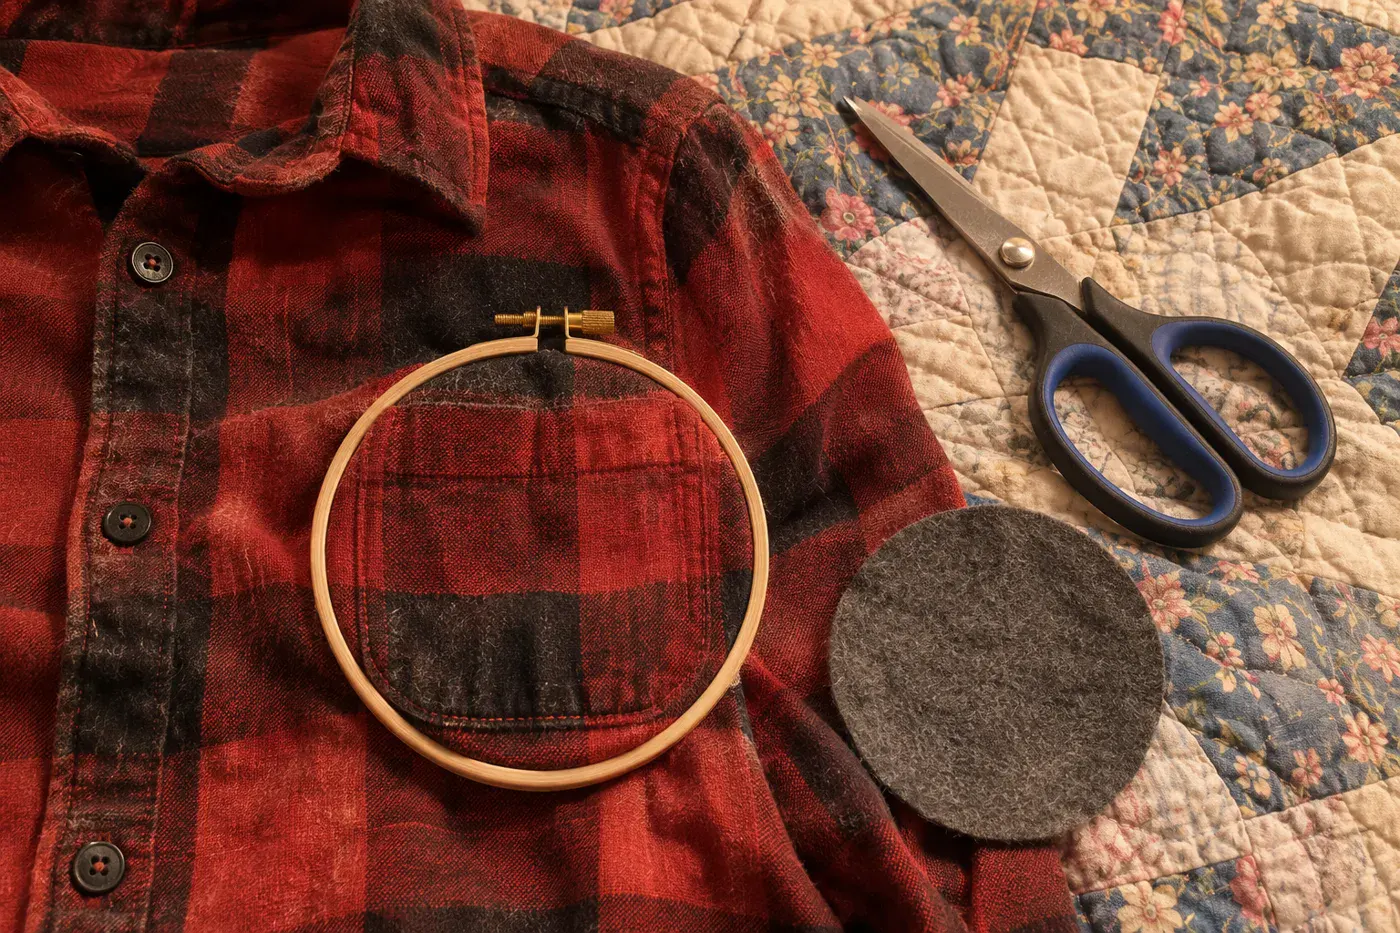
It’s the flannel shirt nobody can bring themselves to take to the donation bin. Here’s what to do with it instead.
My Creative Days clamps a 4-inch embroidery hoop over the part of the shirt worth keeping: the pocket, the plaid, a row of buttons. Then you trim the back, trace the hoop onto felt, cut out the circle and hot-glue it on as a backing. The author made hers as “a great way to create a memento out of something that reminds you of a loved one who has passed.”
Since you can stitch, add initials or a year in floss before you clamp it.
One shirt usually has enough fabric left for more than one ornament. Ask first if anyone else in the family is keeping the shirt. Then make one for each person who would want it, and tie a ribbon through the brass screw at the top.
#8 A child’s drawing shrunk into a keepsake
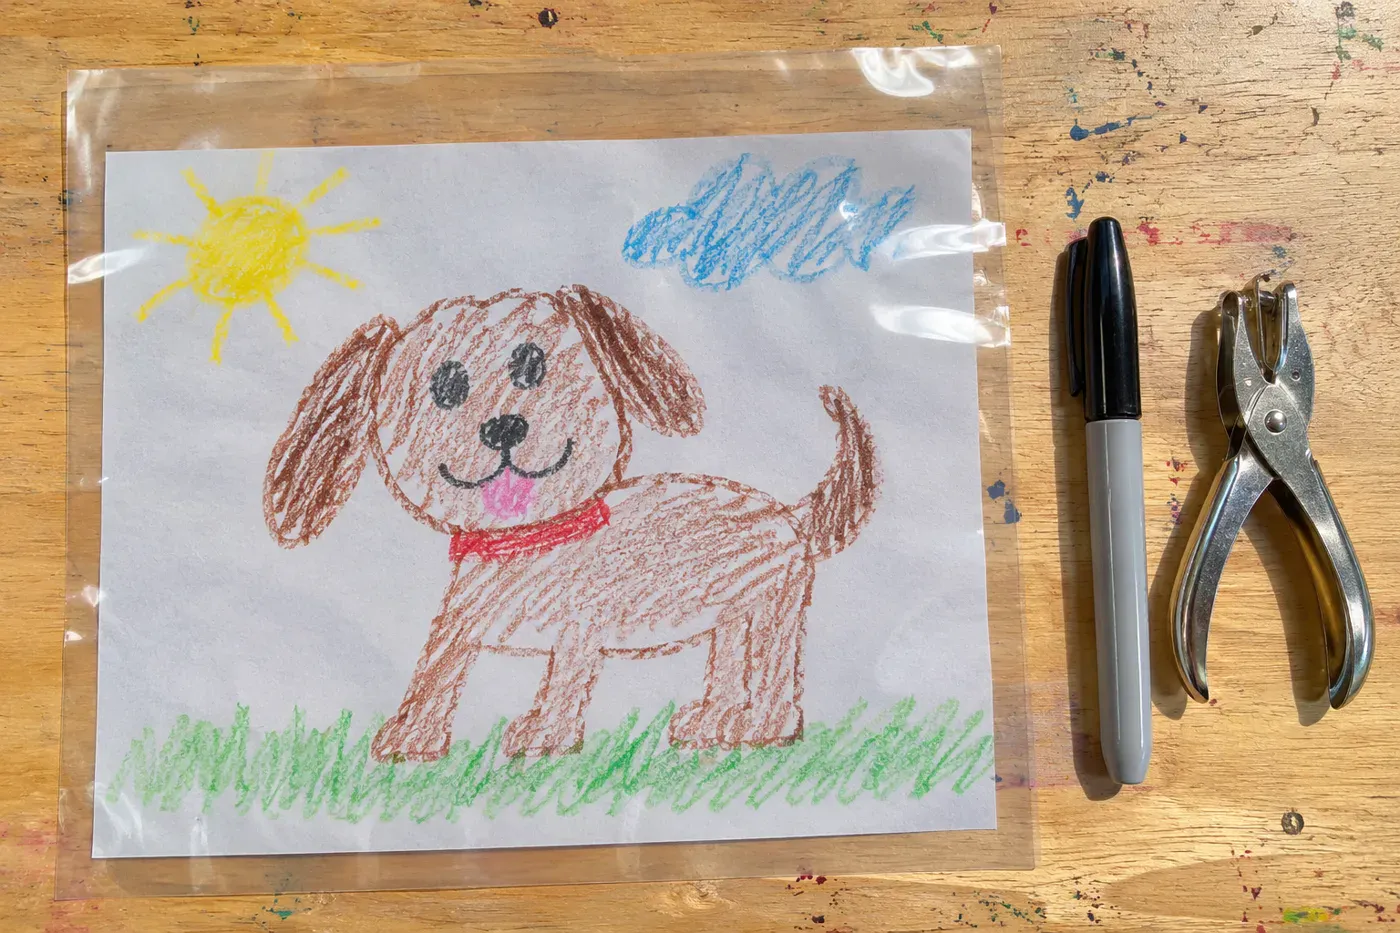
If a small artist in your life hands you drawings, this turns one into something a parent will keep long after the fridge is cleared off.
Sisters, What! lays shrink plastic over the drawing and traces it “using a permanent marker.” The child then colors it in with colored pencil or watercolor. Punch the hanging hole before it goes in the oven, and bake it following the directions on the plastic. “The drawing will shrink considerably,” and the Shrinky Dinks maker says its sheets shrink up to 60%, so start with a big one.
Hide the washable markers. Little Sprouts Learning says they’re water-based and “won’t stay on the plastic.” Alcohol-based markers like Sharpies dry fast and don’t run in the heat.
#7 A dated scrap of this year’s wrapping paper
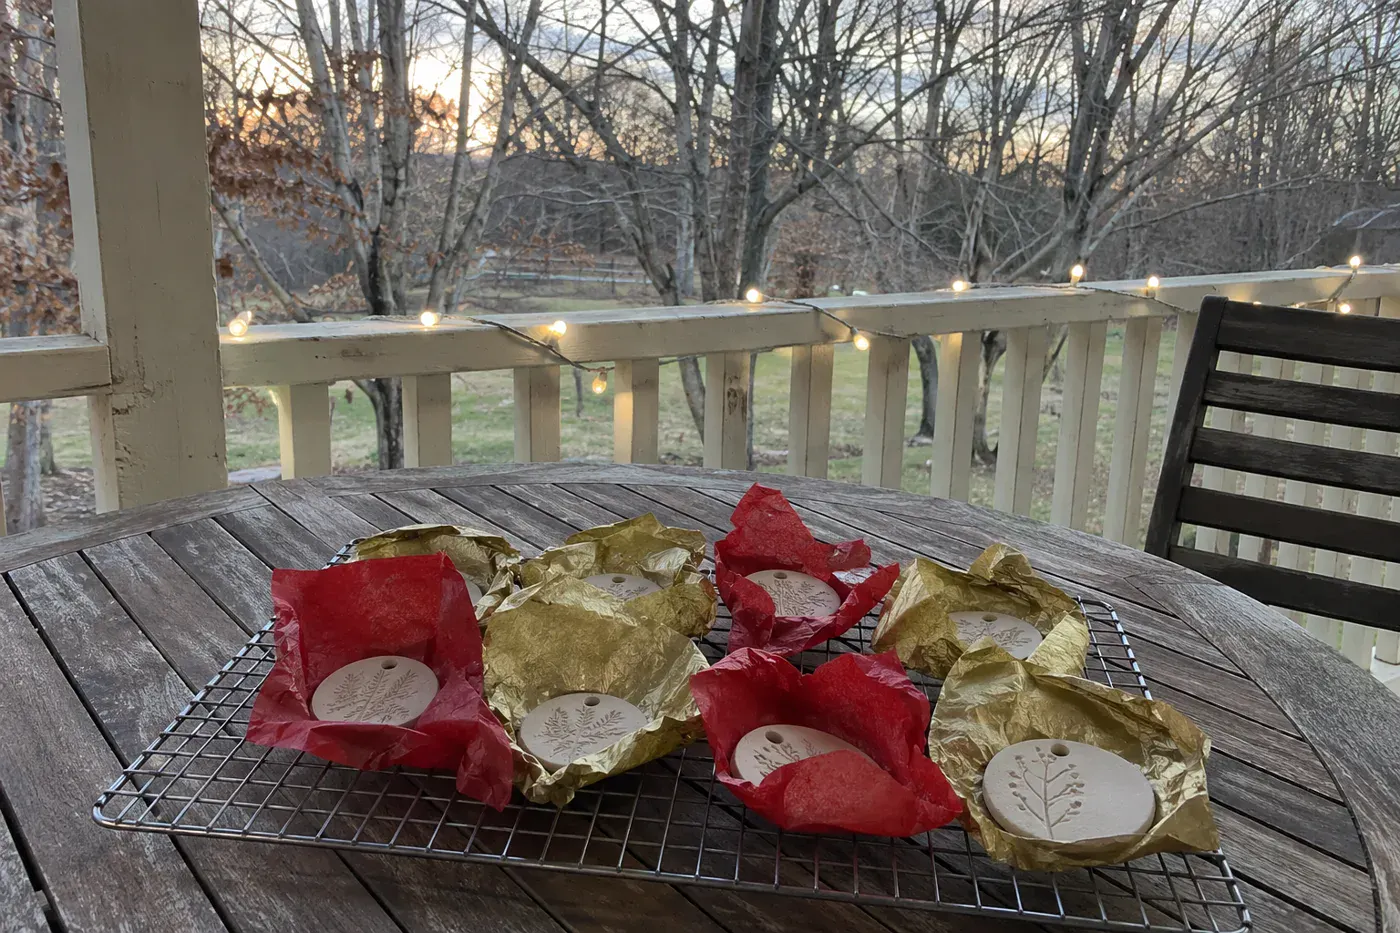
“I just had the best idea – do this with a piece of your wrapping paper every year to remember that year. Mark the year on the back.” A commenter on a napkin-ornament video on TikTok
It makes a good set of personalized ornaments, one a year. Poke a hanging hole in a plain disc of polymer clay such as Fimo or Sculpey, bake it according to the package, and once it cools, glue the paper on with Mod Podge, as Mod Podge Rocks does. Air-dry clay works too, but it needs 24 to 48 hours to dry first. Write the year on the back.
The sealer is where people go wrong. Ginger Davis Allman, a polymer clay teacher at The Blue Bottle Tree, warns: “If you use Mod Podge gloss acrylic spray on your polymer clay project, you WILL ruin it.” The clay’s softener reacts with it, leaving it “terribly sticky and gooey.” She tested sprays on clay:
- Stayed sticky: Mod Podge Gloss Clear Acrylic Sealer, Krylon Triple-Thick Crystal Clear Glaze, Krylon Preserve It!, Krylon Kamar Varnish
- Recommended instead: U-POL #1 Clear, Helmar Crystal Kote, Varathane or Minwax Fast-Drying Polyurethane
She also says brush-on Mod Podge can turn tacky when the air is humid. Thread a ribbon through the hole and the ornament works as a gift tag this year, then goes on the tree next year with the next scrap beside it.
#6 Hand-painted china, the old home hobby
That plate in the cabinet with the violets and the gold rim may have been painted at someone’s kitchen table. According to the Liberty Hall Historic Site in Frankfort, Kentucky, china painting took off in the 1870s and lasted through the first quarter of the 1900s. Women bought plain porcelain “blanks” and taught themselves from books like Mary Louise McLaughlin’s 1877 manual for amateurs. An 1886 Frankfort ad promised “New shapes in Haviland’s French China for painting at Day & Huff’s.”
Antiques appraiser Dr. Lori Verderame describes the same hobby: “People did paint their own plates so they would buy them inexpensively as blanks and then they would decorate them themselves.”
You can do it in your own oven. Pebeo Porcelaine 150 needs at least 24 hours to dry, then bakes 35 minutes at 300°F. Afterward it has “remarkable resistance to dishwashing.” Even after baking, the paint isn’t meant for surfaces that touch food, so paint display plates, trinket dishes or vases.
Plain white thrift-store plates make good blanks. If someone on your list inherited a painted set, copy one flower from it onto a small dish so the old pattern has a new piece.
#5 Painted clay magnets by the dozen
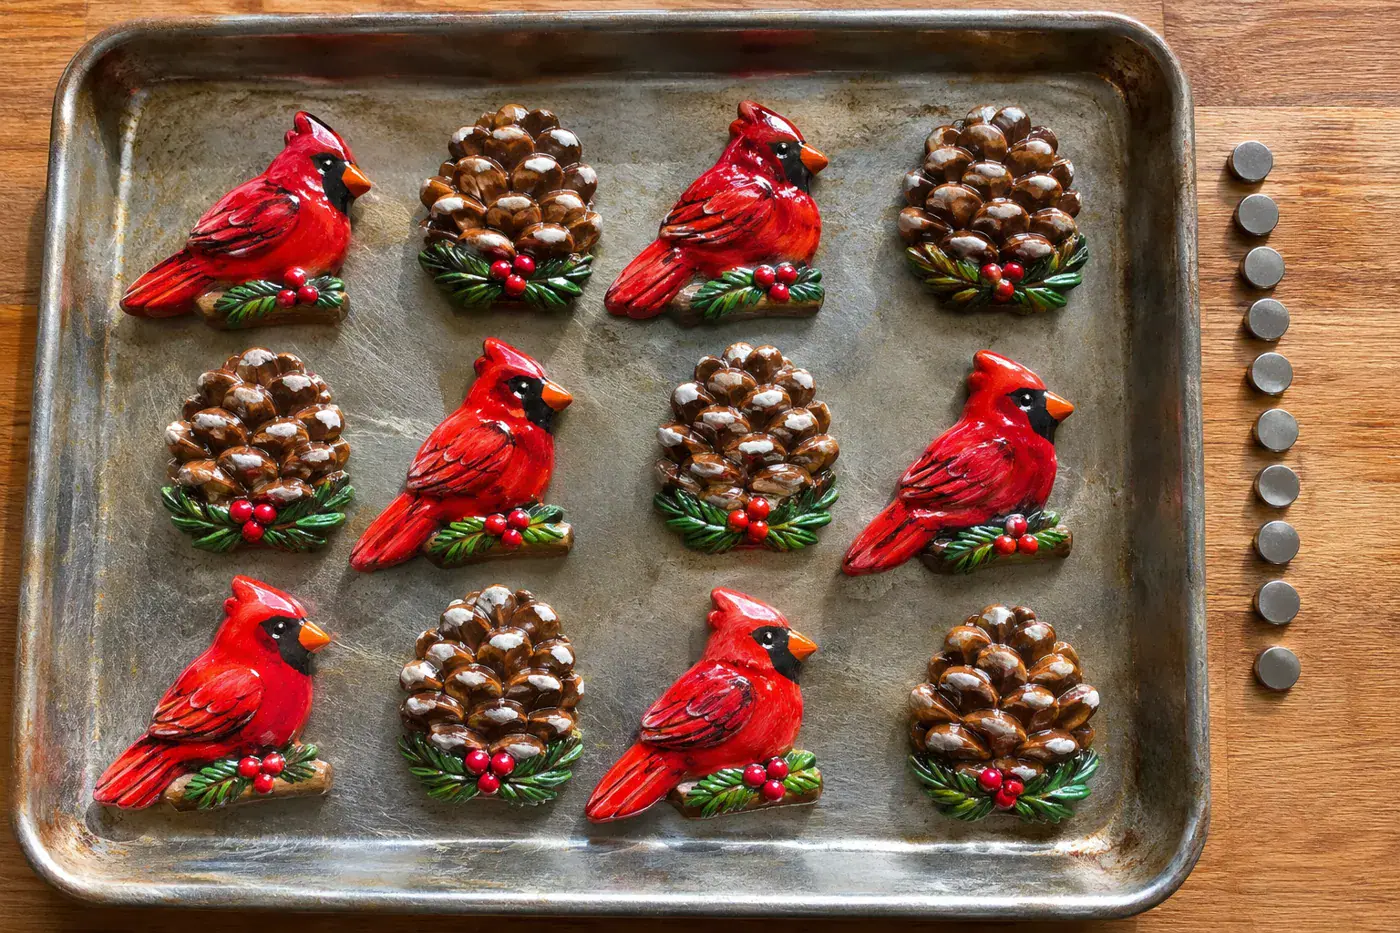
This one surprises people who’ve worked with clay for years: baking a magnet inside polymer clay ruins the magnet. Hawk Hill found that tiny neodymium magnets are plenty strong for small clay pieces, but baking them in “resulted in demagnetized magnets.” So shape the clay around the magnet, pop it out, bake, and glue it back in with super glue. Keep the finished magnets away from young children, because swallowed high-powered magnets can attract each other inside the body and cause serious internal injury or death.
You can skip the sealer, too. Allman says properly cured polymer clay “is a durable vinyl plastic and is, itself, naturally waterproof.” If you painted over it and want a coat anyway, use one from the recommended list in #7.
Makers with long lists mention batches of about 70 painted clay magnets. Shape a whole tray in the same evening, bake them all at once, and do the gluing the next morning with coffee.
#4 A paper gift box filled with treats
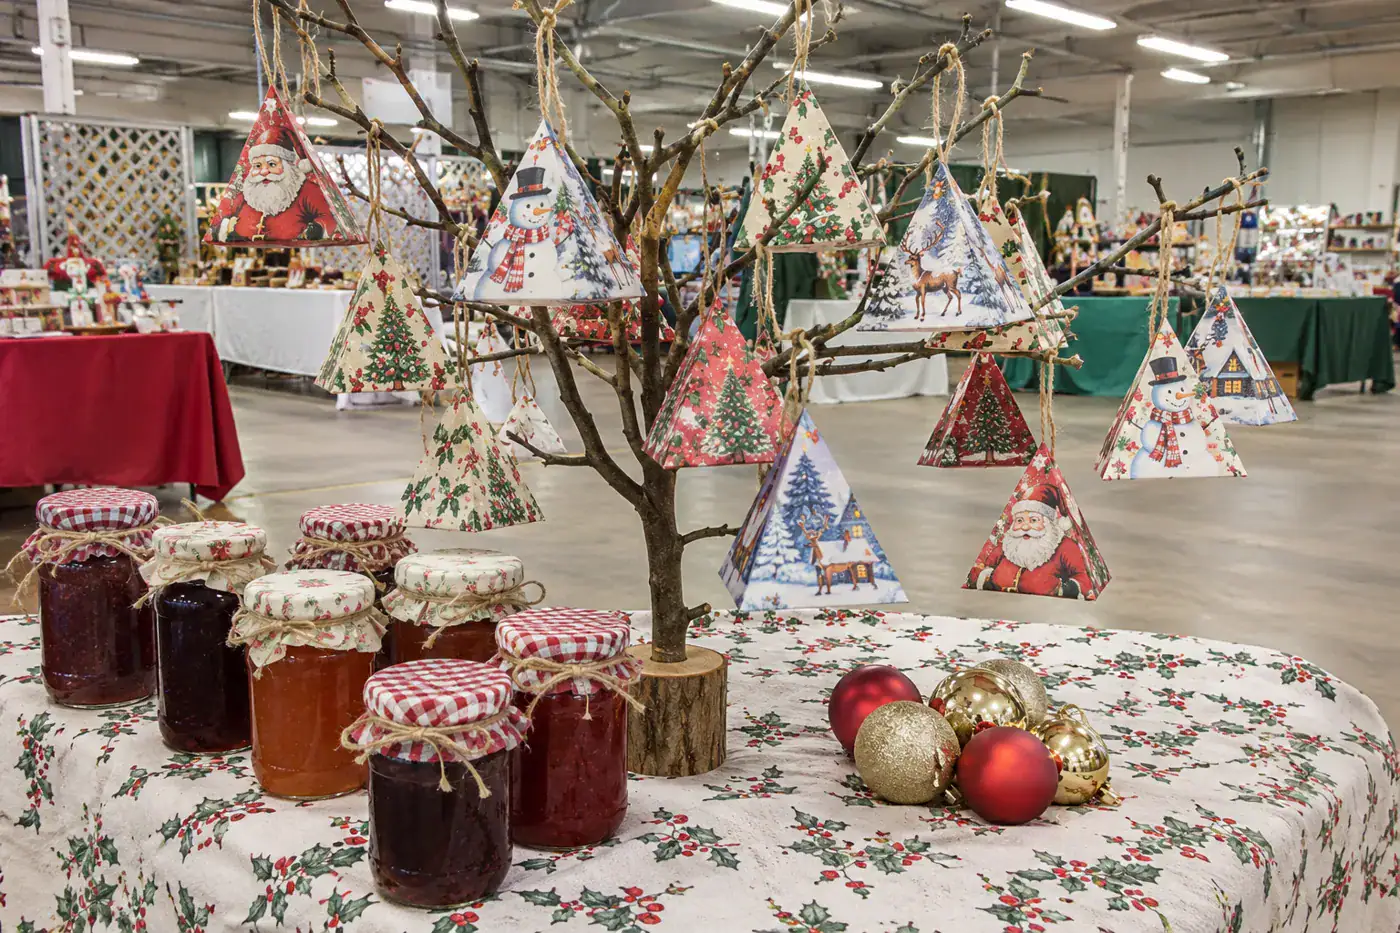
Kimberly Smith, a stamping-supply demonstrator who works craft fairs, noticed that her empty decorative boxes got the compliments while her filled boxes made the sales. Her explanation: “It was the adults buying things for other adults.” Shoppers even asked her to add a string so a box could hang on the tree.
She doesn’t always start from scratch, either. She covers plain party-favor boxes from the clearance shelf with pretty paper, and “When I don’t sell things I’m happy to give these away.”
To fold your own, My Frugal Christmas makes a triangle box from four card pieces, three sides and a base, with the base taped so it opens. Size matters: “My 2.5 inch triangle fit only 2-3 Hershey Kisses and it was a tight squeeze.” Make the base at least 3 inches.
Smith says shoppers kept asking two things: is it edible, and what’s inside? Answer both on the tag.
What goes on the tag – The nine major allergens: milk, eggs, fish, crustacean shellfish, tree nuts, peanuts, wheat, soybeans and sesame, which joined on January 1, 2023 – If you sell them, Maryland’s cottage food rules, for example, want the product name and ingredients listed by weight, heaviest first – Those rules allow hard candy that needs no refrigeration, but not chocolate, caramel or fudge
#3 Saved paper napkins decoupaged onto an ornament
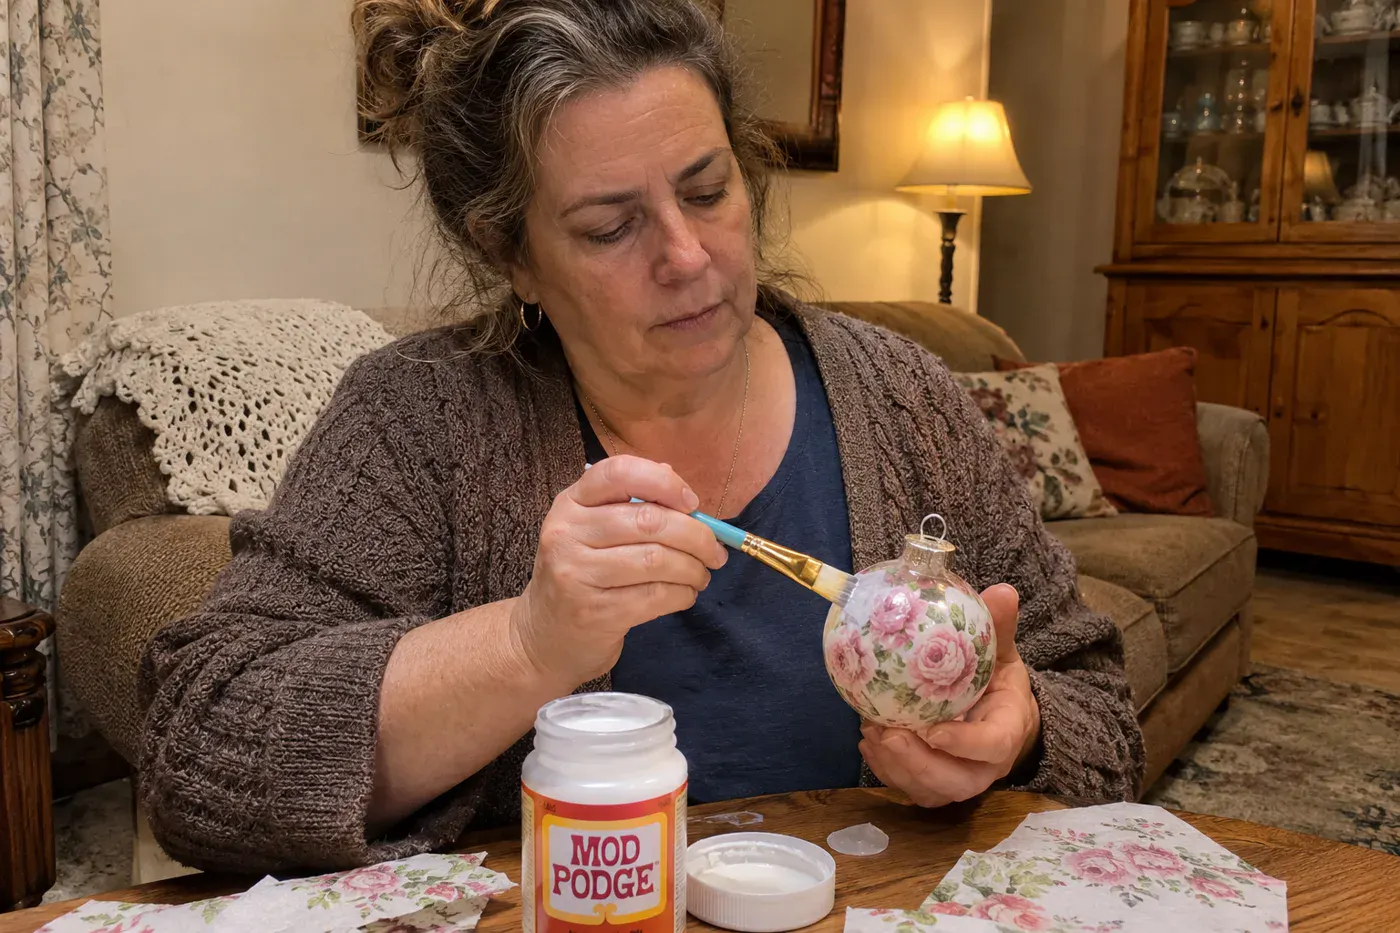
Maybe it’s the napkins from a birthday party, or a set someone you miss always put out at Christmas. Commenters on TikTok want to save exactly those. Napkin decoupage puts them on a glass ornament you already own.
DIY Beautify’s method starts with peeling. “Paper napkins are usually 3-ply, that means 3 layers. Peel away the two layers.” The second layer fights you, so work it loose from one edge. Cut the printed top layer into strips about 1¼ inches wide, brush on matte Mod Podge, smooth the strips around the ball, add a thin top coat and hang it to dry.
Several commenters under one napkin-ornament video asked about clay, sealer or glaze. The sealer is where a napkin ornament usually goes wrong: it stays sticky. Mod Podge Rocks gives the reason: “The more glossy the Podge, the more likely it is to stay tacky.” The fix is a clear acrylic spray, or brush-on Minwax Polycrylic, after about 24 hours. Or use Hard Coat Mod Podge, which dries satin and isn’t tacky.
The bottle says it takes four weeks to reach full strength. Wrap each ornament in its own tissue so the ornaments don’t stick to each other in the box.
#2 A hobby ornament for the men on the list
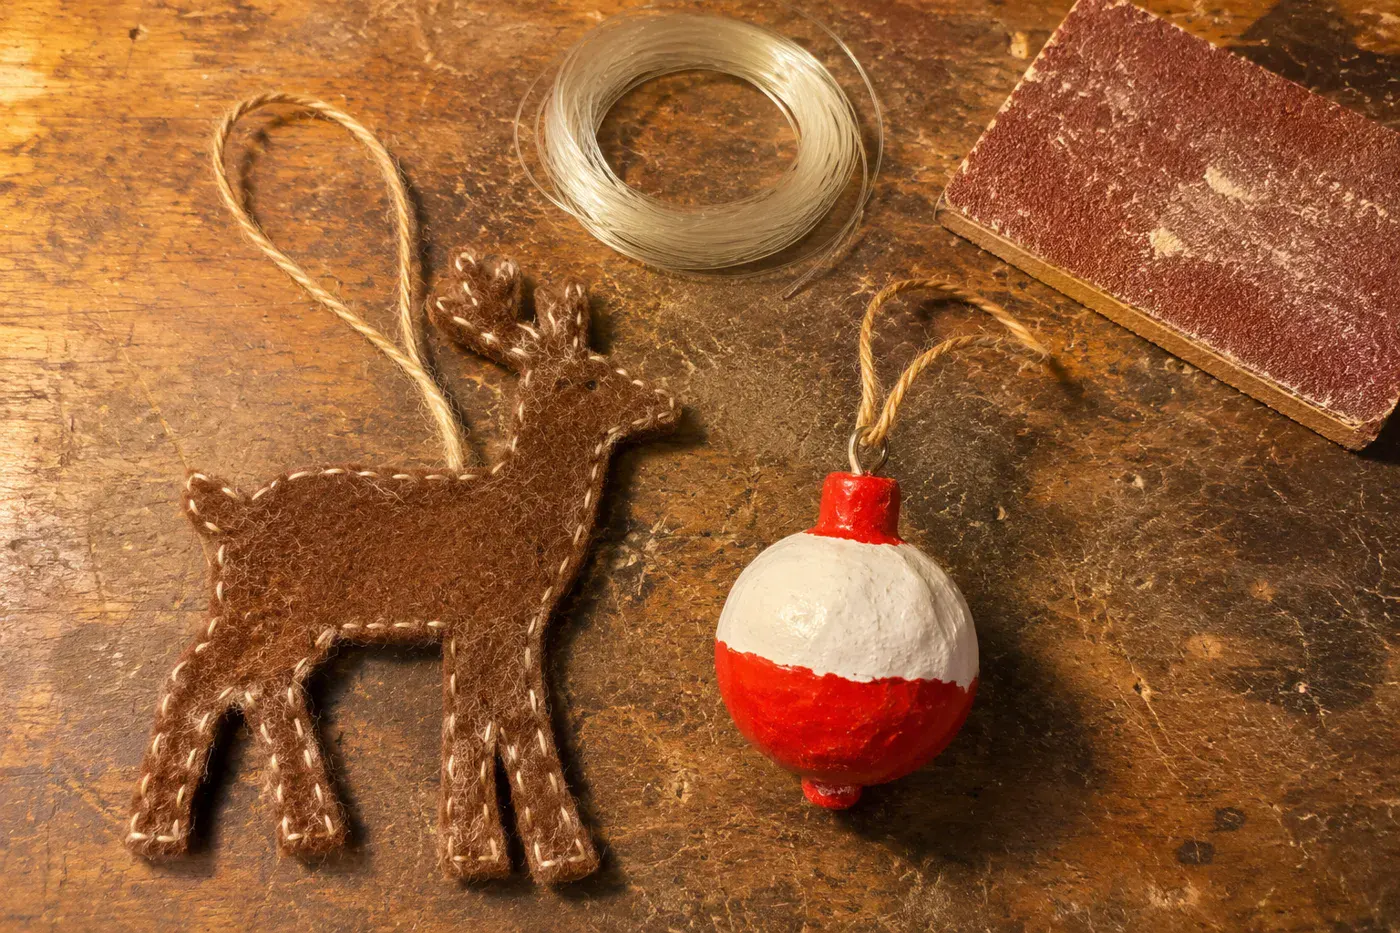
This is where most lists stall. Jennie and Davis, two Texas makers who’ve spent two years selling handmade cutting and charcuterie boards at craft shows, have a rule for it:
“Make something tangent to another hobby or another interest.” Jennie and Davis, craft-show sellers
Their examples are a golf or deer-hunting ornament, a “gone fishing” sign, or a piece shaped like a home state. “Sports are a really easy one.”
Use skills you already have:
- A deer silhouette cut from brown felt and blanket-stitched around the edge
- A red-and-white fishing bobber shaped in polymer clay and baked
- A golf flag sewn from a scrap of plaid, glued to a tee
- A home-state outline traced from GIS Geography’s free maps, which ask for attribution whether you use them for educational or commercial purposes
If he isn’t the ornament type, make the same piece as a magnet using #5’s method, for the fridge in the garage or the workshop.
#1 A lost childhood ornament, remade
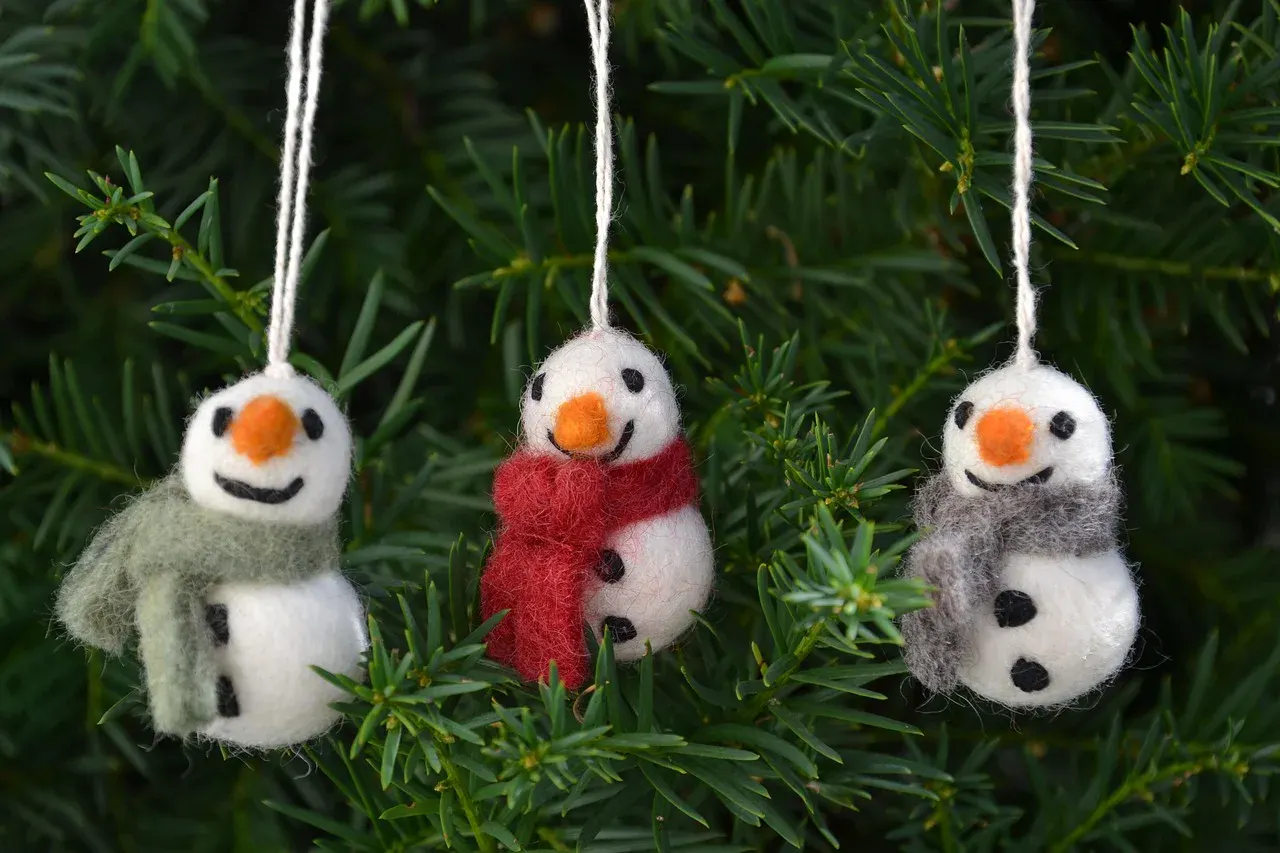
Someone on your list may still bring it up: the glass bird, the felt Santa, the snowman that didn’t survive a move. When makers on Reddit plan one gift per person, they match each gift to a shared history. A crocheted pincushion for a stepmother who sews. A copy of the snowman ornament a father lost as a boy.
That last one is the gift nobody sees coming. Here’s how to make it:
- Find an old photo of the tree. Ask around casually, or go through the shoebox from #10.
- Scan the print at 1,400 to 1,500 dpi if it’s one of those tiny old ones. That much detail lets you zoom in on a single ornament on a branch.
- Copy it in felt if it was soft, or in polymer clay if it was glass or china. Bake the clay according to the package. Cured clay needs no sealer.
- Get it close, not perfect. They’ll recognize it from the shape and the colors.
Wrap the photo in the box with the ornament, so they find the old one and the new one together.
The bottom line
You don’t have to make something for every name. A self-described very crafty maker on Reddit wrote, “I am very crafty but I decided to stop making gifts 2 years ago and the holiday season has become much more enjoyable.” Making nothing is one choice. Making for the right people is another.
Pick one batch gift for the long part of the list, soap or snowflakes or magnets. Then pick one slow, personal gift for the one person who’ll know what it took. Buy the rest and don’t feel bad about it.
Start by going back to the envelope and writing a number from 1 to 17 next to each name.
Bonus: five checks before anything gets wrapped
- If a teacher is on your list, an informal LinkedIn poll of about 700 educators, reported by Education Week, found 79% preferred gift cards. One teacher still wrote, “I have ornaments from 1980s students that still hang on my Christmas tree every year.” Give a small handmade ornament with the card.
- If anything you made sheds glitter, Krylon Glitter Blast Clear Sealer is made to stop it. Spray between 55°F and 75°F with humidity under 60%, and allow 24 hours before handling.
- Before you buy a frame for cross-stitch, divide the stitch count by the fabric count. A 100 by 80 design on 14-count Aida finishes about 7 by 5¾ inches, and Omni’s calculator adds 3 inches of fabric on every side for framing.
- Read the reviews before buying blank towels to stamp or embroider. Target’s MU Kitchen 9-pack of flour sack towels is $32.99 with a 2.34-star rating, and reviewers complain they don’t absorb.
- For a quilter’s version of a batch gift, one 42-square charm pack makes ten 9×9 four-patch mug rugs, and Missouri Star calls a mug rug the project “you can start after dinner and finish before bed.”
Questions people also ask
What can I make for a lot of people on a small budget?
Melt-and-pour soap is the cheapest gift to multiply, at about $1.03 of base per 4-ounce bar with no curing time. That figure comes from Nature’s Garden’s $8.24 two-pound base, before fragrance and shipping. Cloth napkins run about $1.75 to $2.25 each, and a cotton dishcloth takes about $3.99 of yarn.
What homemade Christmas gifts do men actually like?
The best-supported answer is something practical tied to his own hobby. A 2014 study reported by Yale found receivers value practical gifts more than givers expect. Texas craft-show sellers Jennie and Davis suggest tying a small piece to a hobby, such as golf, fishing, deer hunting or a home state.
What sealer do you use on napkin or paper ornaments so they last?
Glue the napkin on with matte Mod Podge, then after about 24 hours finish it with a clear acrylic spray or brush-on Minwax Polycrylic, or use Hard Coat Mod Podge, which isn’t tacky. Glossy Mod Podge is the most likely to stay sticky, according to Mod Podge Rocks. On polymer clay, skip Mod Podge gloss spray entirely, because it turns the clay gooey.
When should I start making homemade Christmas gifts?
September is the sweet spot for knitted and crocheted gifts, according to CC Knits Muskoka, with sweaters and throws starting in July or August and fast stitchers waiting until October. From mid-November on, choose projects that need no cure, such as melt-and-pour soap, over cold-process soap, which takes 4 to 6 weeks. Allow up to 24 hours for stiffened snowflakes to dry.
Is it cheaper to make Christmas gifts than to buy them?
The materials for a single handmade gift are inexpensive: an apron takes about $7 to $9 of fabric, and a napkin about $2. For context, shoppers in the National Retail Federation’s 2025 survey planned to spend an average of $627.93 on gifts overall. A 2015 study also found people buying for loved ones preferred handmade items, and many would pay up to 17% more for them.
What are some easy Christmas crafts for adults to make and sell?
Soap, candles, textiles and home decor are the steady sellers named by Nancy Badillo, an Etsy seller since 2016. Makers who shared their best sellers with Meghan Makes Do add hats, ear warmers, zippered pouches and mason jar cozies. Anything edible that you sell falls under cottage food labeling rules like Maryland’s, which require the product name, ingredients listed by weight, and allergen disclosure.


