The real names of the vintage handmade Christmas ornaments you grew up with, what each one was made from, and how to make it again, one pin, bead or dab of glue at a time.
The last ornament here is the only one nobody can sell you.
You’re stringing lights when your hand closes around it. It’s a satin ball gone soft and fuzzy, with a few sequins hanging by a crust of glue and one pin standing up where it worked loose years ago. Your mother made it at the kitchen table. For decades you’ve called it “Mom’s sparkly one,” because nobody ever told you anything else.
It has a real name. So do the ones she dipped, baked, painted and stitched. Every one of them can be made again, and this time it can be made to last.
#17 Satin balls covered in sequins and pins
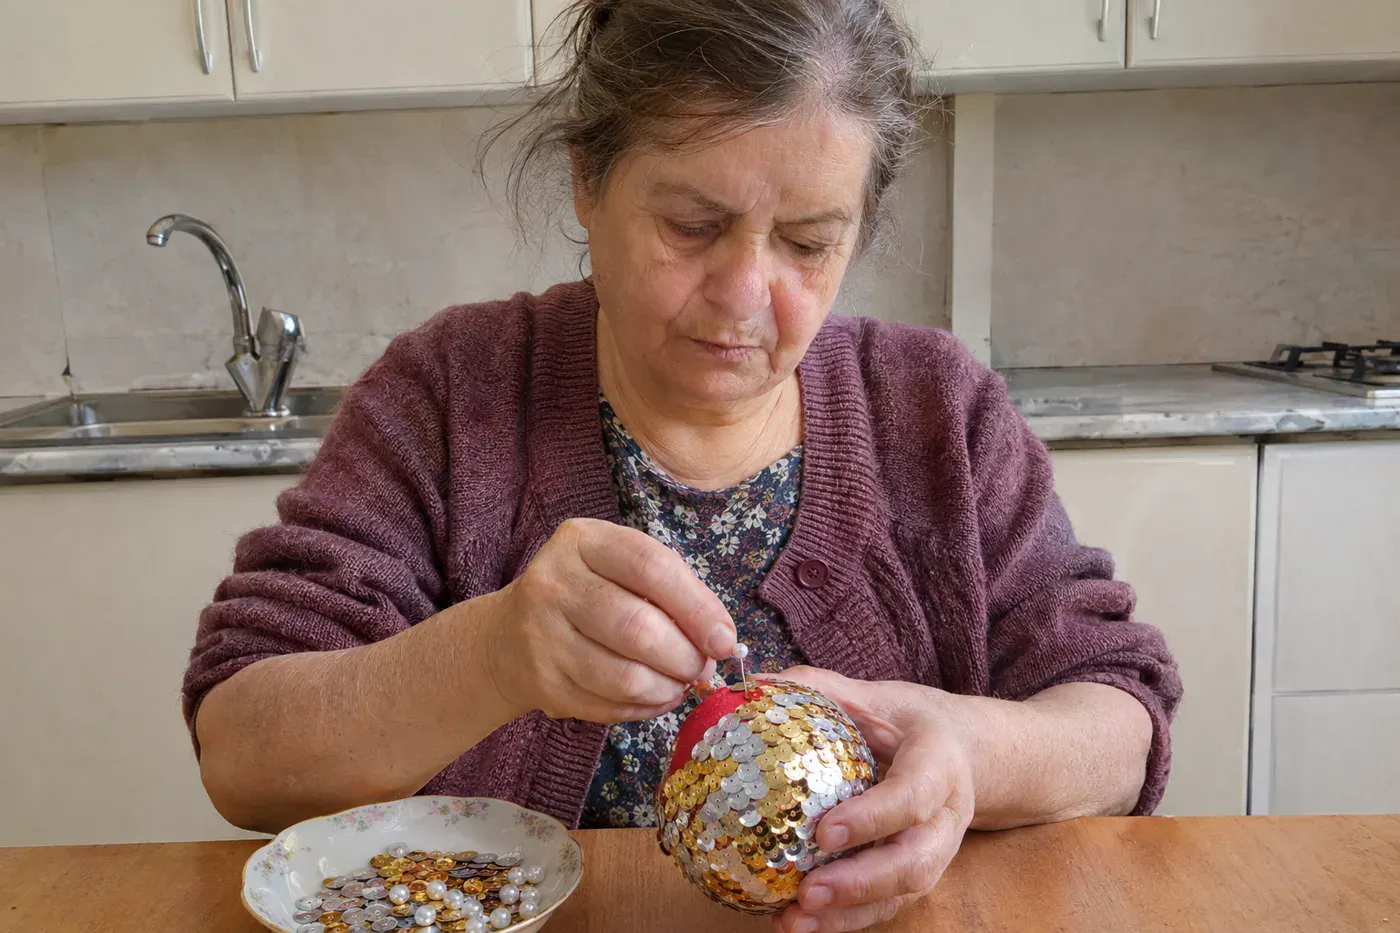
They’re called push-pin ornaments. You’ll also see them listed as beaded sequin or satin ball ornaments. They had their big run in the mid-century years of the 1960s and ’70s, when people pinned sequins, beads, braid and faux pearls into foam balls, bells, eggs and cones. The Urban Kitten’s history of the craft names the kit makers: Walco, LeeWards, Bucilla and Fibre-Craft.
People made them together. Writer Libby Callaway says her grandmother Marie and Marie’s friends first made theirs for a church bazaar.
If yours is shedding pins, look at the foam first. The maker behind Brucie’s Baubles says floral foam and porous craft foam won’t grip a pin. She wants firm foam you can’t squeeze.
Then comes the glue trick. Cheap pins slip, so dab just the tip in plain white school glue before you push it in. A commenter on MyFrugalChristmas swears by it: “dip just the point of the pin in Elmers glue before sticking it in the styrofoam ball… It’s just enough to stabilize the whole thing.”
The pattern itself is simple. Thread beads onto a sequin pin, top them with a sequin, and push them in overlapping, crossing rows until no white shows. People who made these as kids say pushing in hundreds of pins can hurt, and some use a metal thimble or a bandage; others say the real challenge is patience, not sore fingers.
Push-pin cheat sheet – Ball: 2½ inches in a MyFrugalChristmas reader’s method, about 2.8 inches in Callaway’s – Pins: ¾-inch sequin pins with two or three beads each, or dressmaker pins bought 4,000 to a pack – Time: about an hour for a simple ball, six hours or more for an elaborate one – Worth: $15 to $25 for a finished vintage ball, more for fancy ones
#16 Pinned folded-fabric quilted ornament balls
If you just finished #17, put that dense foam away before you start this one.
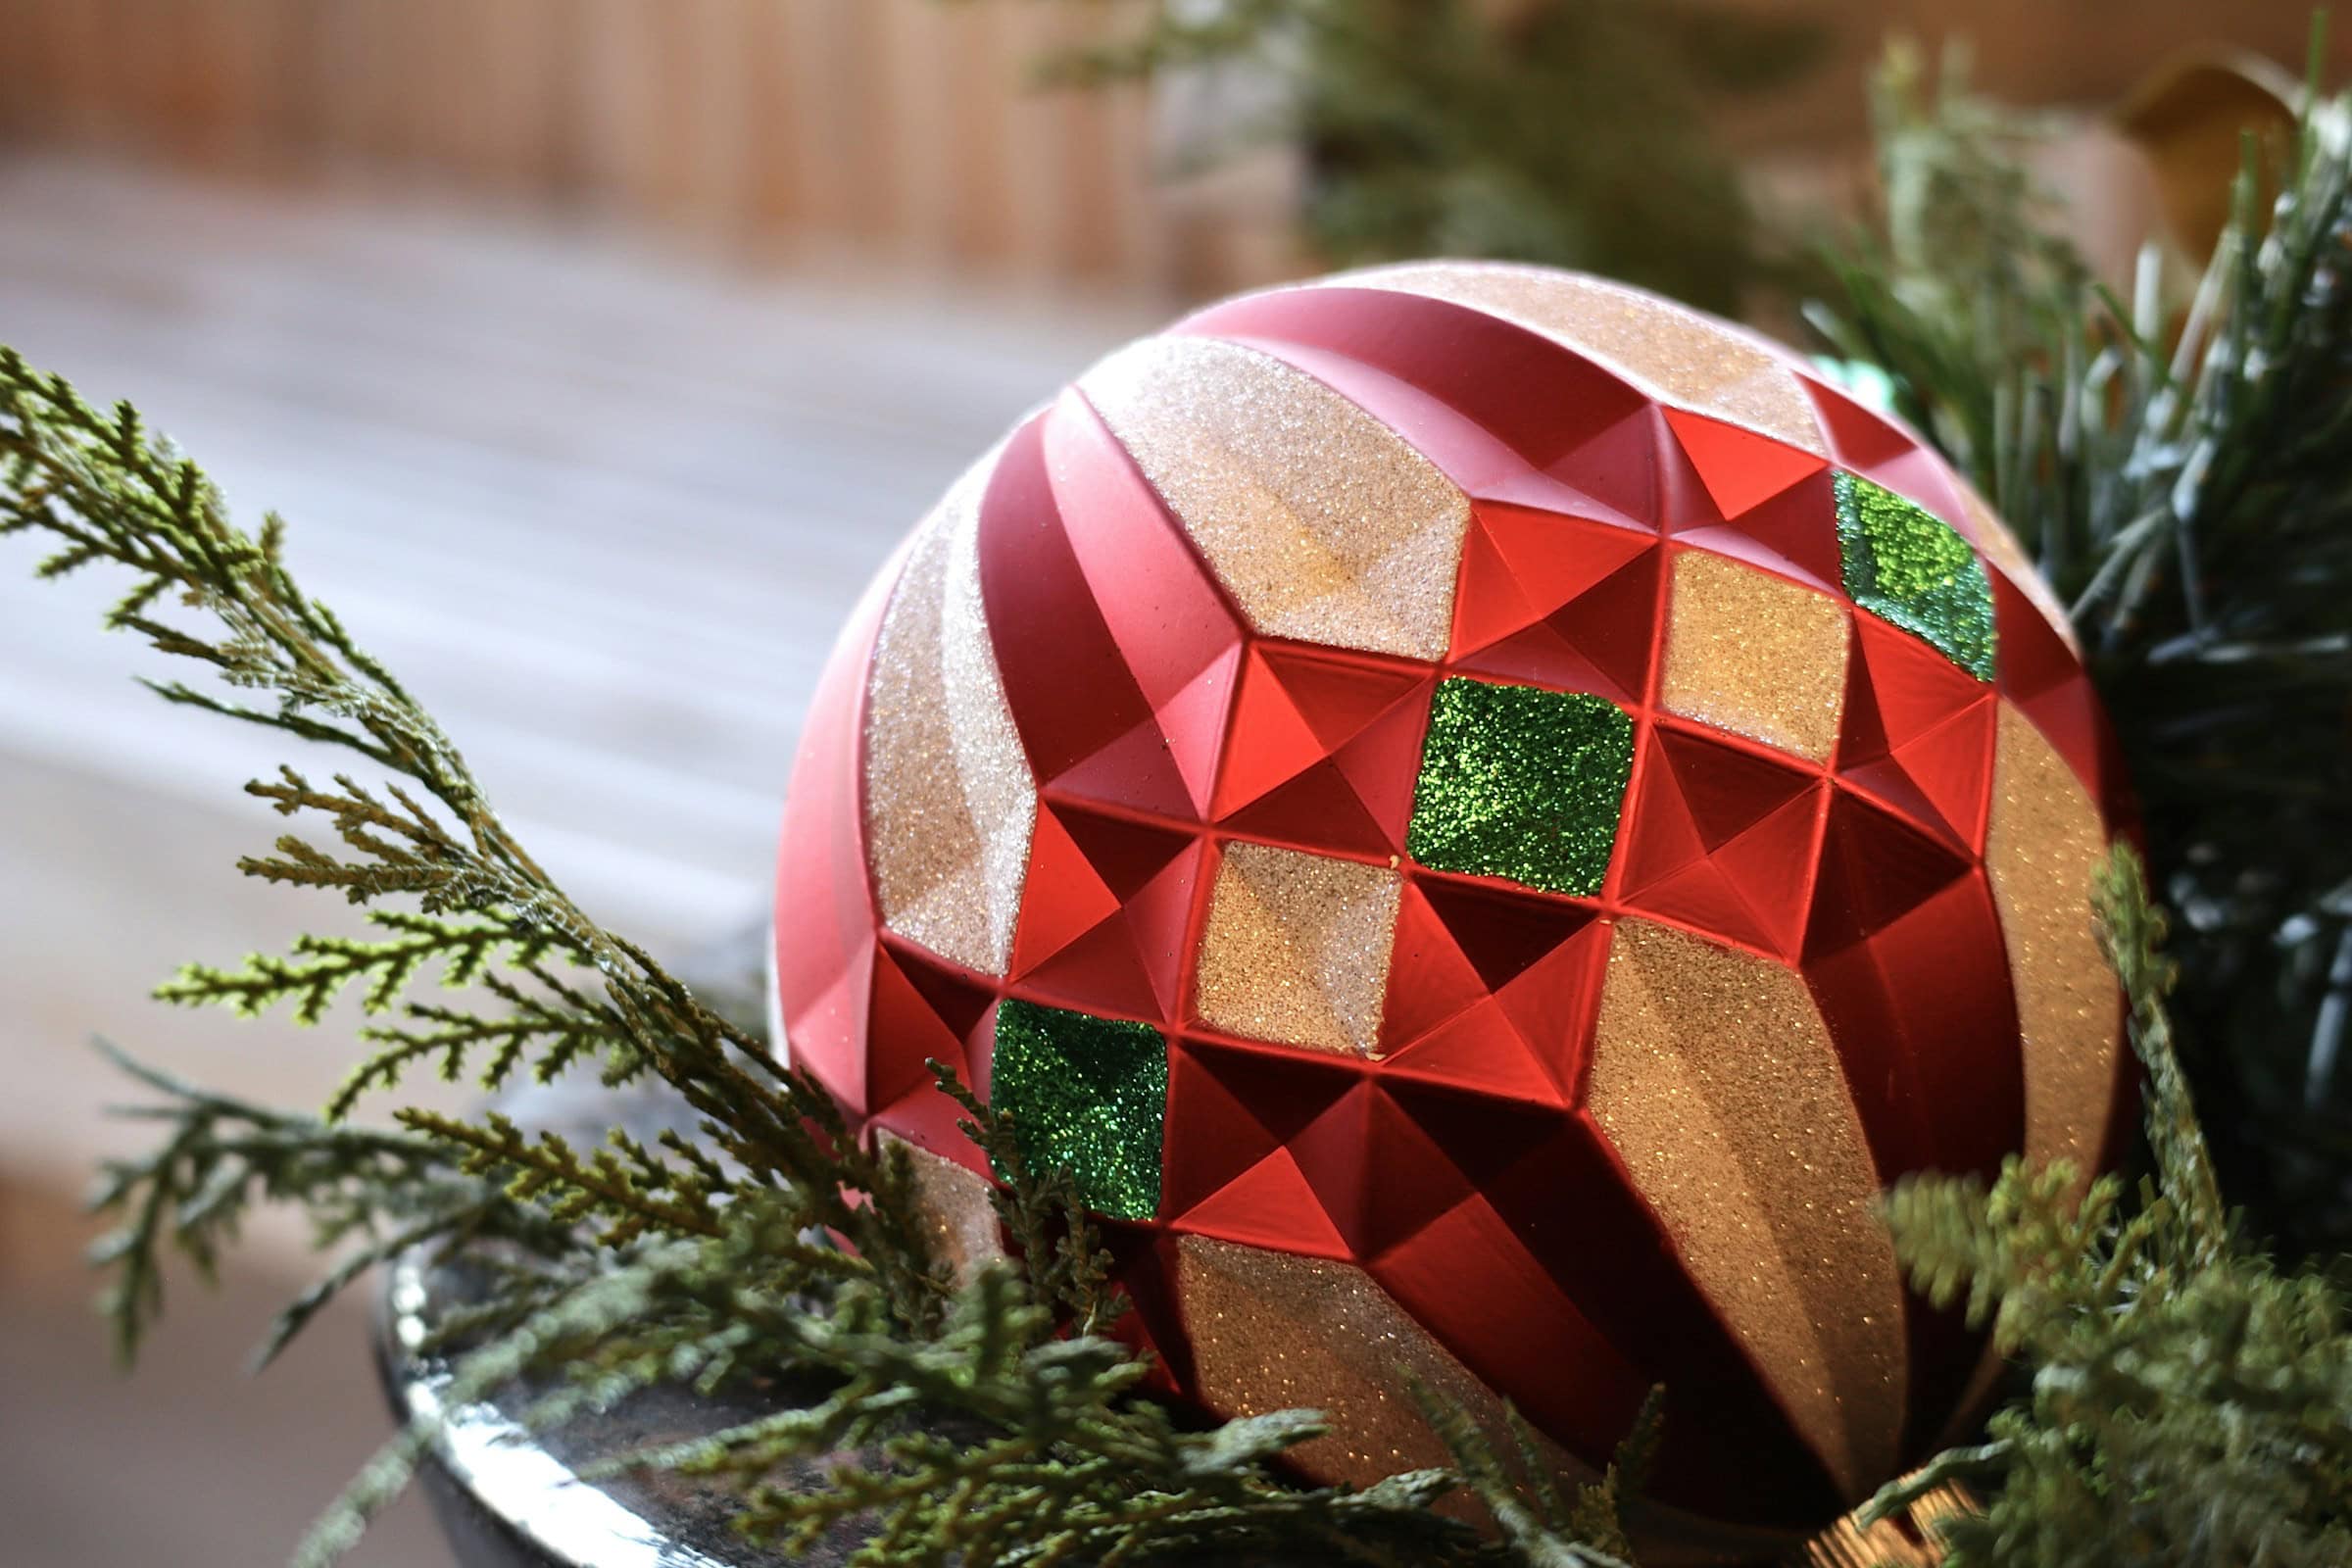
Quilters call this a quilted ornament, though there’s no quilting in it. Small fabric squares are folded into points and pinned in rings around a foam ball until they look like a star block wrapped into a sphere. In a Shabby Fabrics video, founder Jennifer Bosworth says she remembers these from childhood.
Melissa’s Happy Quilting tutorial gives you the shopping list:
- One 3-inch foam ball
- 2½-inch fabric squares: 12 for the base, 16 for the middle, 16 for the border
- Flat-headed straight pins and a little hot glue
- A foot of lace or ribbon for the hanger
Shabby Fabrics’ free pattern starts from a jelly roll instead, which is a bundle of precut 2½-inch fabric strips.
Two habits keep the ball round. Bosworth pins in opposite positions to keep the ball balanced, never side by side. Melissa checks it by measuring from pin to pin on both sides until the distances match.
That’s also why the foam matters. The designer who calls herself The Ornament Girl says dense SmoothFoam is “amazing for many other crafts.” Then she warns it will “KILL your fingers if you use them for quilted ornaments.” For a pattern that takes a couple hundred pins, she recommends rough Styrofoam. One of her readers bought thimbles.
Melissa’s fix costs nothing, and it’s sitting in the junk drawer: “it helps to use the eraser of a pencil, trust me, your finger will thank you.”
#15 Salt dough cutouts and handprint ornaments
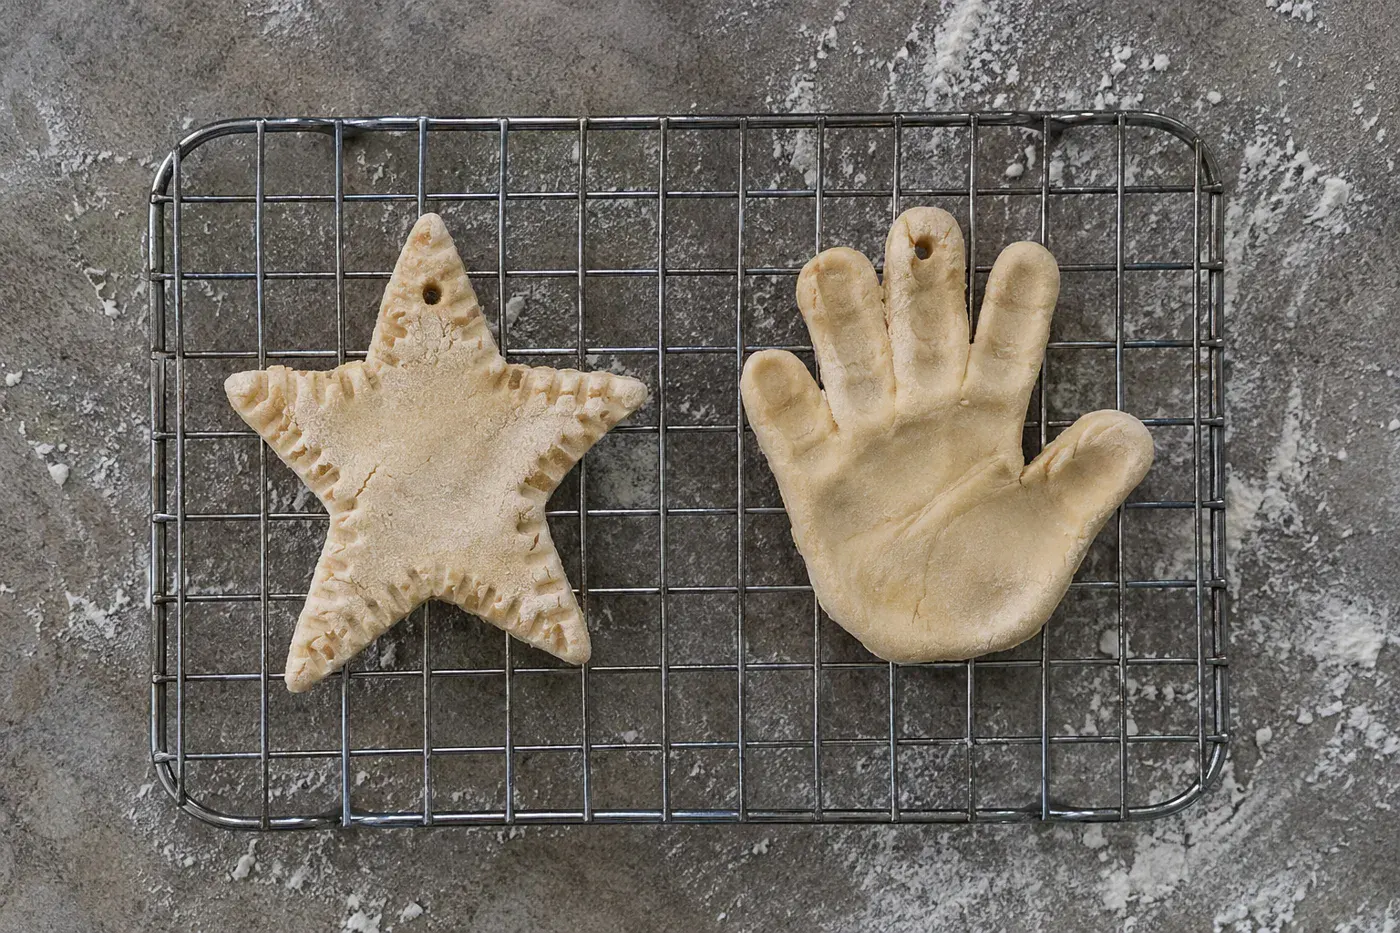
You can still feel it: a small palm pressed flat into cool dough on a floured counter, fingers spread, and somebody saying “hold still” while a straw punched the hanging hole.
Salt dough ornaments are flour, salt and water, and the ratio is easy to remember: 2 to 1 to 1. Keep each source’s oven numbers separate, though, because they differ:
- Liesl Mahoney, Associate Educator at the Brandywine Museum of Art, mixes 1 cup flour, ½ cup salt and ½ cup warm water, then bakes it for 1.5 to 2 hours at 200 degrees.
- A method credited to Michigan State University Extension rolls the same dough ¼ inch thick, bakes it at 250°F for 2 to 3 hours, and seals it with clear acrylic varnish to keep moisture out.
That second step is the easy one to skip, and an unsealed ornament lets moisture back in. Dry them all the way through, then seal them. A West Virginia University 4-H agent quoted on the same page says properly made ones “can last decades as long as they are dried all the way through.”
If a dog lives in your house or visits, hang these on the high branches. Pet Poison Helpline says “As few as 1-2 ornaments could make your dog very sick” because of the salt, and its 24-hour line is (855) 764-7661 if one goes missing.
#14 Cinnamon applesauce ornaments
You smelled these before you saw them. The lid came off the decorations, and the whole room went warm and spicy for a second.
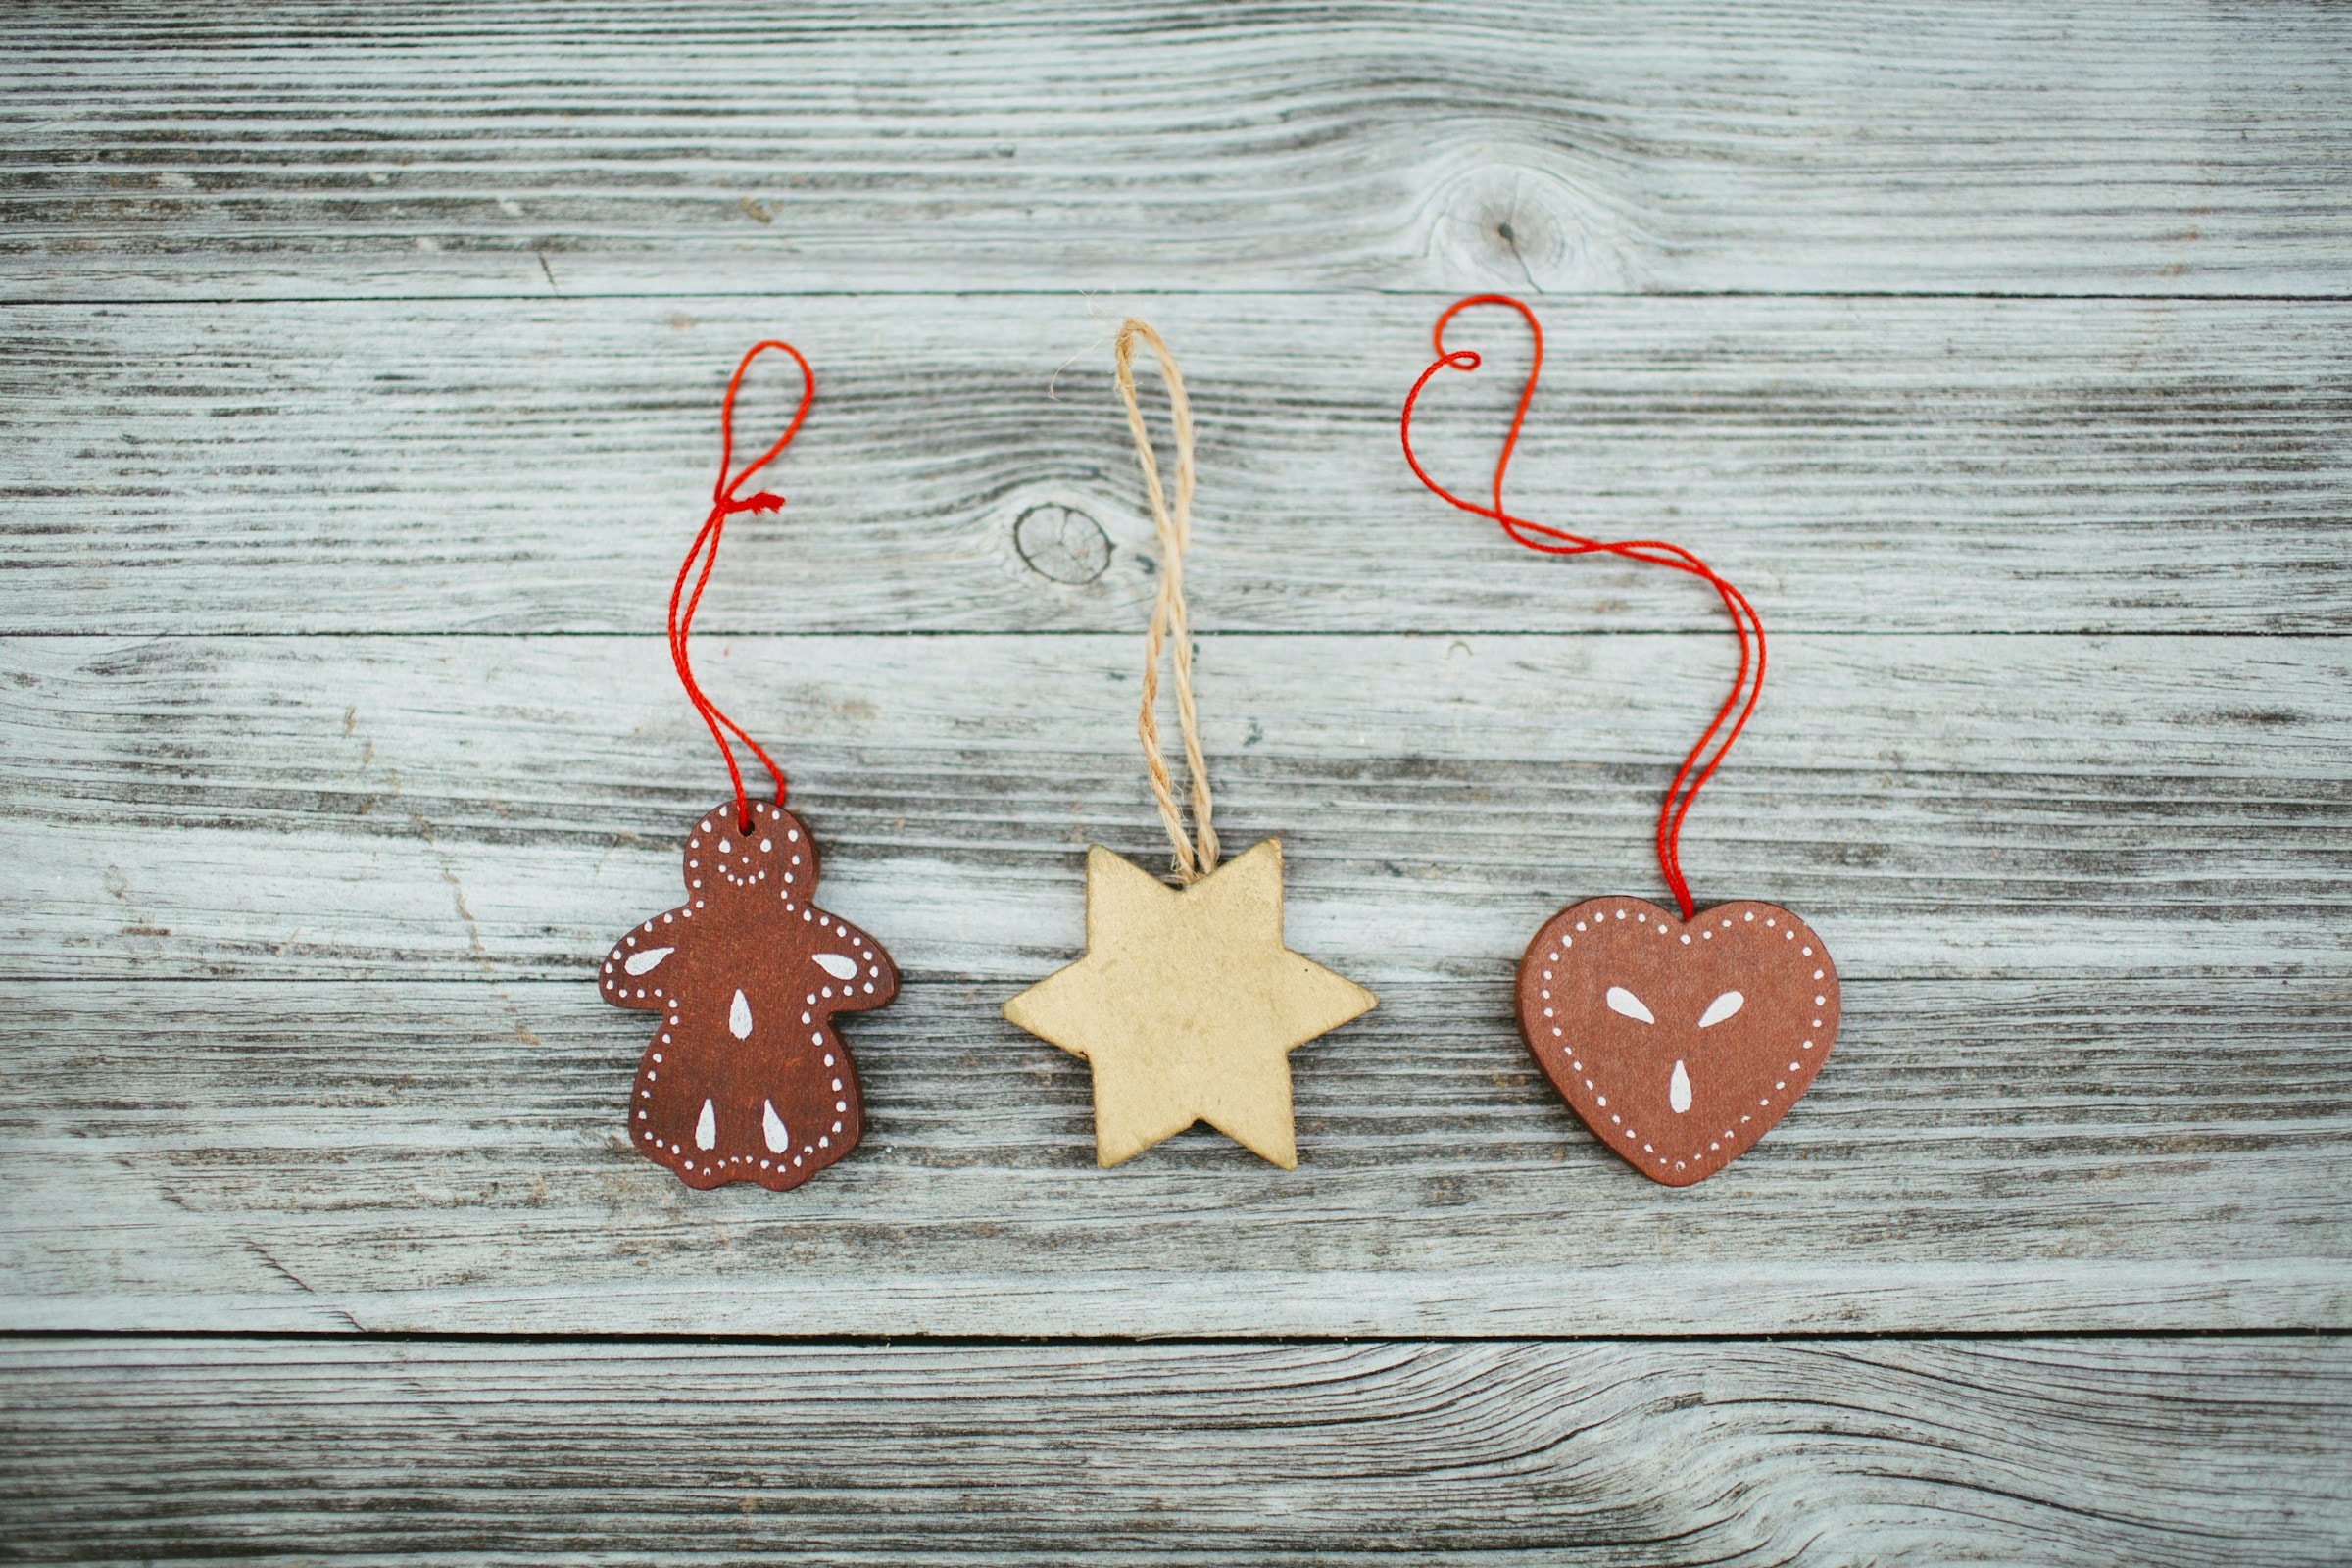
That smell is the point. The shapes were plain brown hearts and gingerbread men, a little lumpy, and nobody cared. McCormick’s cinnamon ornament recipe is the kitchen version most of us knew:
- Mix ¾ cup applesauce with 2 bottles (2.37 ounces each) of ground cinnamon.
- Roll it ¼ to ⅓ inch thick and cut with 2- to 3-inch cookie cutters.
- Bake at 200°F for 2½ hours, or air-dry for 1 to 2 days, turning now and then.
That’s two full bottles of cinnamon, so check the spice rack before you open the applesauce. McCormick says “Their aroma lasts long after the holidays are over.” These aren’t treats, either. The ASPCA warns that dough made of applesauce, cinnamon and glue can cause vomiting in pets, so keep any dough and finished ornaments out of reach of cats and dogs.
#13 Felt ornaments with sequins from kits
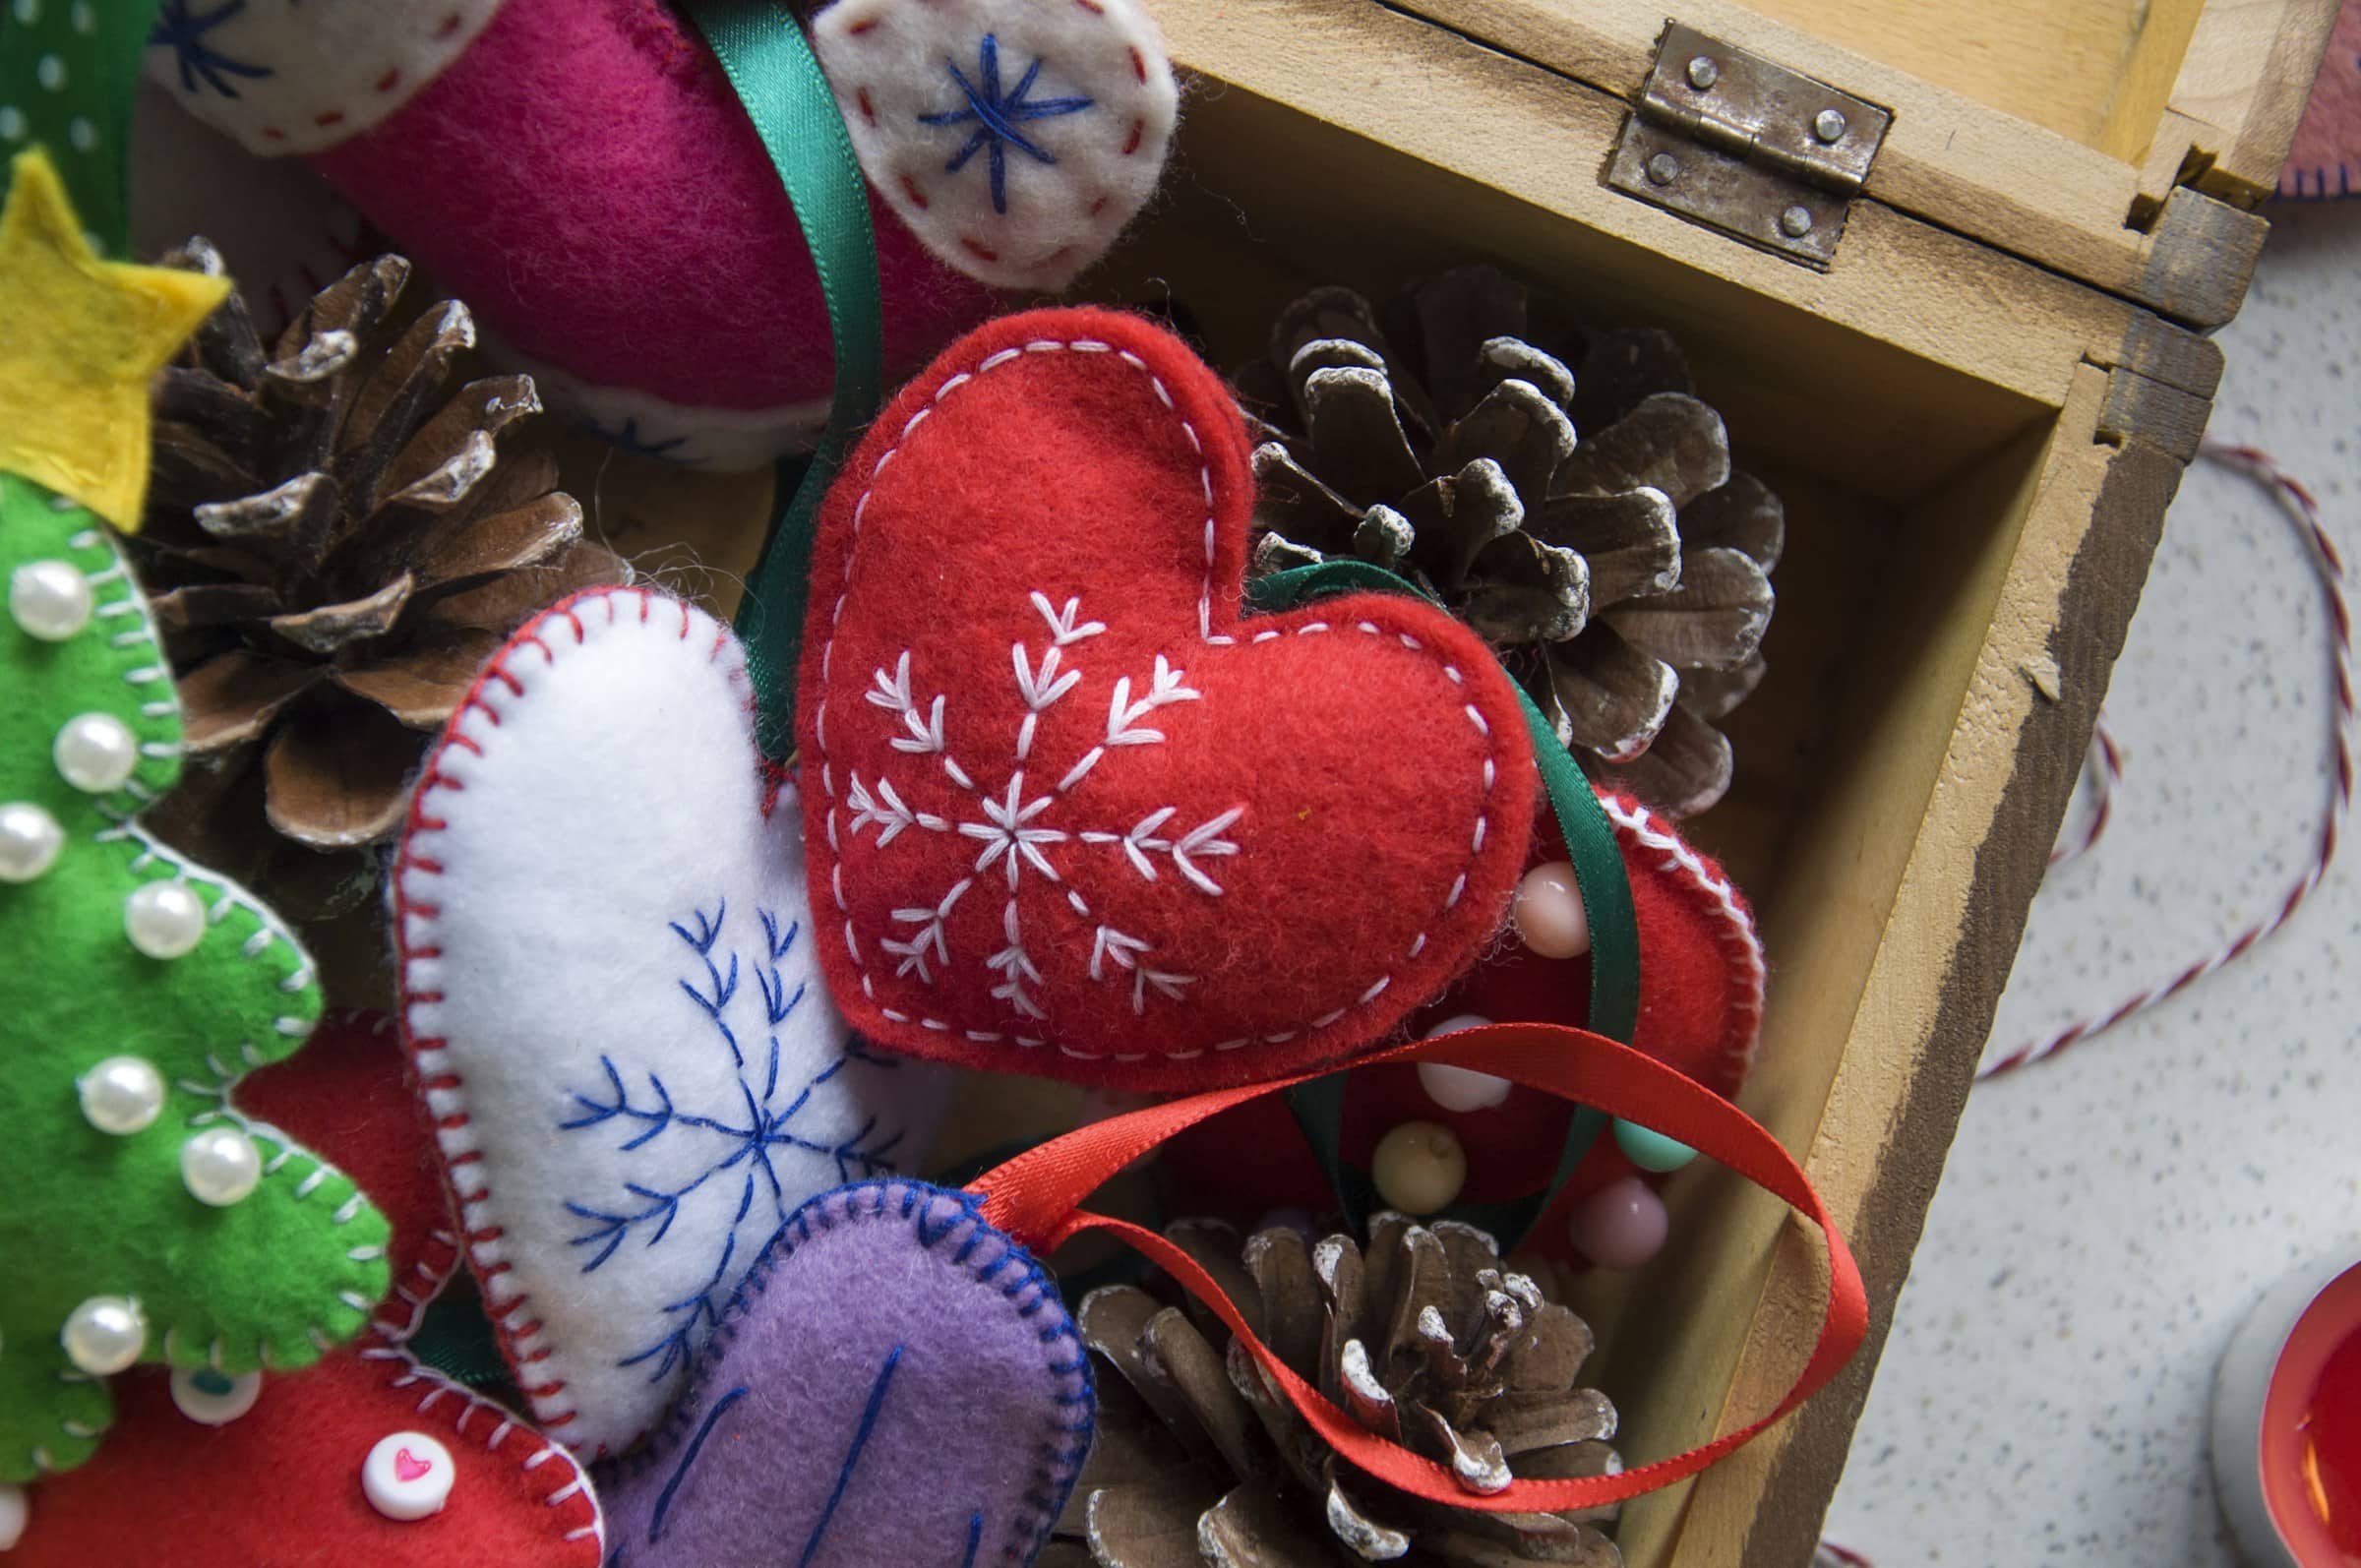
Bucilla moved from yarn into needlework kits in the late 1960s, a line that later came to include its felt Christmas ornament kits.
Bernhard Ulmann founded the company in 1867, and the name stands for Bernhard Ulmann Lace, Linen, and Accessories. Plaid Enterprises has owned it since 1996.
The surprise is that the kits never stopped. Plaid still sells a Bucilla Twelve Days of Christmas felt ornament kit that makes 12 appliqué ornaments, each about 3 by 3½ inches. The felt comes stamped, and the kit has the floss, sequins, beads and needles. It’s $24.99 at regular price, about $2 an ornament, and it has been on sale for around $18.74. It’s labeled for intermediate or advanced stitchers, which is to say for you.
Some families kept the ones a mother made. Christine Minkler Pena of Sonoma told the Press Democrat in 2011: “My ornament was sewn and hand embroidered and appliqued by my mother, Frances Minkler.”
#12 Chenille pipe-cleaner Santas and candy canes
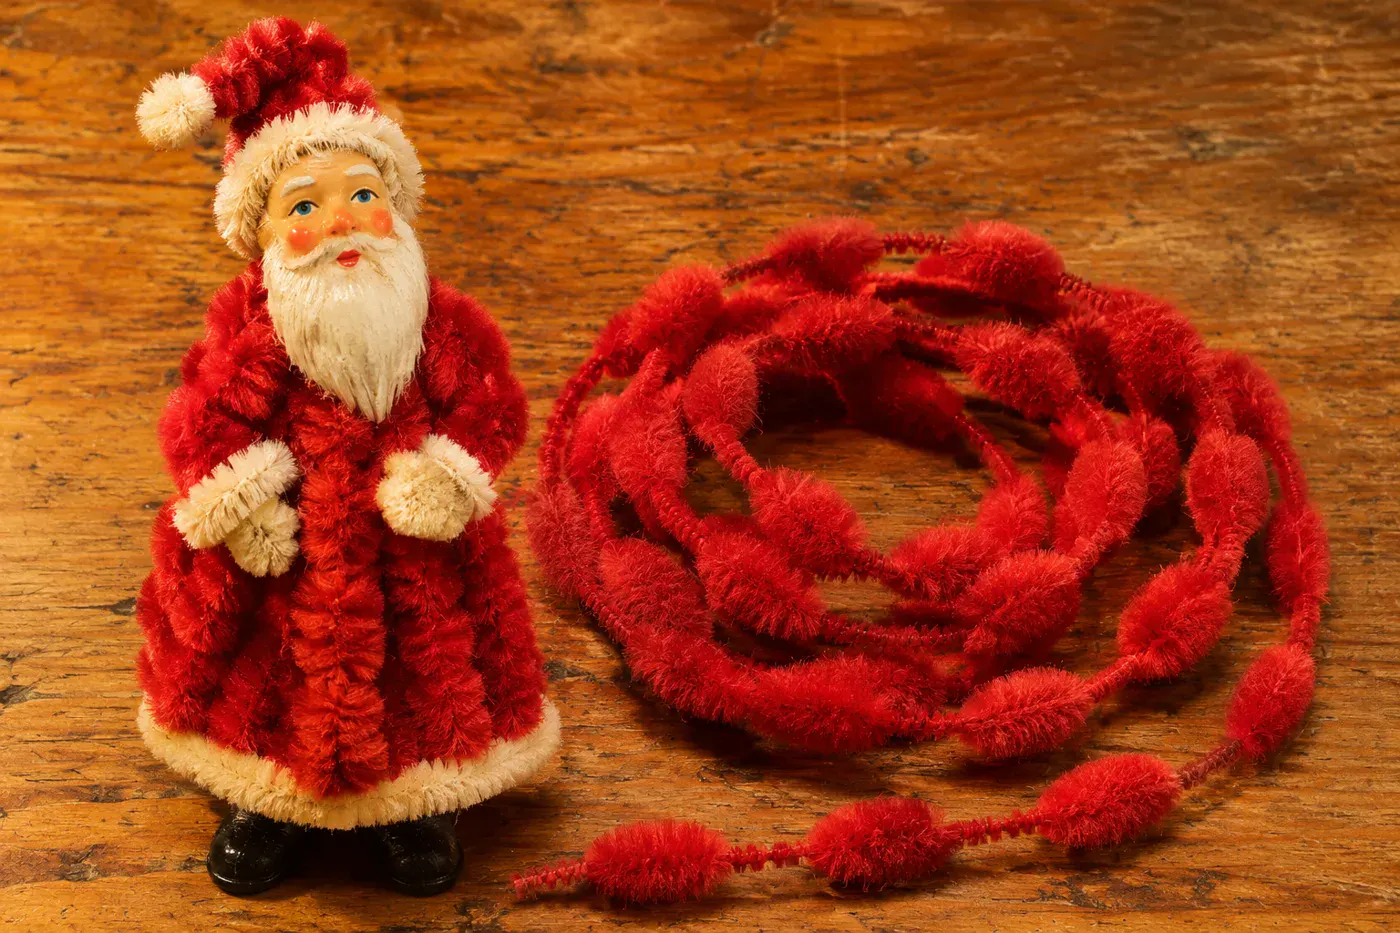
The little fuzzy Santa with the painted face is sometimes called a Clay Face Santa.
Smile Mercantile’s chenille Santa history says these Japanese-made figures were sold at the five and dime “as early as the 1930s.” Each one was a painted clay face wired onto a chenille body.
When you try to make one today, plain pipe cleaners come out skinny and stiff. The vintage look comes from bump chenille, which swells fat and narrows thin along its length like a string of fuzzy beads. The Santa’s body is one two-bump piece folded in half, so the plump parts become the coat. Plain chenille pipe cleaner ornaments are fine for candy canes. For Santa, buy the bumps.
#11 Hand-painted ceramic ornaments from a ceramics class

The shelves were lined with pale, chalky bells and Christmas trees, the kiln ticked in the back room, and Tuesday night was the night.
Dan Mehlman writes that “In the 1960’s-70’s, every town had a ceramics shop like this,” sometimes in a storefront and sometimes in a hobbyist’s own house. You bought greenware, which is clay that hasn’t been fired yet, and cleaned and glazed it there. The weekly class became “a regular weekly ‘girls’ night out’.”
Why did they vanish? Mehlman points partly to the rise of women in the workforce. Tuesday nights got spoken for.
Painting your own wasn’t new even then. Antiques appraiser Dr. Lori Verderame says people bought plain china cheaply and decorated it themselves, a practice she traces back decades before the mid-century ceramics-shop boom. Your grandmother’s mother may have done it.
Today’s paint-your-own studios use bisque, which has already been fired once. That means less prep work before you paint, and you pick from whatever ornament shapes the studio stocks.
#10 Frozen-juice lid punched-tin ornaments
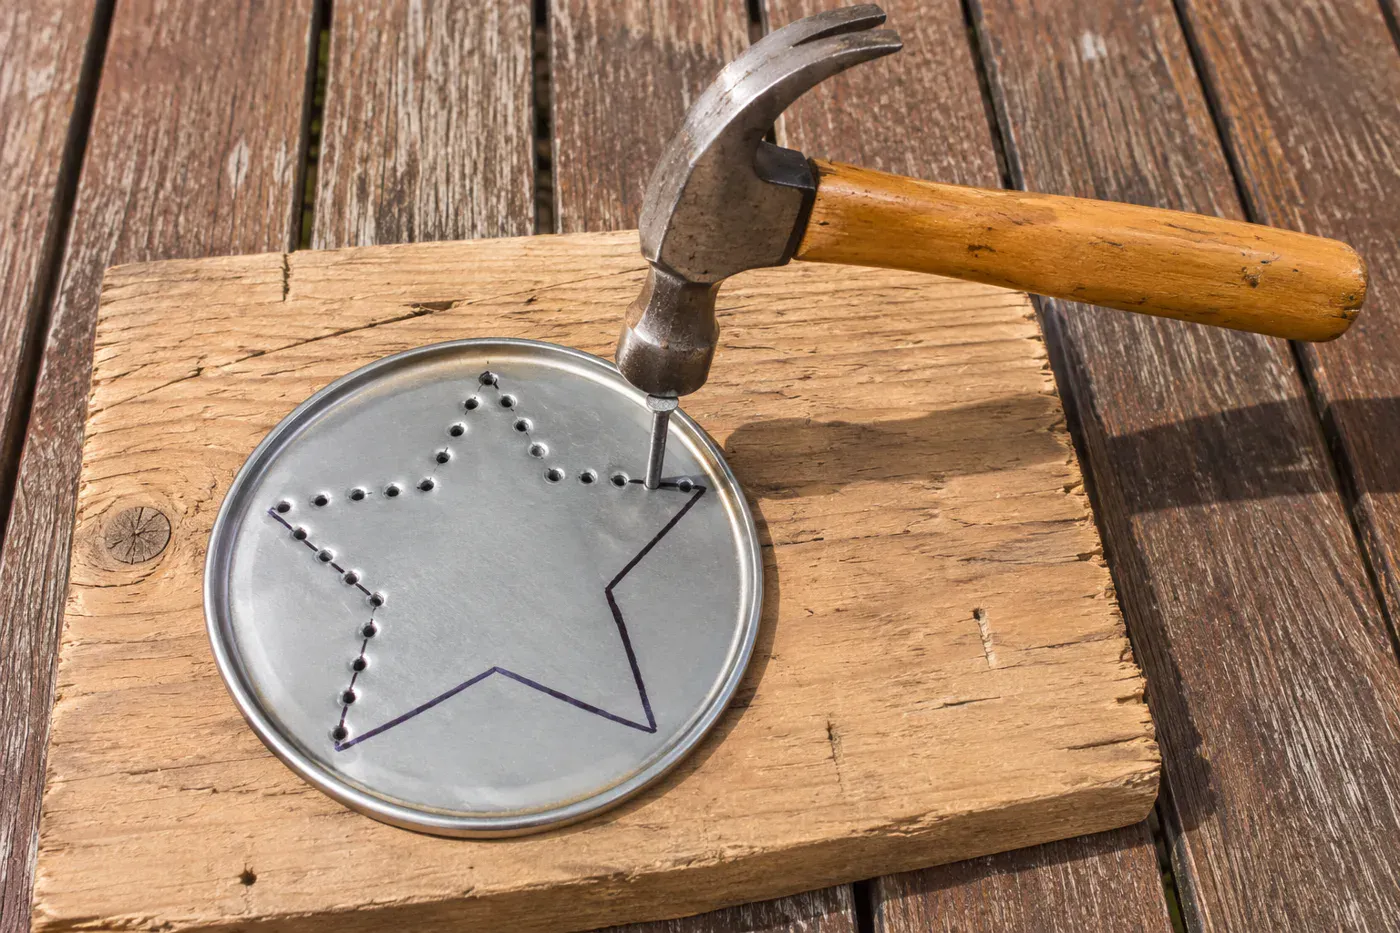
“Don’t throw that lid out.” If you heard that in the kitchen, it was headed for the craft drawer.
The round metal lid from a can of frozen juice concentrate made a ready-made tin ornament. Readers on ThriftyFun still remember the method. One wrote, “We use to use the lids to make nail punch designs and decorate with trimming around the edge.” The same reader added, “I cut out pretty sections from Christmas cards, that I glued to center of lid.” Another gave the whole technique in one line: “using hammer and nail, tap around the design evenly. Add a string for hanging.”
To make it again:
- Wash and dry the lid, and lay it on a scrap board.
- Draw a star or a tree in marker, then tap along the line with a hammer and nail, keeping the holes evenly spaced.
- Glue a picture cut from an old Christmas card in the center, and glue braid or rickrack around the rim.
- Thread a string through one hole.
Hold one up to a lamp when you’re done. The light comes through the holes like a tin lantern.
#9 Cross-stitch ornaments in mini hoops
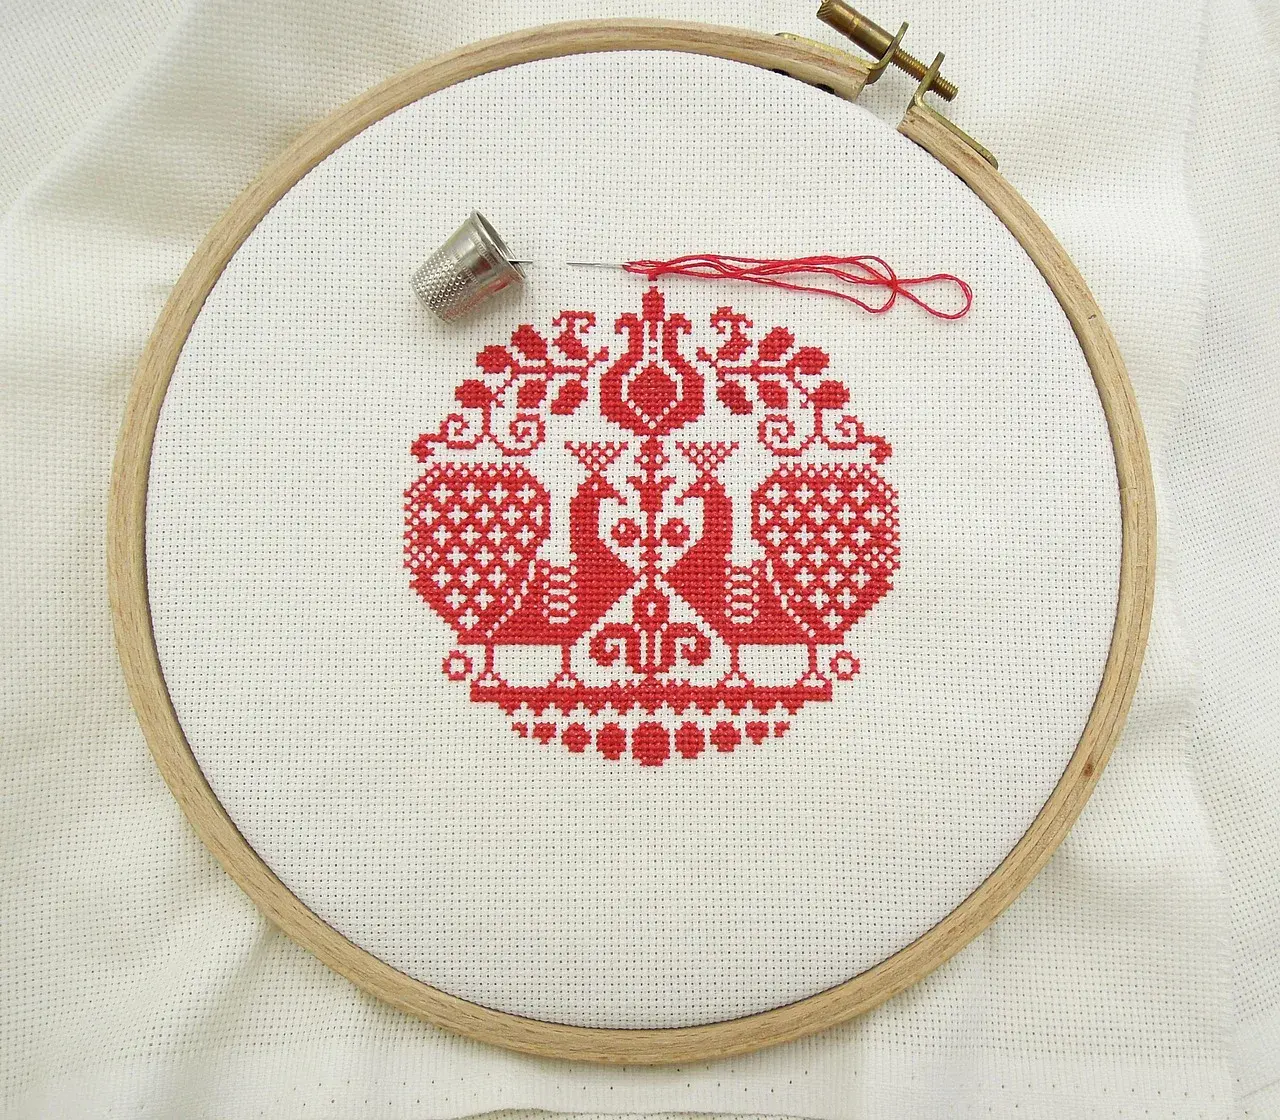
You can stitch the design in an evening. Then it sits in a drawer for three years because nobody ever finished it.
Finishing is the step that stalls most stitched ornaments, and Caterpillar Cross Stitch lays out five ways to do it, with honest times:
| Finish | About how long |
|---|---|
| Snap-together no-sew frame | 15 minutes |
| Mini hoop | Under an hour |
| Flat, backed with felt | Under an hour |
| Stuffed pillow | 1 to 2 hours |
| Padded round with cord | 2 hours or more |
If you have a pile of stitched pieces waiting, the snap frames clear the backlog. The padded rounds with cord are the ones that look like they came from a shop. Whichever you pick, they suggest stitching a name or the year onto the felt backing, which is the part someone will turn over and read someday.
#8 Ornaments cut from old Christmas cards
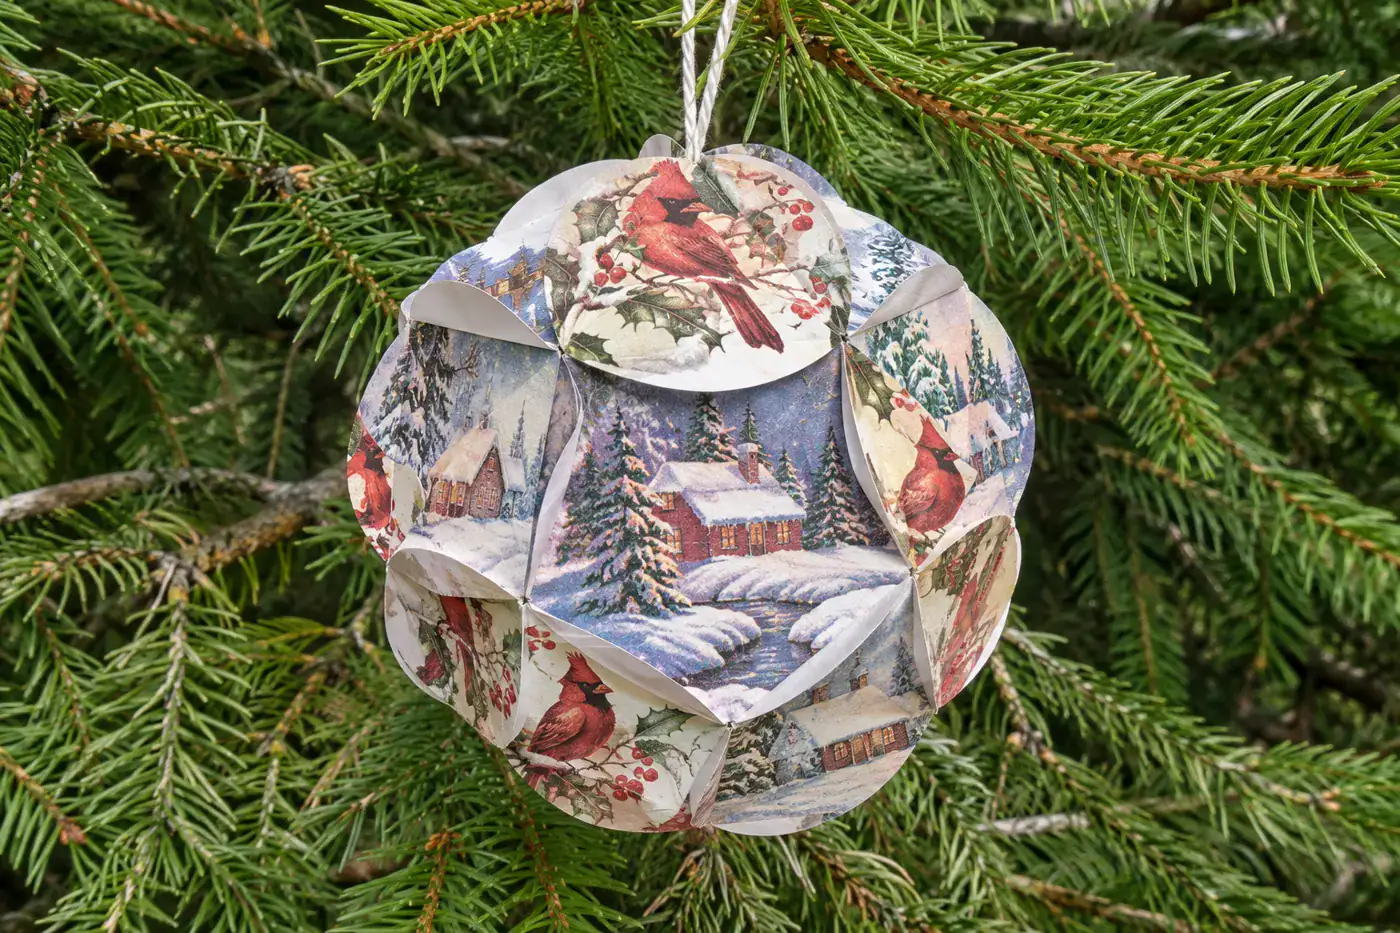
That 20-sided ball of old Christmas card circles on your aunt’s tree has a geometry name. It’s an icosahedron.
You need 20 circles cut from saved cards. On the plain side of each one, score an equal-sided triangle that fits just inside the circle, so the three curved edges fold up into flaps. The Quilted Turtle tutorial builds it like this:
- Glue five circles together, flap to flap, into a top cap.
- Glue five more into a bottom cap.
- Join the remaining ten into a band, then fit both caps onto it.
She uses rubber cement and lets it dry overnight. The craft has been in classrooms a long time, as one commenter on her page explains: “I’ve been making these icosahedron ornaments with slight variations for over 30 years… I actually learned this idea from MY geometry teacher!”
Cut the circles with the picture centered, and the angels and snowy barns all land on the outside curves.
#7 Yarn God’s-eye ornaments on sticks
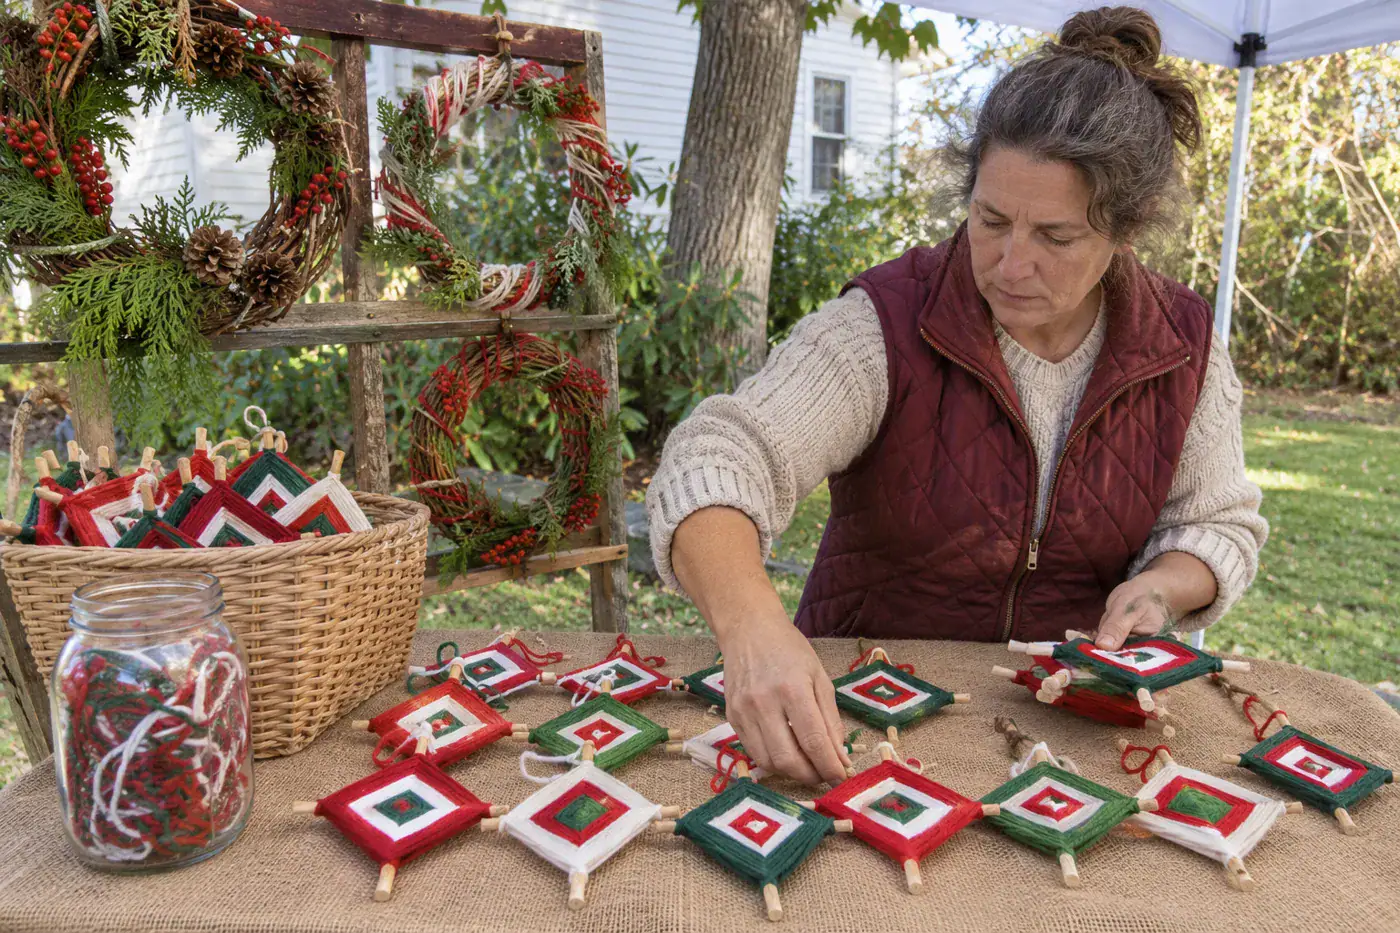
The God’s eye you wrapped on two Popsicle sticks at camp or in Sunday school wasn’t invented for camp.
It comes from the Huichol (Wixárika) and Tepehuan peoples of western Mexico. They call it Tsikuri, which means “the power to see and understand things unknown.” The same page notes how widely it spread as an easy craft for children, which is how it reached you with a strand of variegated acrylic and a dab of glue.
The wrap is a single repeated move. Lay the yarn over one stick, wrap it all the way around, then move clockwise to the next stick and do it again. Darn Good Yarn gives the one rule that matters: “Keep it tight! If it’s loose, the God’s Eye will look messy.”
Use the leftover ends from your yarn basket and change color every few rounds. Small sticks make tree-sized ones.
#6 Spun cotton fruit and figures
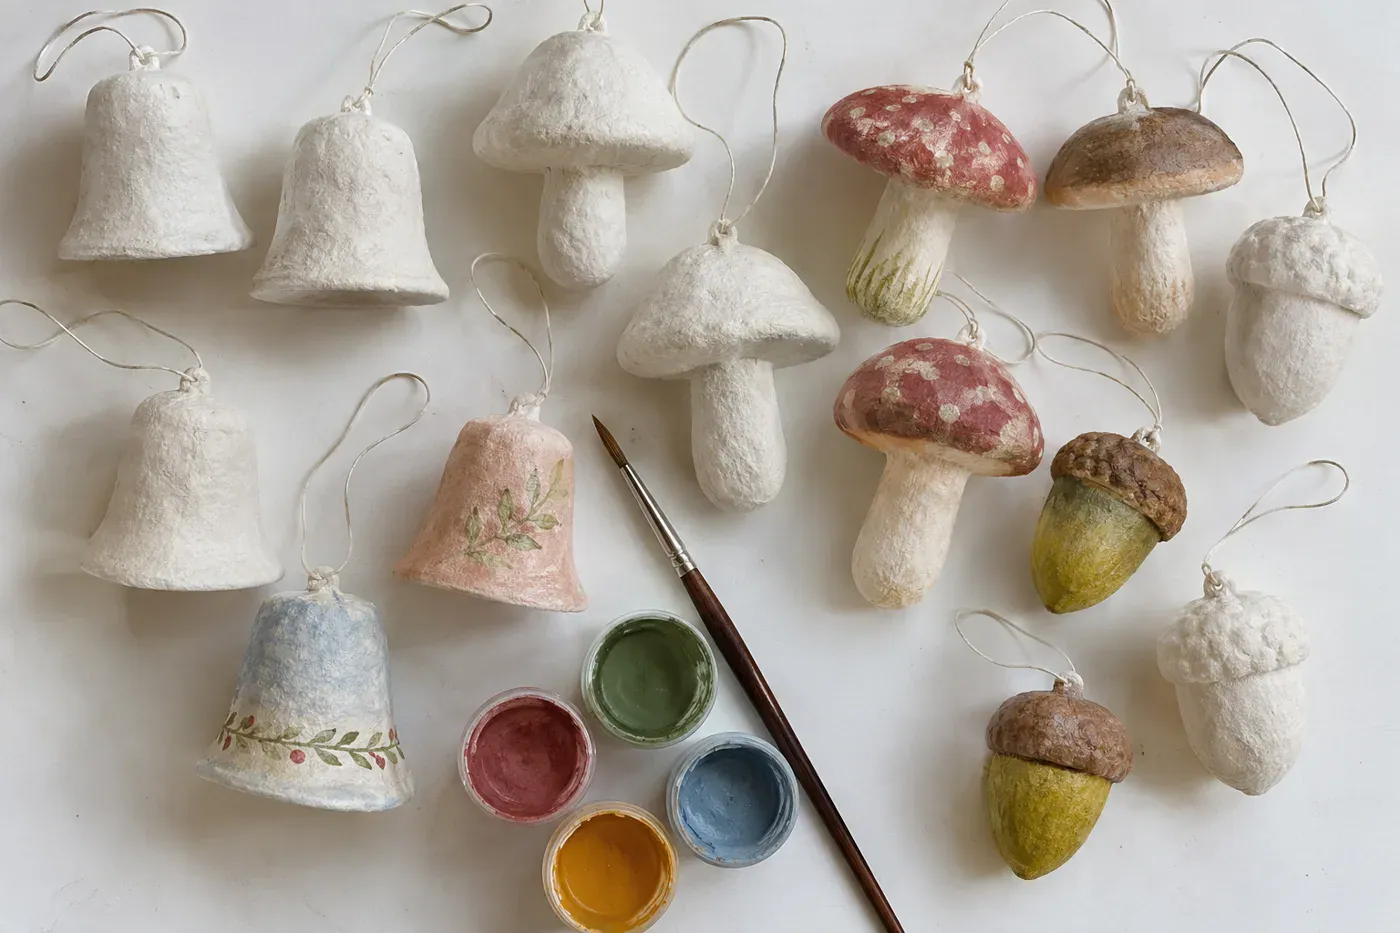
Those soft pears, mushrooms and little faces that felt like stiffened cotton balls are spun cotton ornaments, and they’re older than you’d guess.
Smile Mercantile’s history of spun cotton puts their start in 19th-century Germany. Cotton batting was first molded by hand around wire, and later spun on a lathe with molds. After World War II, Japan mass-produced them. Spun cotton was mixed with pipe cleaners, celluloid and paper, and that’s the mid-century look most of us knew from the dime store.
Then and now:
- Then: a finished piece you bought from the dime store
- Now: a blank you finish yourself. The shop sells packs of 12 shapes, such as bells, mushrooms and acorns.
Molding your own cotton from scratch is a long road. Buy the blanks and spend your time on the paint and glitter, which is where the charm was anyway.
#5 Shrinky Dinks ornaments
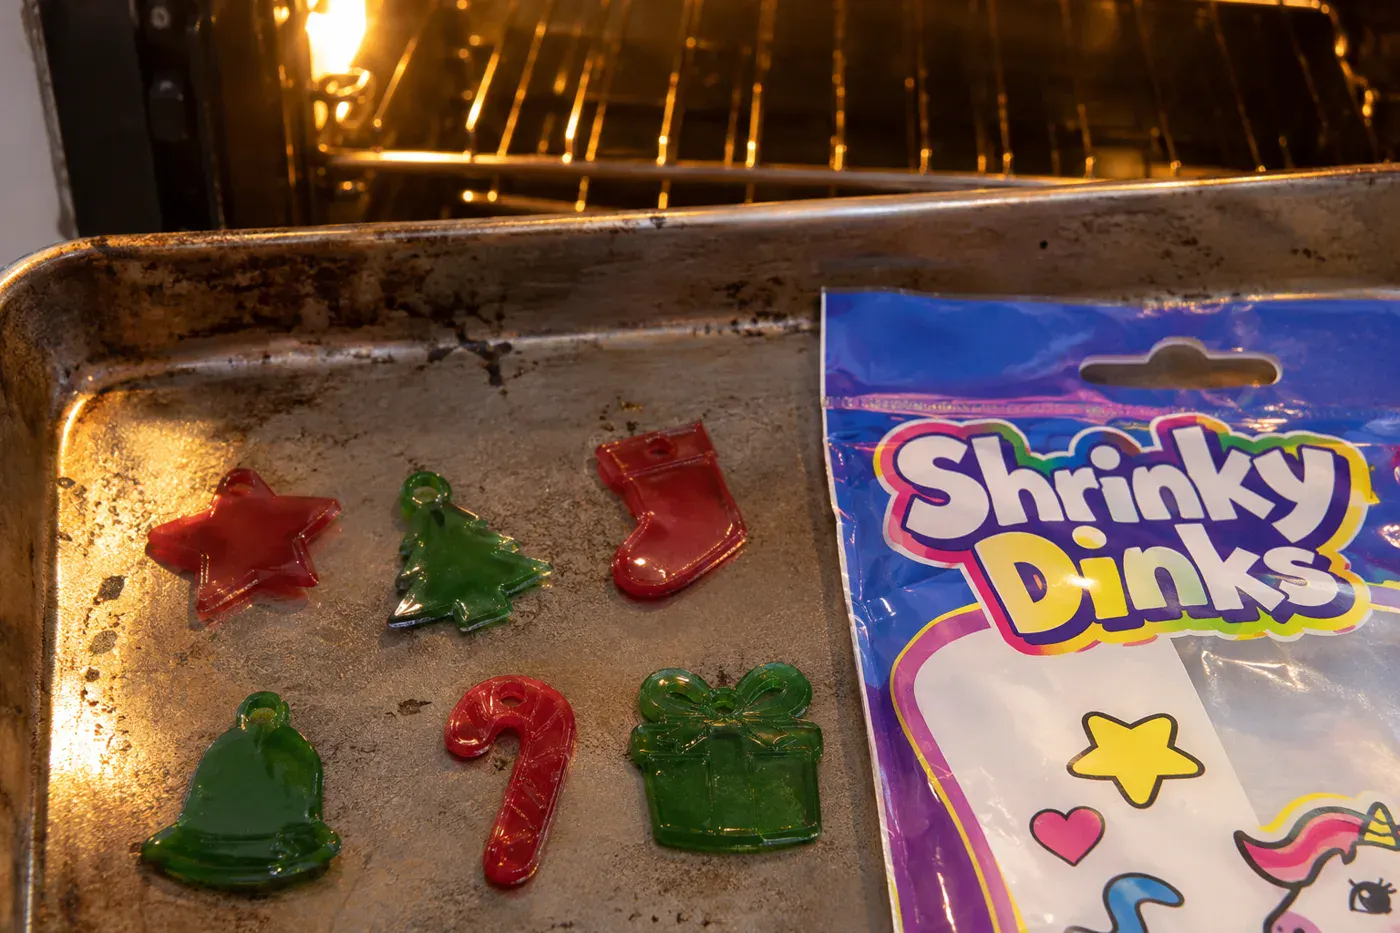
Shrinky Dinks started as a Cub Scout project. Betty Morris and Kate Bloomberg came up with them in 1973 in Brookfield, Wisconsin.
The first kits sold for $2 at mall demonstrations, and 3,000 sold in the first ten days. By 1974 they were a Christmas toy, and in 1976 they reached the Sears Wishbook. The TV ad promised that if a child could trace, color and cut, a little baking would shrink the picture like magic. You remember crouching at the oven window to watch the plastic curl up, panic you, and flatten out again.
Of all the retro DIY Christmas ornaments here, this one is easiest to restart, because the brand is still sold. Carnegie Mellon’s Gelfand Center gives the oven directions: 325°F for 1 to 3 minutes, then about 30 seconds more once the pieces lie flat. A microwave won’t work.
A finished piece comes out about a third its original length and width and about nine times thicker. That means the hanging hole shrinks too, so punch it before baking and make it bigger than seems sensible. If young helpers are at the table, the same page says adult supervision is required during cutting and baking.
#4 Dried orange slices and clove pomanders
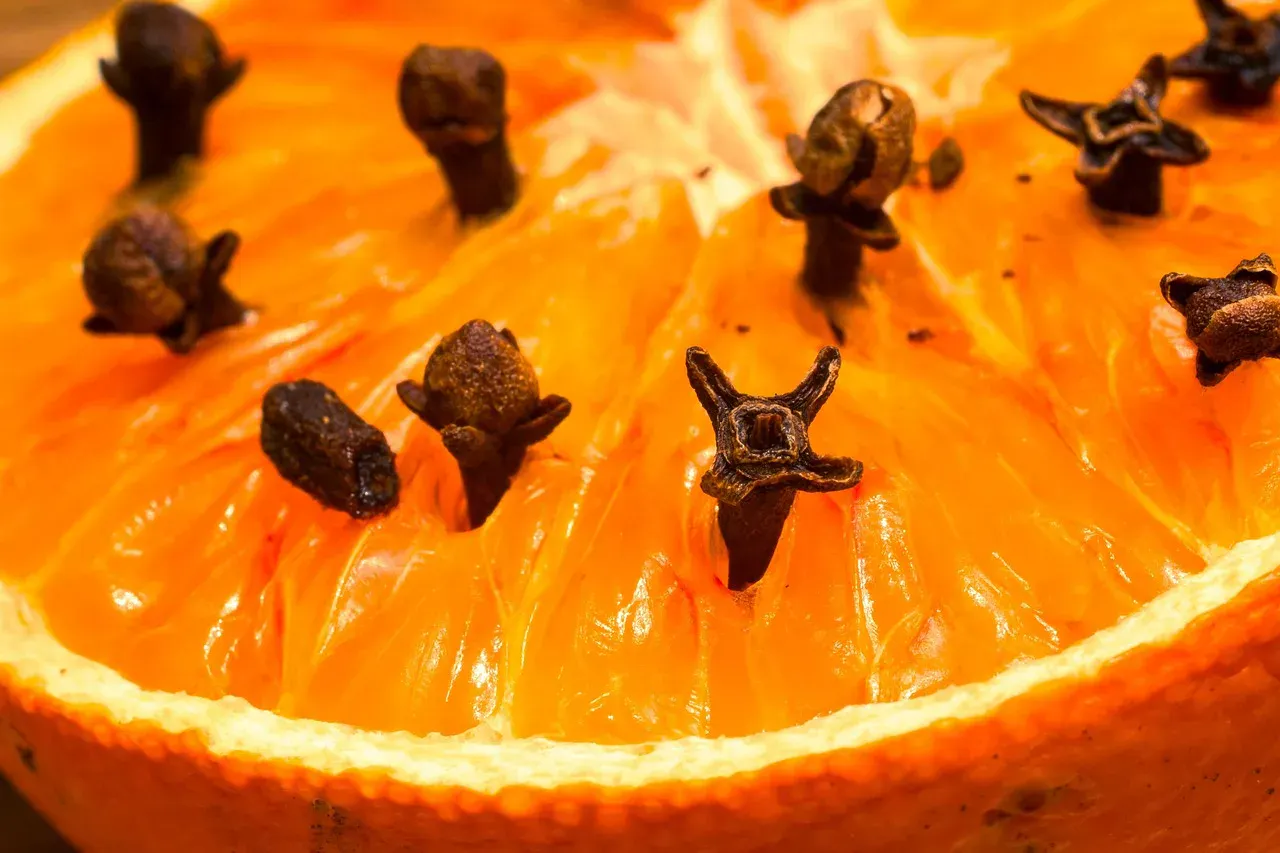
You’ll need an oven, a sharp knife and a little patience. A pomander needs a lot of patience.
For dried orange ornaments, Ellen McCarthy, Children’s Garden co-coordinator at Brooklyn Botanic Garden, cuts ¼-inch slices and bakes them at 250°F for 2 hours, flipping at least once. They’ll keep drying over the next few days, so don’t panic if they feel tacky when they come out. Hung in a window, they glow like stained glass.
For a pomander, she makes the holes with a pencil and pushes whole cloves in. The Farmers’ Almanac says you’ll need about 1 ounce of whole cloves per medium orange. Roll it in spices, then cure it in a paper bag somewhere dark and dry for 2 to 4 weeks. A well-cured one lasts “Six to twelve months.” Start it a month before you want it on the tree, or it will still be curing at New Year’s.
The name is a small gift. Pomander comes from the Old French pomme d’ambre, “apple of amber.”
#3 Beaded safety-pin and 3-D beaded ornaments
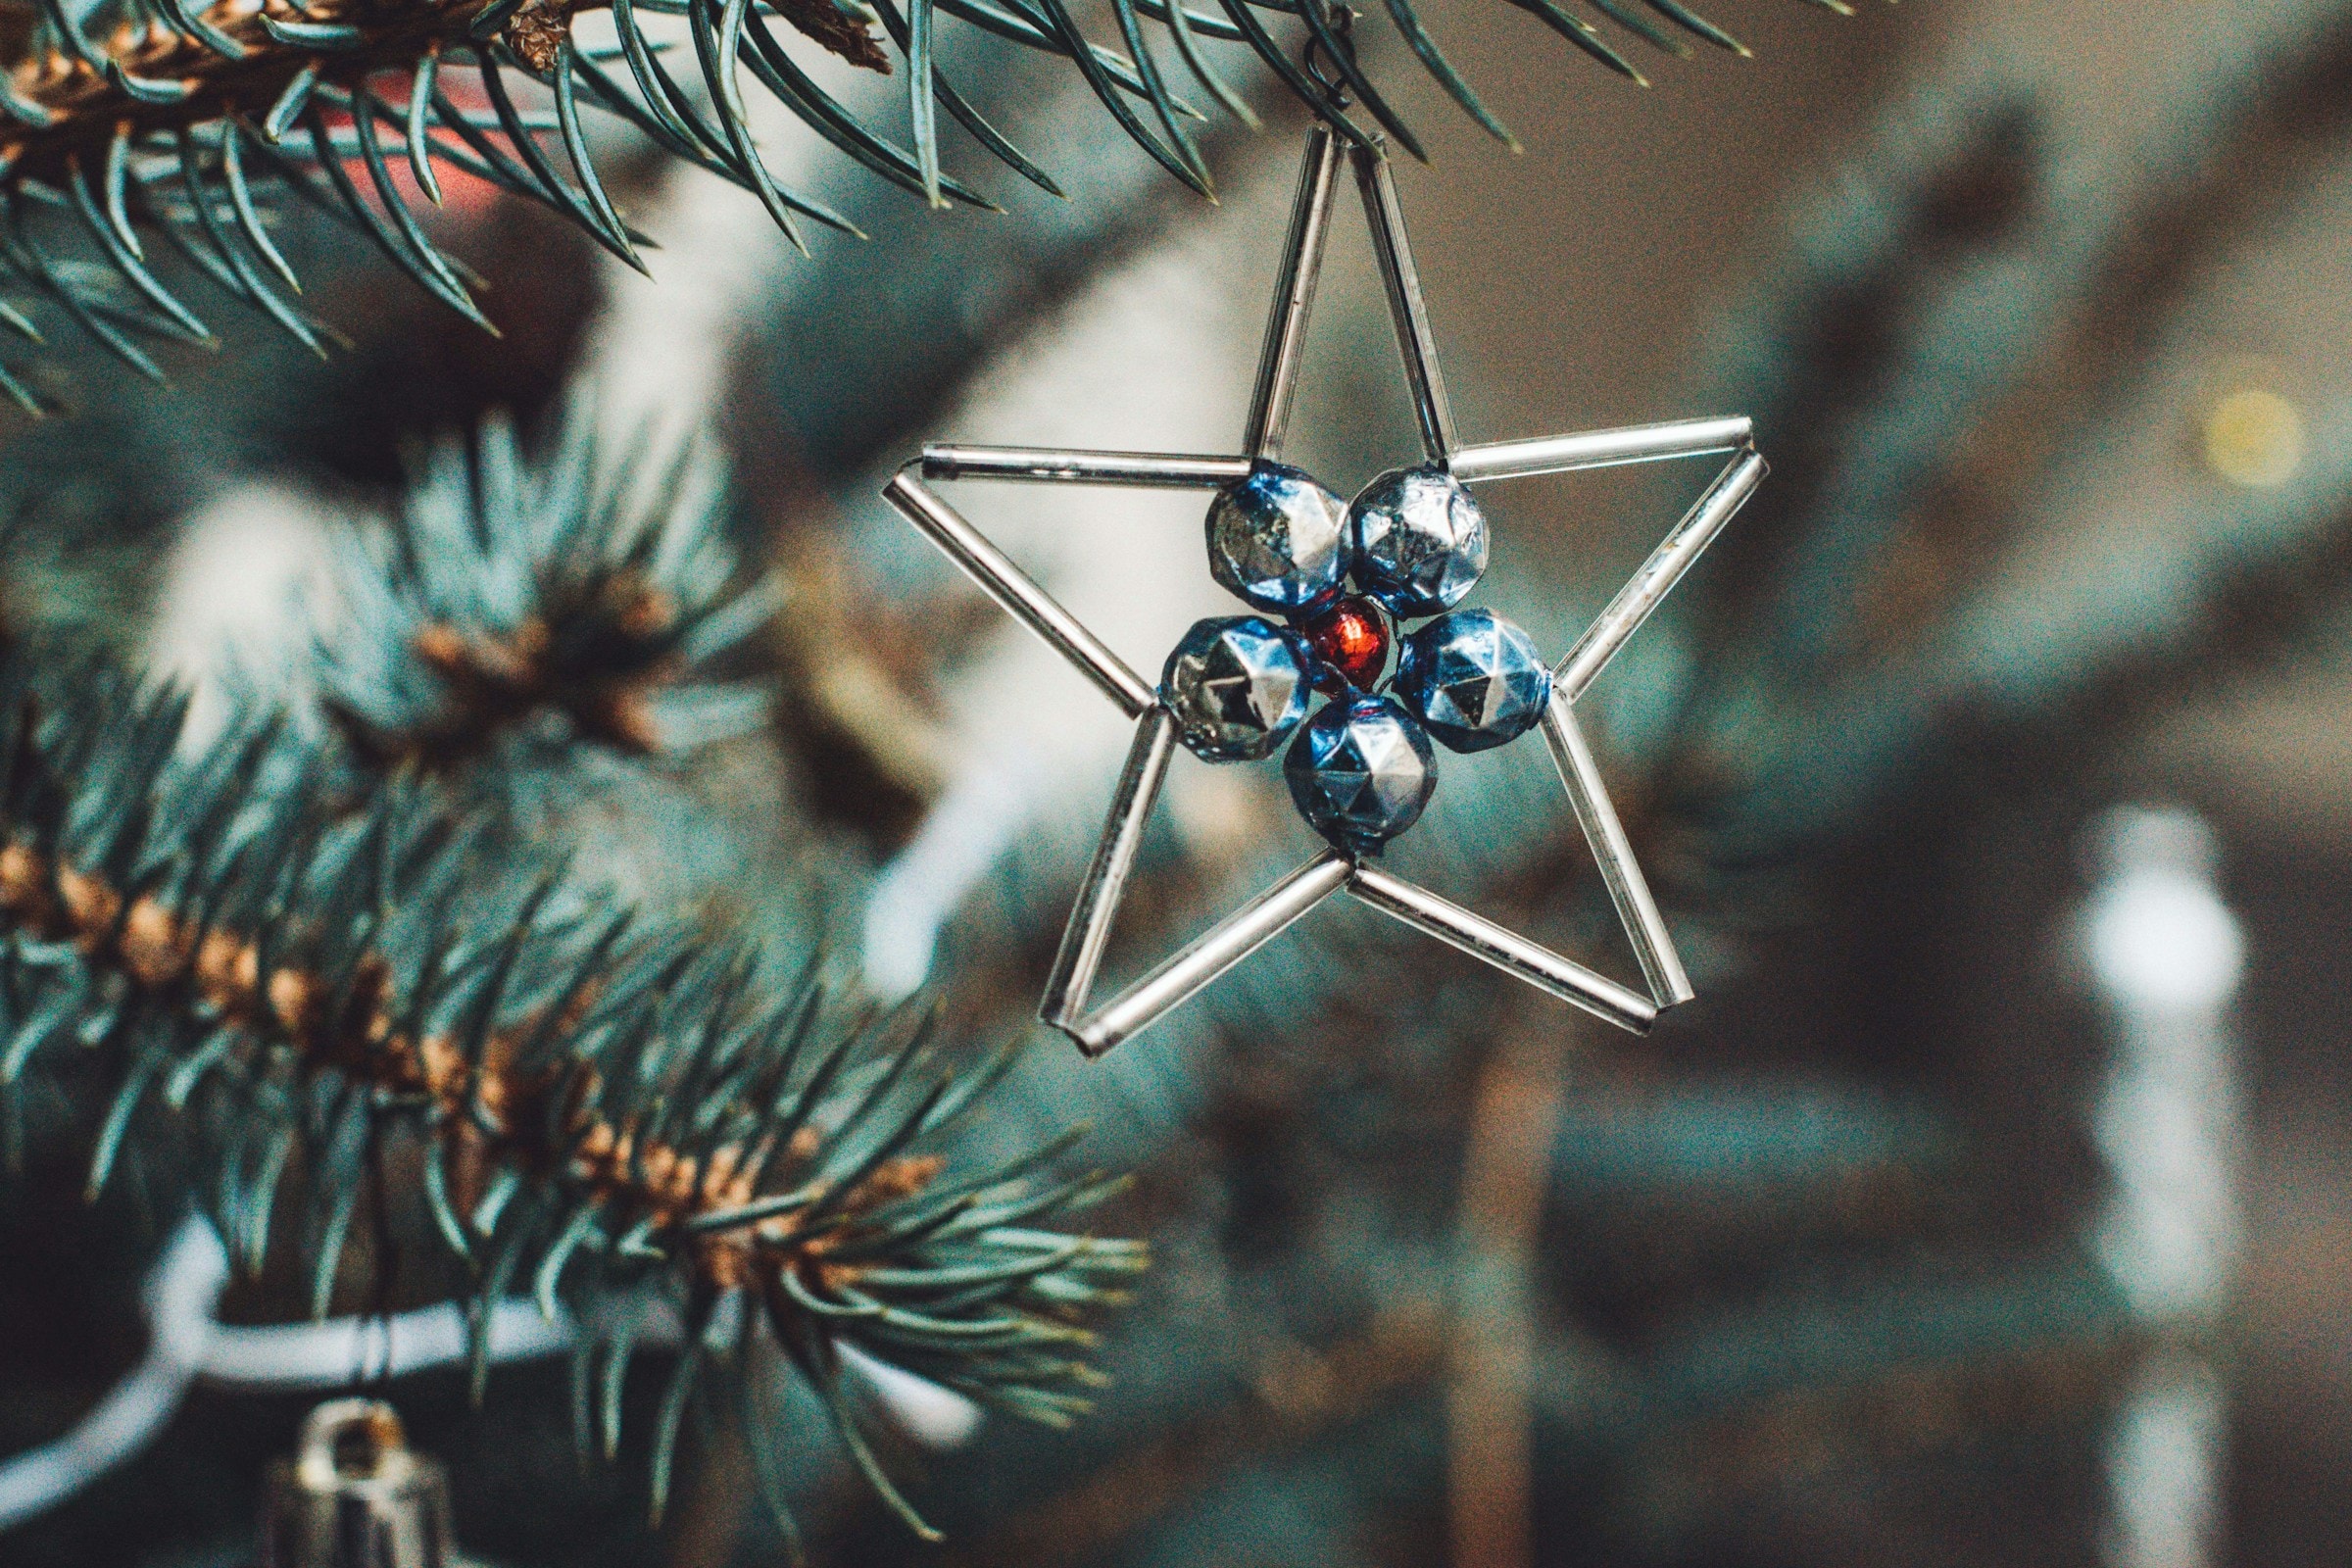
The TV was on, the bead trays were on everybody’s knees, and somebody always dropped a whole tray of crystals into the carpet.
One family who inherited these couldn’t say what they were called. When they asked on Reddit how to make the beaded ornaments a relative made in the 1980s, commenters recognized them right away. They called them 3D beaded ornaments, still sold as kits, and several remembered making them, or the safety-pin-and-bead kind, in groups in front of the TV in the ’80s and ’90s.
If you lived in the Midwest or Northeast, your kit may have come from LeeWards. It was an Elgin, Illinois craft chain that grew to about 101 stores before Michaels bought it in 1994. Elgin’s own history museum still remembers them fondly: “Many of us have fond memories of beaded Christmas ornaments, crochet topped dish towels or embroidered pillow cases at Grandma’s house.”
The kits are still out there, too. The Beadery sells its Classic Indent Ornament Kit for $11.99, enough for eighteen 2¼-inch beaded Christmas ornaments. The circle is the part you’d have to gather yourself, and a guild meeting would do.
#2 Tole-painted wooden cutout ornaments
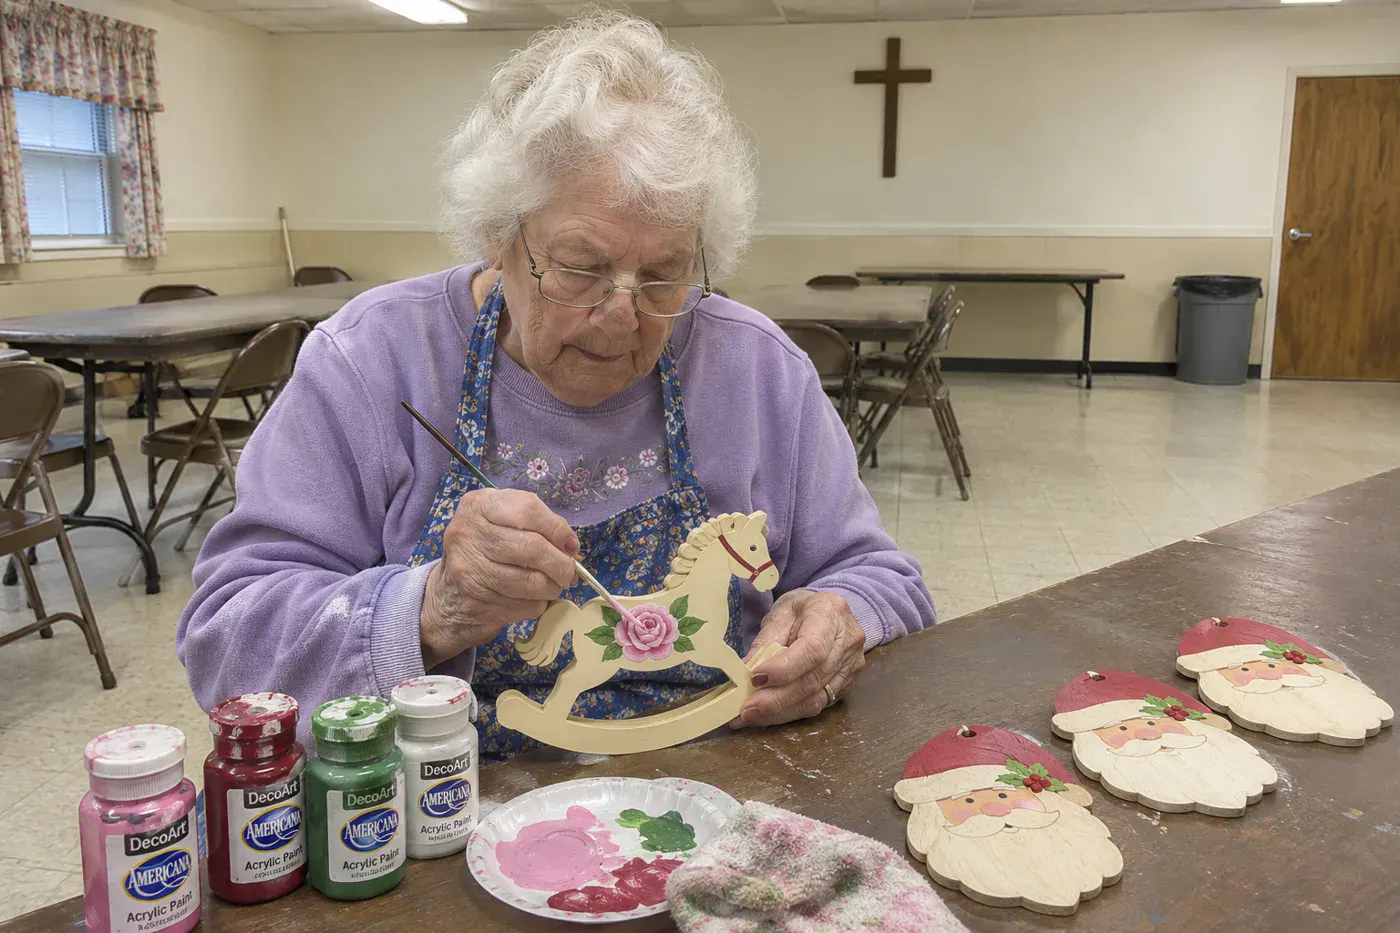
The wooden rocking horses, Santas and folk-art angels with the one-stroke roses and the little white comma strokes were tole painting. A lot of the women who painted them learned from one teacher, or from her books.
Priscilla Hauser opened Priscilla’s Little Red Tole House in Tulsa, Oklahoma. By Plaid’s account she taught about 40,000 to 50,000 people to paint and wrote more than 250 books and articles. She said what brought people to the table better than anyone:
“With brush in hand, my mind empties of its sorrows and the beauty in life smiles!” (Priscilla Hauser, Plaid)
The group that carried the craft lasted half a century. The Society of Decorative Painters was founded in 1972, and in 2008 it tracked down the artist who had painted Christmas ornaments for the White House. Then, in December 2022, it disbanded after 50 years. It ended quietly, without the fuss you’d expect for something that filled so many church halls on Saturday mornings.
To paint one again, start with a plain wooden cutout, a round brush and, if you kept them, the patterns your mother traced.
#1 Keepsake ornaments made from family paper
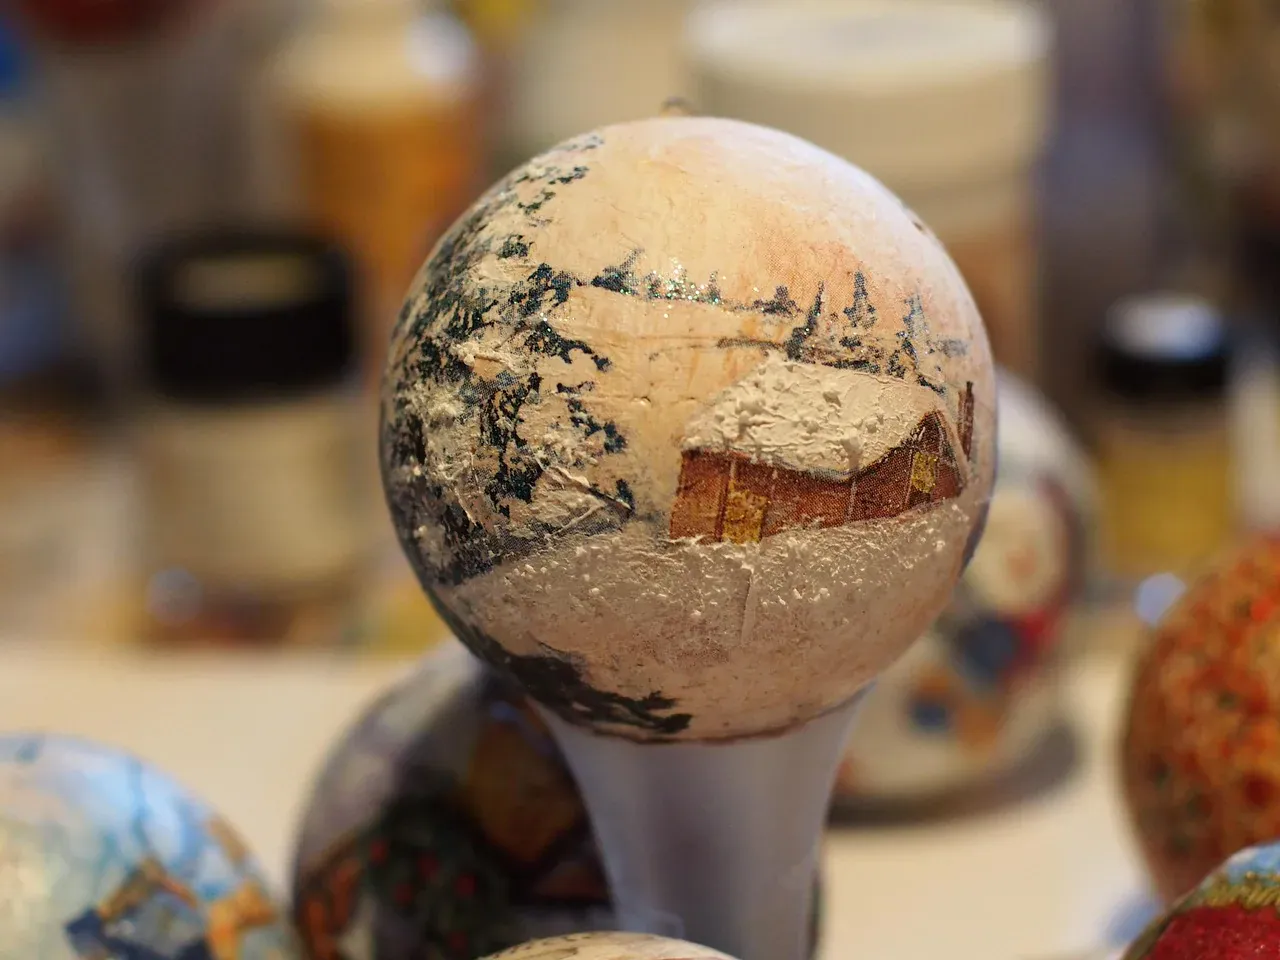
It’s a stack of paper napkins in a kitchen drawer: holly print, her favorite, half a package left. Or it’s a scrap of the plaid wrapping paper she used every year, because she bought it on sale in January.
That’s where the most lasting keepsake ornament comes from, and no shop carries it. On TikTok, people under a napkin-decoupage video kept adding what they’d saved: a late grandmother’s napkins, napkins from each child’s birthday parties, school artwork, drawings meant to become heirlooms.
The method is plain decoupage. Brush decoupage glue on a plain ball or disc, smooth the napkin or paper over it, let it dry, and write the year on the back before you seal it.
Do it while the paper still exists. In 2023 the country brought in about $3.2 billion in imported Christmas decorations, close to nine dollars in ten of it from China. None of it has her holly napkins on it. And things do go. One grandchild on Reddit said their grandparents’ ornaments went to a charity hostel, and that they wish they’d kept them.
Storing them so they last – An interior closet beats the attic or basement: art conservators at the University of Delaware want “a cool, dry, climate-controlled space away from direct sunlight or heat sources.” – Wrap each piece in white acid-free tissue and cushion with polyester batting or divided boxes, per Family Tree Magazine – Wool draws moths, so knitted and felted pieces go in tightly sealed containers – Pre-1940 decorative “snow” may contain asbestos and antique tinsel may contain lead
The bottom line
Somebody still alive may know what your mother called that ornament. It could be a sister, the neighbor who sat at the ceramics table with her, or a cousin who helped push the pins. Ask while you can, and write the answer down.
Then take the one on your tree that’s falling apart, find its number above, and make a new one to hang beside it. Hang the old one too. The two of them on the same branch, a few inches apart, will tell you more than any label.
Bonus: five more ways to bring the old ones back
- For a popcorn garland, leave the popcorn out a day or two first. Popsmith says “Stale popcorn is tougher to break,” and dried cranberries outlast fresh ones, which hold up only a day or two.
- To clean pinecones, bake them at 200°F for 45 minutes on a foil-lined pan, and don’t crowd them. One blogger burned about a third of hers by packing in 200 and stretching the time to 90 minutes.
- Knitters can make the tiny mittens again from Erica Lehner’s free Tiny Mitten pattern: fingering-weight yarn, US 2 needles, 15 to 20 yards, with a left and a right.
- Cut the scraps from a Christmas quilt into 2½-inch squares for #16, so the ornaments match the quilt. Jennifer Bosworth suggests it in a Shabby Fabrics video, where she says handmade ornaments are the special ones.
- Don’t wash an old crocheted or fabric ornament yourself. Family Tree Magazine says to take it to a conservator instead.
Questions people also ask
What are the old sequin and pin Christmas ornaments called?
They’re usually called push-pin ornaments, and you’ll also see them sold as beaded sequin or satin ball ornaments. They were made by pinning sequins and beads into Styrofoam shapes and were most popular in the 1960s and ’70s. Kit makers included Walco, LeeWards, Bucilla and Fibre-Craft, according to The Urban Kitten.
What kind of foam do you use for push-pin ornaments?
Use firm Styrofoam that you can’t squeeze, and never floral foam or porous craft foam, which won’t hold pins, says the maker behind Brucie’s Baubles. Libby Callaway gets good results with rough Styrofoam balls about 2.8 inches across. For pinned fabric balls that take a couple hundred pins, The Ornament Girl warns that very dense SmoothFoam is hard on your fingers.
How do you keep salt dough ornaments from breaking or going moldy?
Bake them low and slow at 200 to 250°F until they’re completely dry through, then seal them with clear acrylic varnish to keep out moisture. A West Virginia University 4-H agent is quoted saying they “can last decades as long as they are dried all the way through.” If a dog is around, hang them high, because Pet Poison Helpline warns one or two can make a dog very sick.
Are old homemade Christmas ornaments worth anything?
Vintage push-pin sequin ornaments typically sell for about $15 to $25 each, with elaborate or collectible ones bringing more, according to The Urban Kitten. Timing matters if you sell. Antiques appraiser Dr. Lori Verderame has said holiday collectibles tend to bring more before the new year than after it.
How do you store handmade ornaments so they last?
Store them in a cool, dry, climate-controlled space away from sunlight and heat, such as an interior closet, and never in an attic or basement, say University of Delaware conservators. Keep wool pieces in tightly sealed containers against moths. Wrap each piece in white acid-free tissue and cushion with batting or divided boxes, per Family Tree Magazine.


