From a tatting shuttle to a darning egg, here is how to name the tools and heirloom linens you inherited and where these old needlework techniques are still taught.
If a little boat-shaped shuttle turned up in what you inherited, #1 tells you what it made, how to tell its lace from crochet and the cheapest way to start using it.
The shuttle fits in the hollow of your palm, smooth as a creek stone, with a few inches of thread still wound on it. Under it in the box is a pillowcase edged in tiny knotted rings, so even and neat you’d swear a machine made them. Nobody ever sat you down and showed you how. That edge has a name, and so does nearly everything else in the basket: the wooden egg, the U-shaped frame, the quilt block stitched in red. Most of these old needlework techniques can still be learned, some of them free.
#17 Hand quilting in a frame
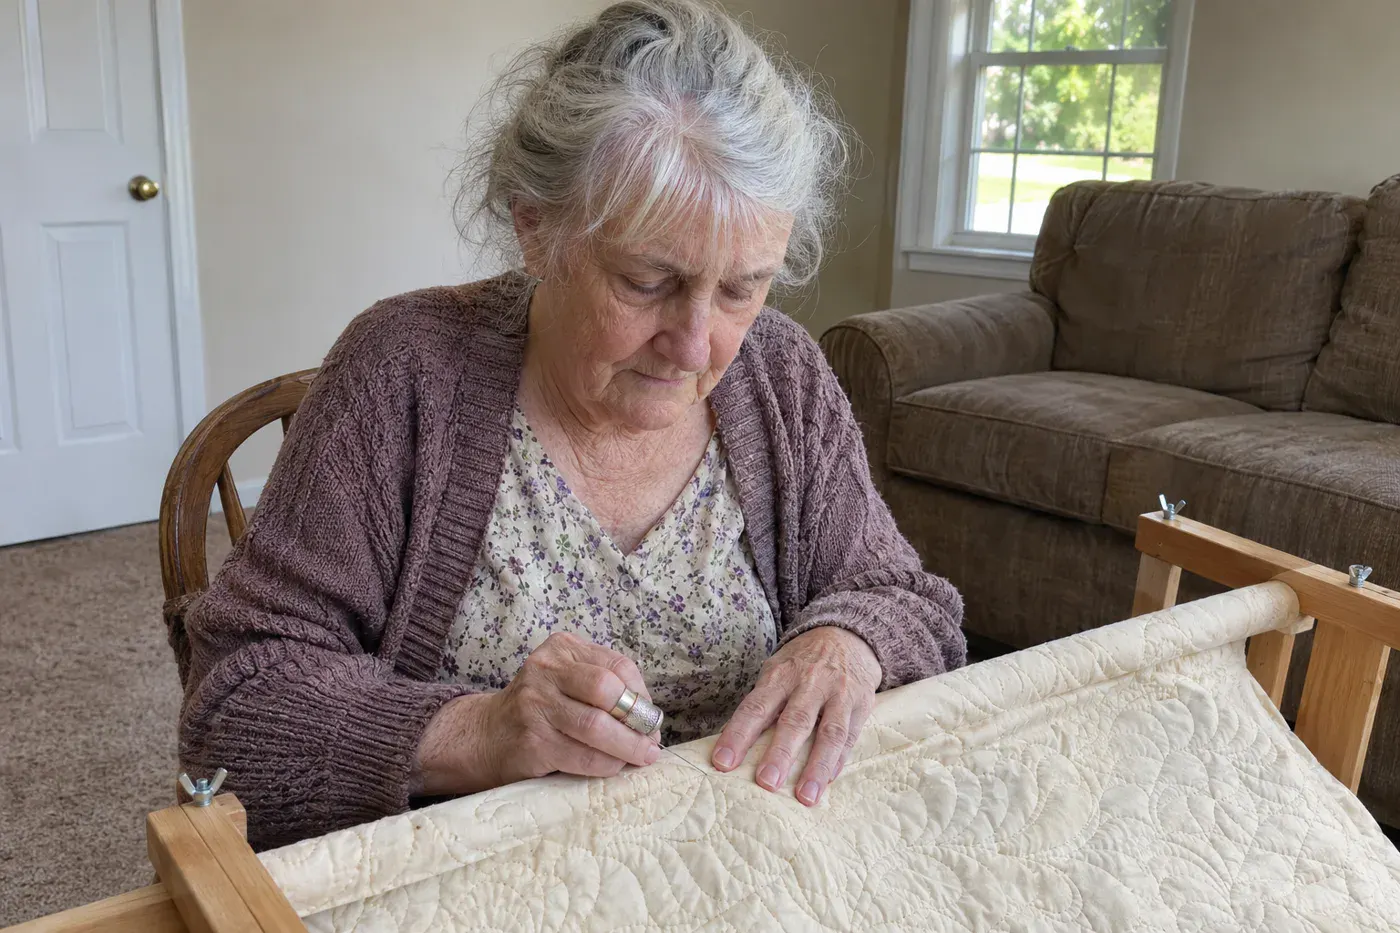
You can size up an inherited hand-quilted quilt in about ten seconds, with two fingers.
Judge an old quilt in 10 seconds
- Spread two fingers about an inch apart along a line of quilting.
- Count the stitches between them. “You should have nine stitches or more to an inch,” says US antiques appraiser Dr. Lori Verderame.
- Check that they’re even. An older quilt with consistent stitching has “a lot of value,” she told 12 Tomatoes.
- Look at the colors. Soft, dull shades from vegetable dyes can point to a quilt made before bright synthetic dyes arrived in the later 1800s.
Dr. Lori says a quilting circle was usually made up of women about the same age, so the stitches would match from block to block. She also reads the tiny, closely quilted areas as a sign that more people and more hours went into the piece.
If you want to learn it yourself, the motion is the rocking stitch. You rock the needle up and down through all three layers with your thimble, loading two to four stitches before you pull the thread through. Missouri Star Quilt Co.’s beginner guide puts the priority in three words: “Even beats tiny.” It treats eight to ten stitches an inch as a goal, not a starting requirement. Use size 8 or 9 betweens and about 18 inches of thread.
The old quilt itself is for studying, not laundering. Asked whether to wash an heirloom quilt, the International Quilt Museum answers “a resounding ‘no!'” Store it flat if you can, pad any folds with acid-free tissue or muslin, and keep it out of attics, basements, kitchens, laundry rooms and unheated spaces.
Skip the cedar chest, too. Dr. Lori says a quilt soaks up the cedar smell. And if you’d planned to hang it on the wall, she’d rather see it on a bed, because hanging “puts undue stress on all of the fibers of the material.”
#16 Iron-on transfer embroidery on dish towels
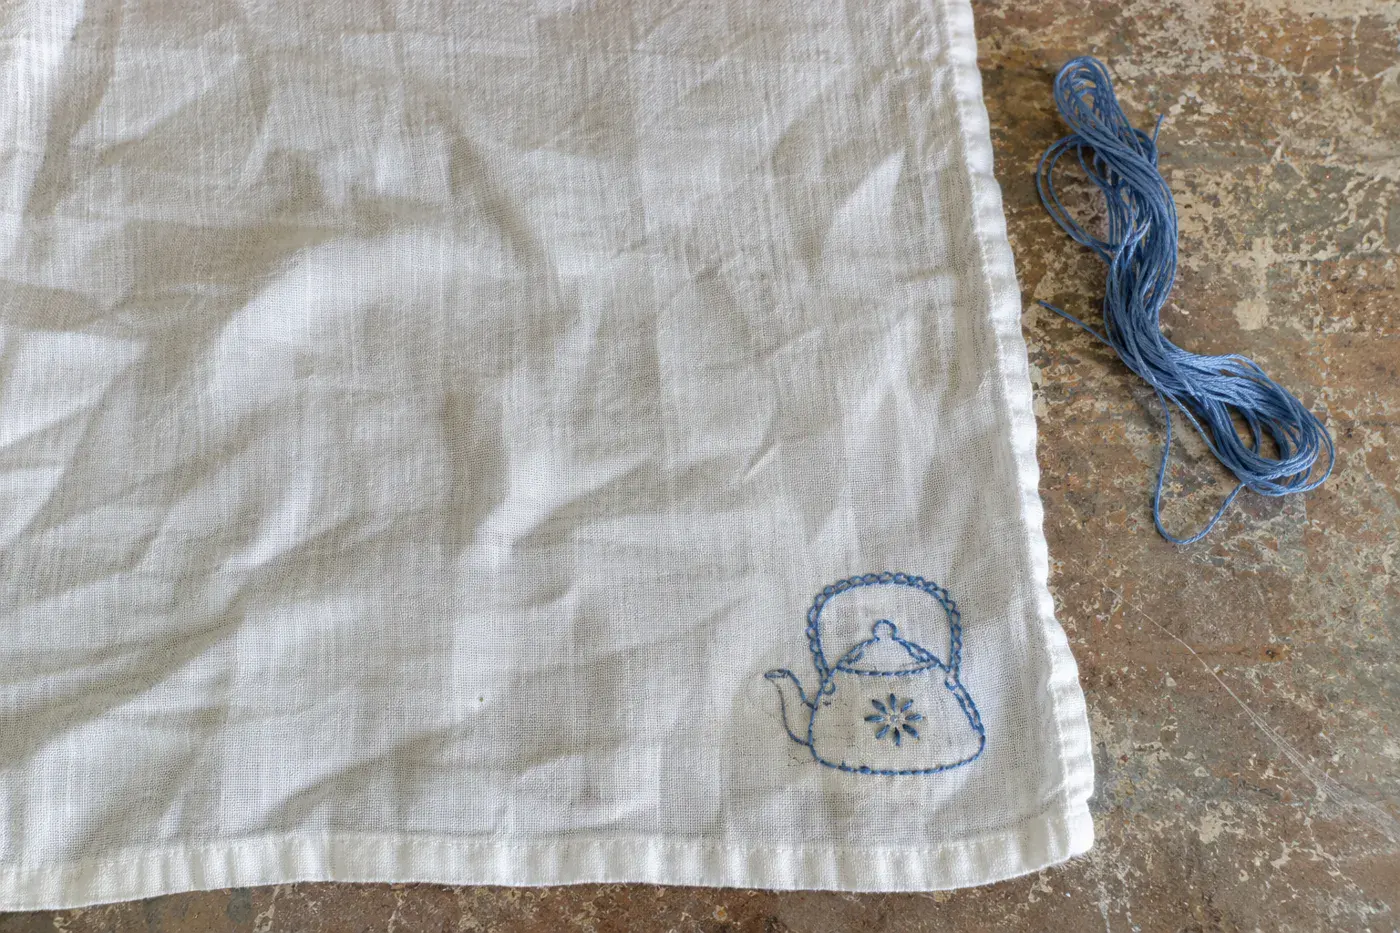
Plenty of kitchen drawers hold a dish towel with a little stitched picture in one corner and, if you look close, a faint printed line where the stitching wandered off the transfer. If the pattern came in an envelope from Aunt Martha, you should know there was never an Aunt Martha.
During the Depression, Jack and Clara Tillotson of Kansas City ran a business with the stiff name of the Colonial Readicut Quilt Block Company. An editor in Chicago decided the products needed a grandmotherly name, and the Tillotsons trademarked Aunt Martha. Their ads were made to look like an ordinary newspaper column, which is why they read like advice from a neighbor. The Work Basket magazine came along in 1935.
The Swenson family bought the business in 1949, and the Price family in 1974, renaming it Colonial Patterns. It’s still an American-owned family business in Kansas City’s River Market, with thousands of patterns under the Aunt Martha’s name, sold at Walmart, Michaels and Hobby Lobby. The transfer you buy to match a 1950s towel can come from the same company that printed the original.
For free designs, Hoop Love is a Flickr group sharing thousands of vintage transfers that are out of copyright.
A lot of those towels began as flour sacks, which held 40 to 100 pounds of flour before paper bags took over in the 1950s. The La Crosse County Historical Society keeps a pink one. Its donor, Winifred Mattson, born in 1917, wrote: “The pink towel was made into a towel by me after this period was over, and I have used it until now, 60 years later.”
#15 Redwork embroidery on quilt blocks
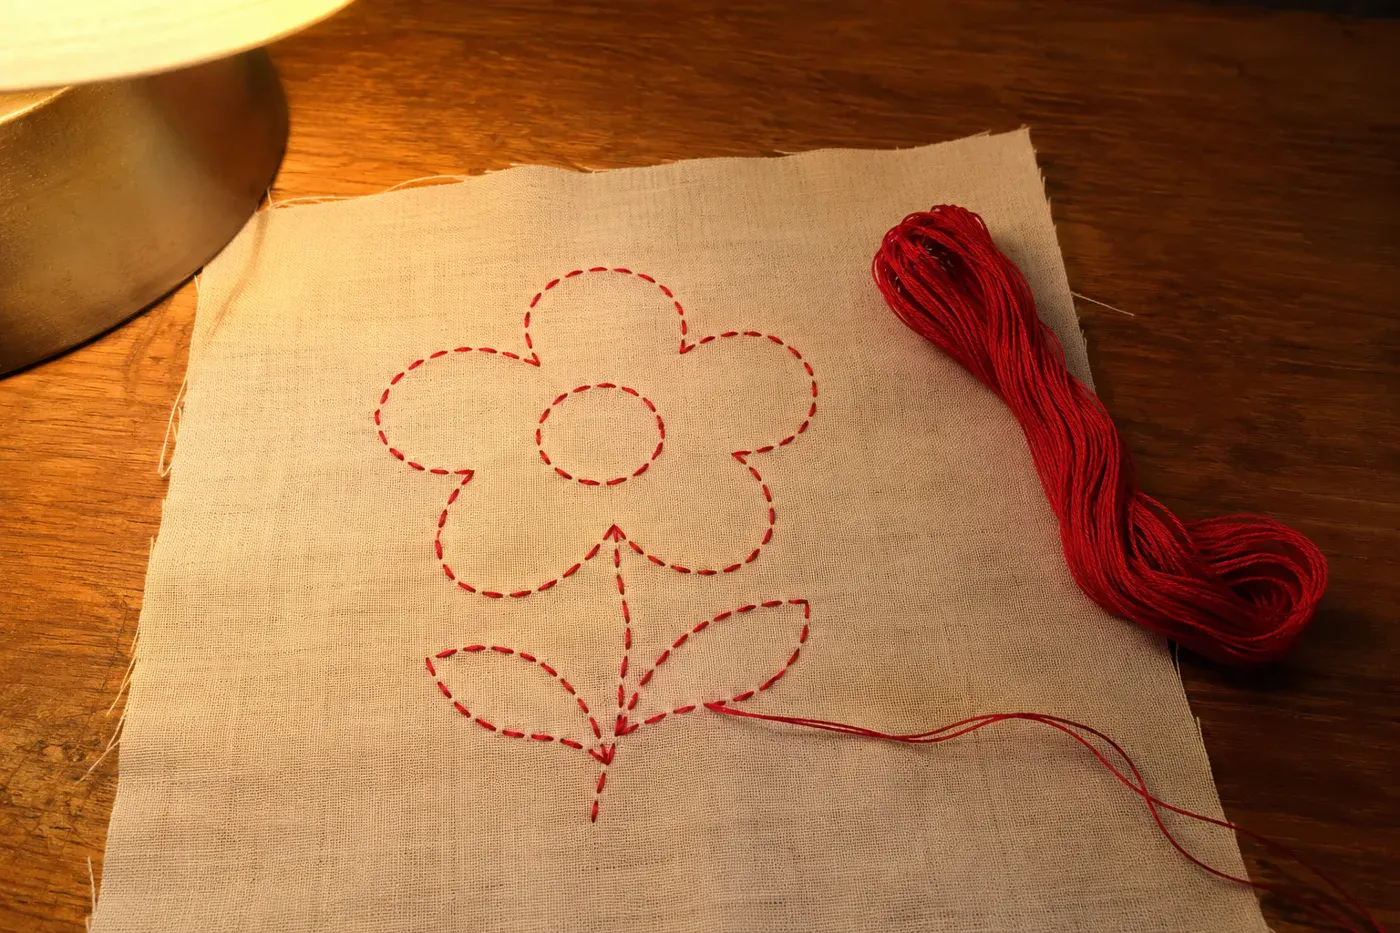
The red in redwork came down to laundry.
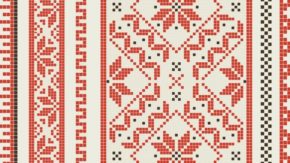
Stitchers used red because red dyes were the first commercially available colorfast dyes, sold as Turkey red floss. A white block worked in red could go through the wash and come out still red and white.
Redwork was most popular between 1855 and 1925. Patterns for single quilt blocks sold for a penny. The stitch was backstitch or outline stitch, which used to go by the name Kensington stitch, and redwork was a common first embroidery for children.
That makes it one of the quickest skills here to pick back up. If you can outline a dish towel, you can stitch a redwork block tonight with nothing more than red floss and a transfer.
It also gives you a rough date. A red-and-white block points toward that seventy-year stretch, when the look was at its height.
#14 Candlewicking on bedspreads and pillows
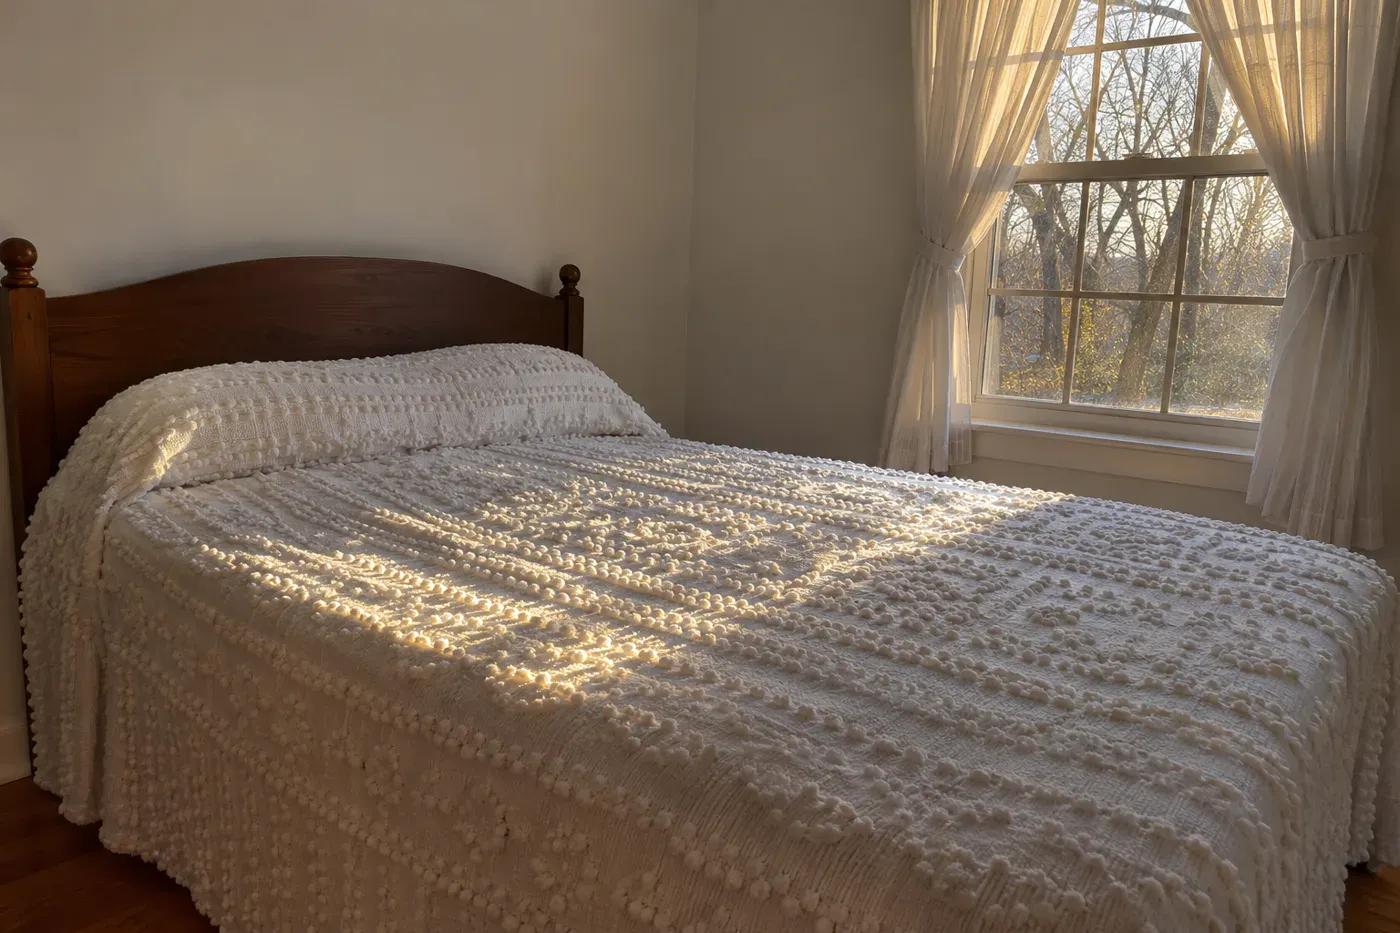
That nubby white bedspread has a bigger story than anybody let on.
Candlewicking started as whitework in unbleached cotton thread on unbleached muslin, using the same soft cotton that got braided into candle wicks. It mixes ordinary embroidery stitches with a tufted stitch, and these days you mostly see it on cushion covers.
The tufted kind built an industry. Near Dalton, Georgia, Catherine Evans, later Catherine Whitener, revived the handcraft of tufting in the 1890s. Tufted bedspreads reached department stores in the 1920s. In the Depression, farm families earned cash working in “spread houses,” and in the 1930s a stretch of Highway 41 lined with spreads for sale picked up the nickname “Peacock Alley.”
By the 1950s, carpet had overtaken the bedspreads.
For a pillow of your own, the supply list is short: unbleached cotton thread, unbleached muslin and one knot. The colonial knot sits larger, rounder and more raised than a French knot, and the Royal School of Needlework’s free StitchBank teaches it in seven photo steps.
#13 Chicken scratch embroidery on gingham aprons
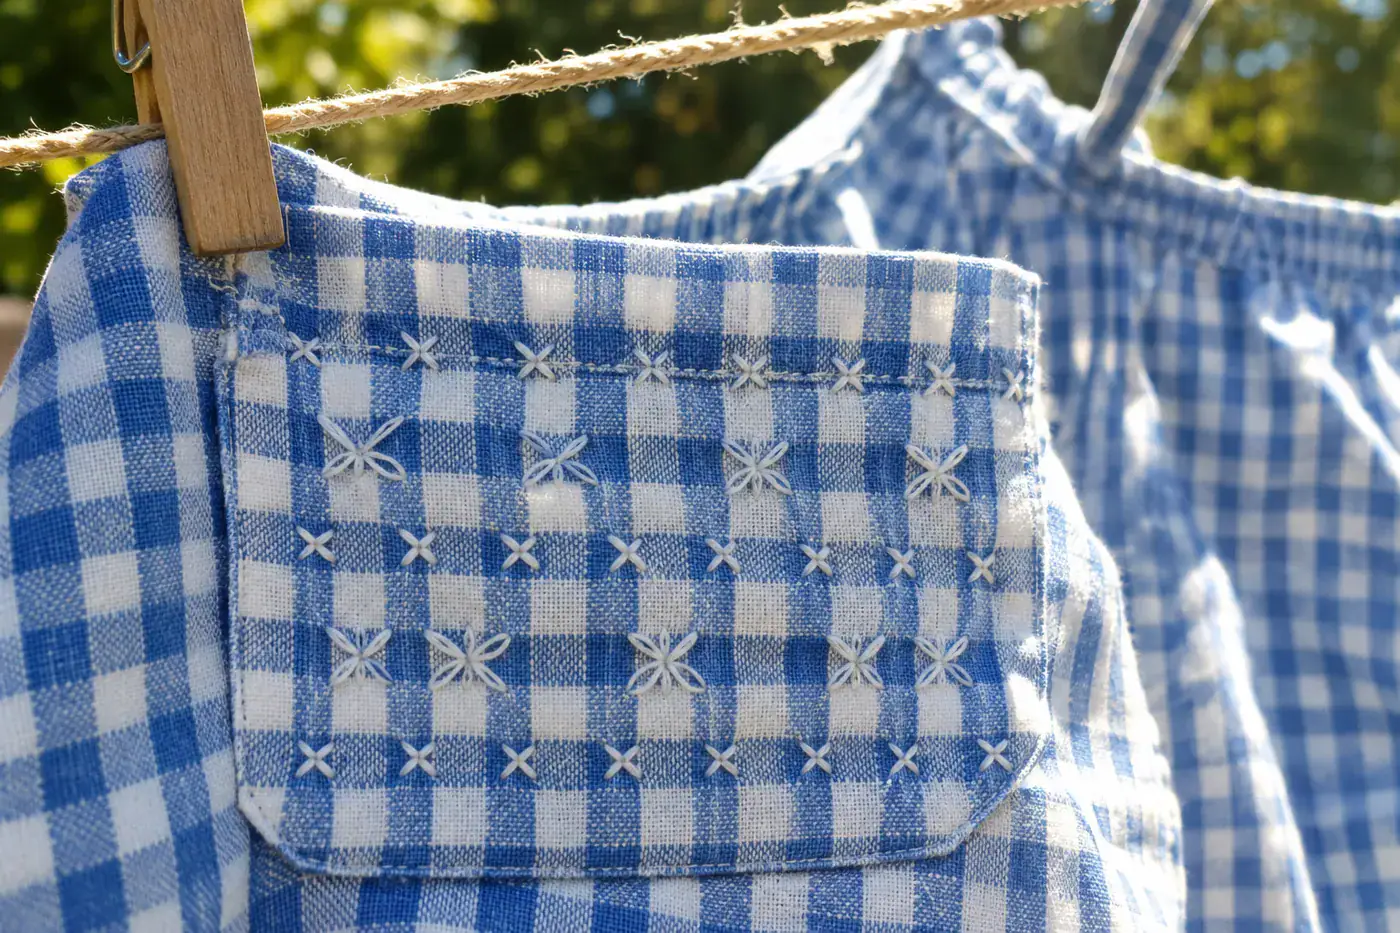
Your gingham apron may have answered to half a dozen names. Mary Corbet, the needlework writer behind Needle ‘n Thread, lists them: “gingham lace, gingham embroidery, hen scratch, broderie Suisse, depression lace.” She also calls it Depression embroidery, after the era it’s tied to.
The stitches are ones you already have in your hands: mostly cross stitches and their variations, double cross, running and threaded running stitch, plus laced stitches. The gingham does the counting for you.
Of all the old needlework techniques for beginners, this is the easiest place to start. Corbet calls it fun and easy, and she points to a free guide from West Virginia University Extension, Traditions Continue… What is Chicken Scratch Embroidery?
The one thing that can trip you up is the fabric. Corbet prefers a 1/8-inch check and says checks bigger than 1/4 inch make the stitches unstable. Buy the eighth-inch check, even if the bigger one looks cuter on the bolt.
#12 Needlepoint and Bargello flame-stitch pillows
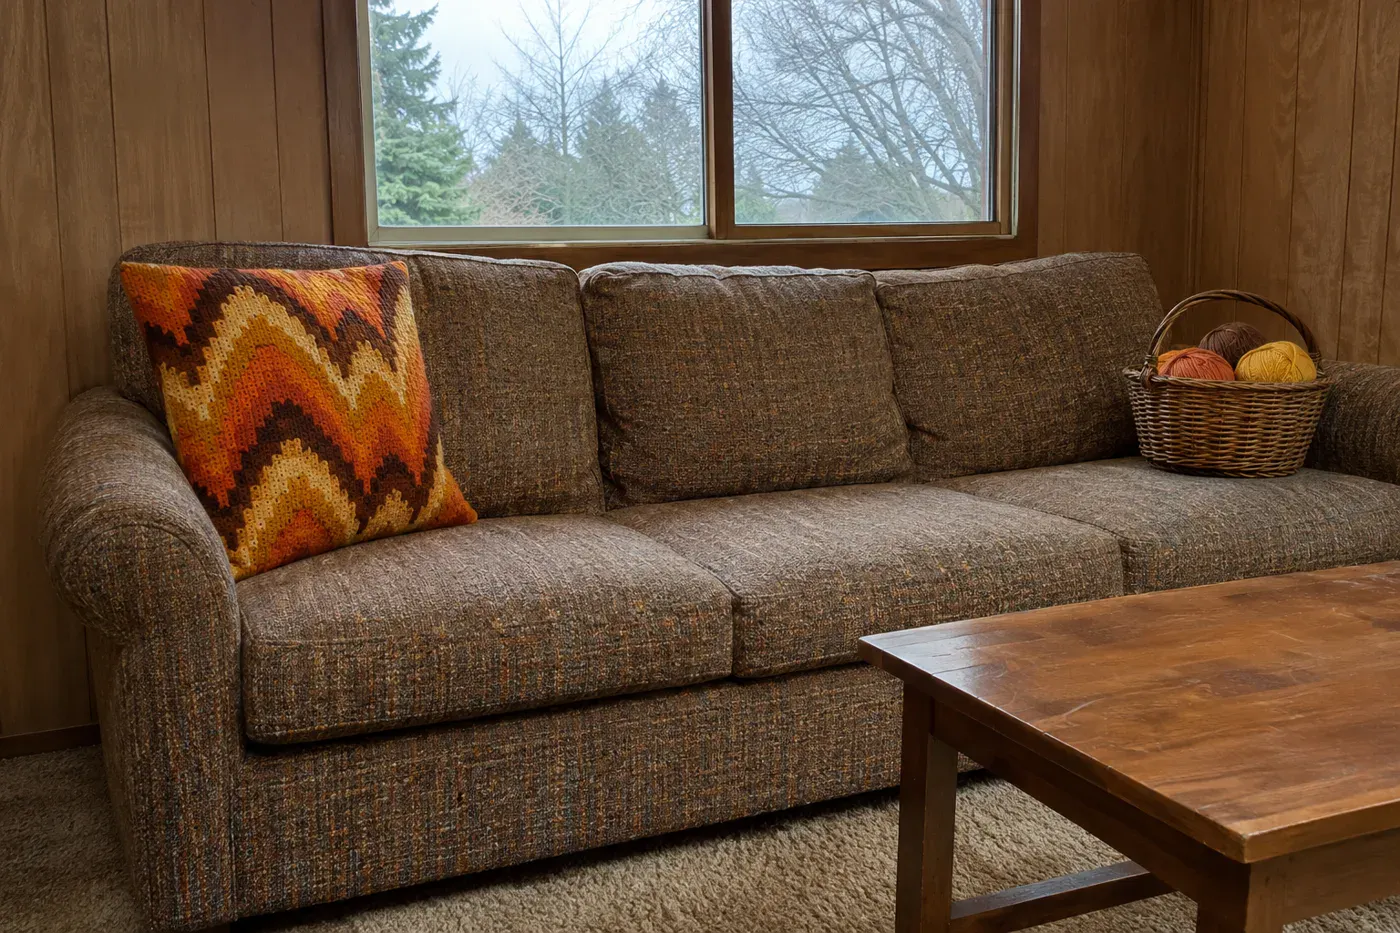
The zigzag pillow in the den had more names than it had colors. The Embroiderers’ Guild of America, the national needlework guild, lists bargello’s others as Florentine work, Hungarian point, flame stitch, cushion stitch and Irish stitch. Florence’s Bargello museum has 17th-century chairs covered in flame stitch.
It’s canvas work, the needlepoint family, done in upright stitches stepped up and down across the canvas. That’s why the color climbs in peaks and drops into valleys, and why the only real skill is counting the steps.
In the US it peaked in the 1970s, after books such as Elsa Williams’ Bargello: Florentine Canvas Work (1967) and Bargello Magic (1972). A former needlework instructor named Ashley recalls: “The bargello was the new ‘had-to-do’ thing.” In the 1960s and 70s, department stores even gave embroidery kits ground-floor space later handed to cosmetics.
“It’s like eating peanuts. You can’t stop once you begin.”
Erica Wilson said that about bargello. She trained at the Royal School of Needlework, came to the US in 1954 and hosted Erica on public TV in the 1970s. If you turn up a used copy of either of those books, you’ve got a 1970s teacher on your shelf.
#11 Cutwork tablecloths and doilies
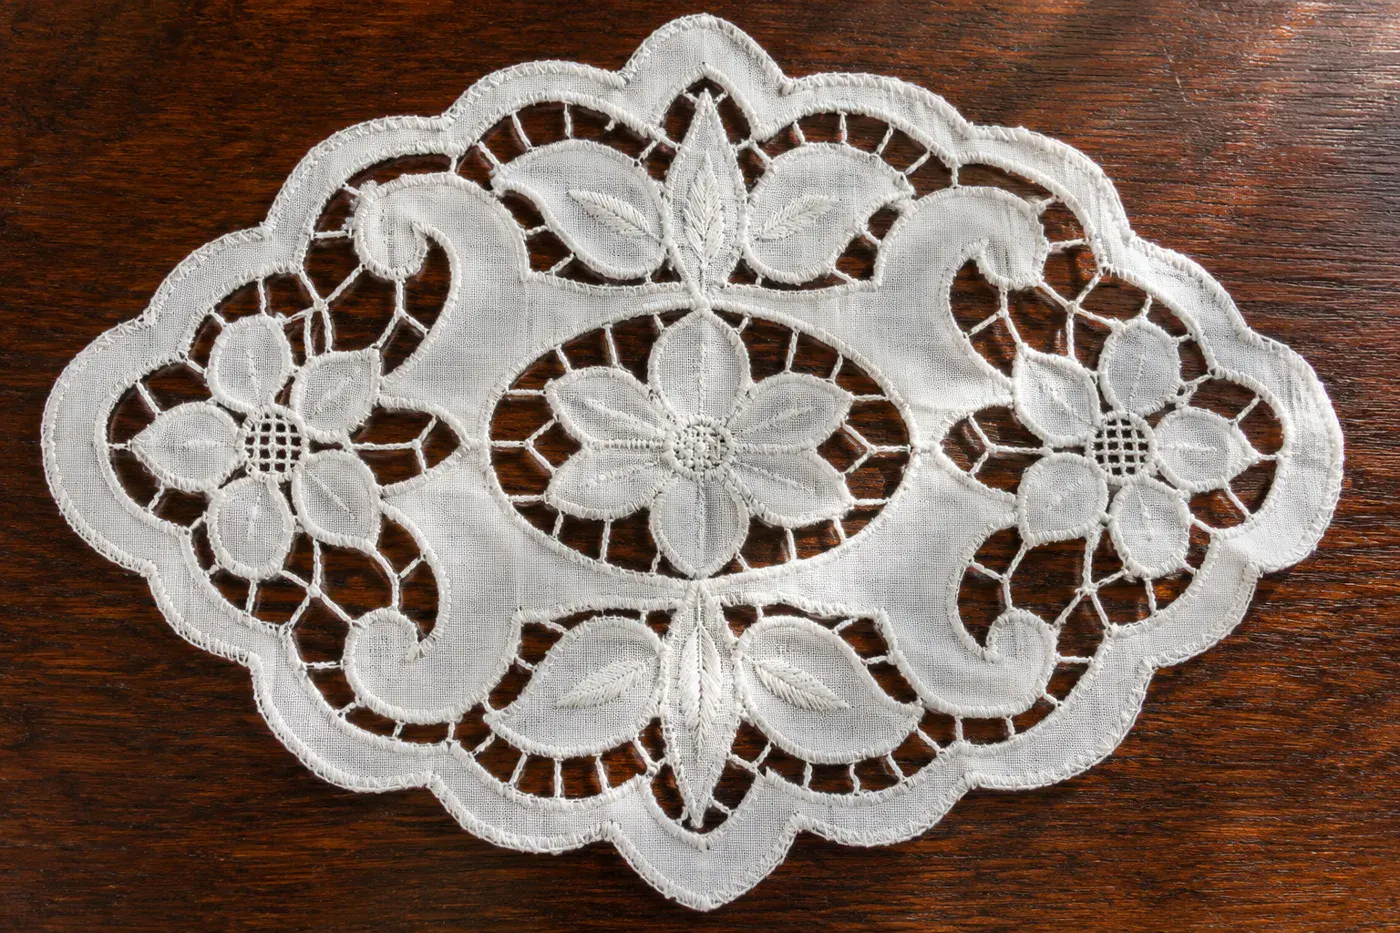
If anyone ever corrected you on the stitch around the holes in a cutwork doily, she had backup.
In Richelieu cutwork, the same guild explains, stitchers outline the design, reinforce the edges, then cut sections of fabric away. Little bars called “brides” bridge the open spaces. The technique began in Italy as punto tagliato and was later named after Cardinal Richelieu. The guild’s own description calls the outline stitch buttonhole. The needlework expert Marion Scoular, quoted on the same page, won’t have it:
“The stitch used in Richelieu is NOT buttonhole stitch. It is blanket stitch.”
You know the difference between those two stitches in your fingers. Turn your doily toward the light and look at the edge of a hole.
#10 Battenberg tape lace collars and tablecloths
Run a thumb along the outline of that lacy estate-sale tablecloth. If you feel a narrow woven tape, about a quarter inch wide, with tiny picots (little loops) along both edges, you’ve found Battenberg.
It’s a tape lace: the ready-made braid lays out the shapes first, and the open spaces are filled with buttonhole stitch, bars and spiderwebs. Sara Hadley won a gold medal for a Battenberg design at the 1893 Chicago World’s Fair.
The name honors the 1885 wedding of Princess Beatrice and Prince Henry of Battenberg. The original filling stitch was buttonhole picot. Butterick, Sears and Montgomery Ward all sold the machine-made tape, so the fiddliest part of the lace came by mail.
That’s the good news if you want to try it. The outline is made for you, so all you’re doing is the fillings, which makes Battenberg one of the gentler ways into lacemaking.
#9 Blackwork patterns on even-weave linen
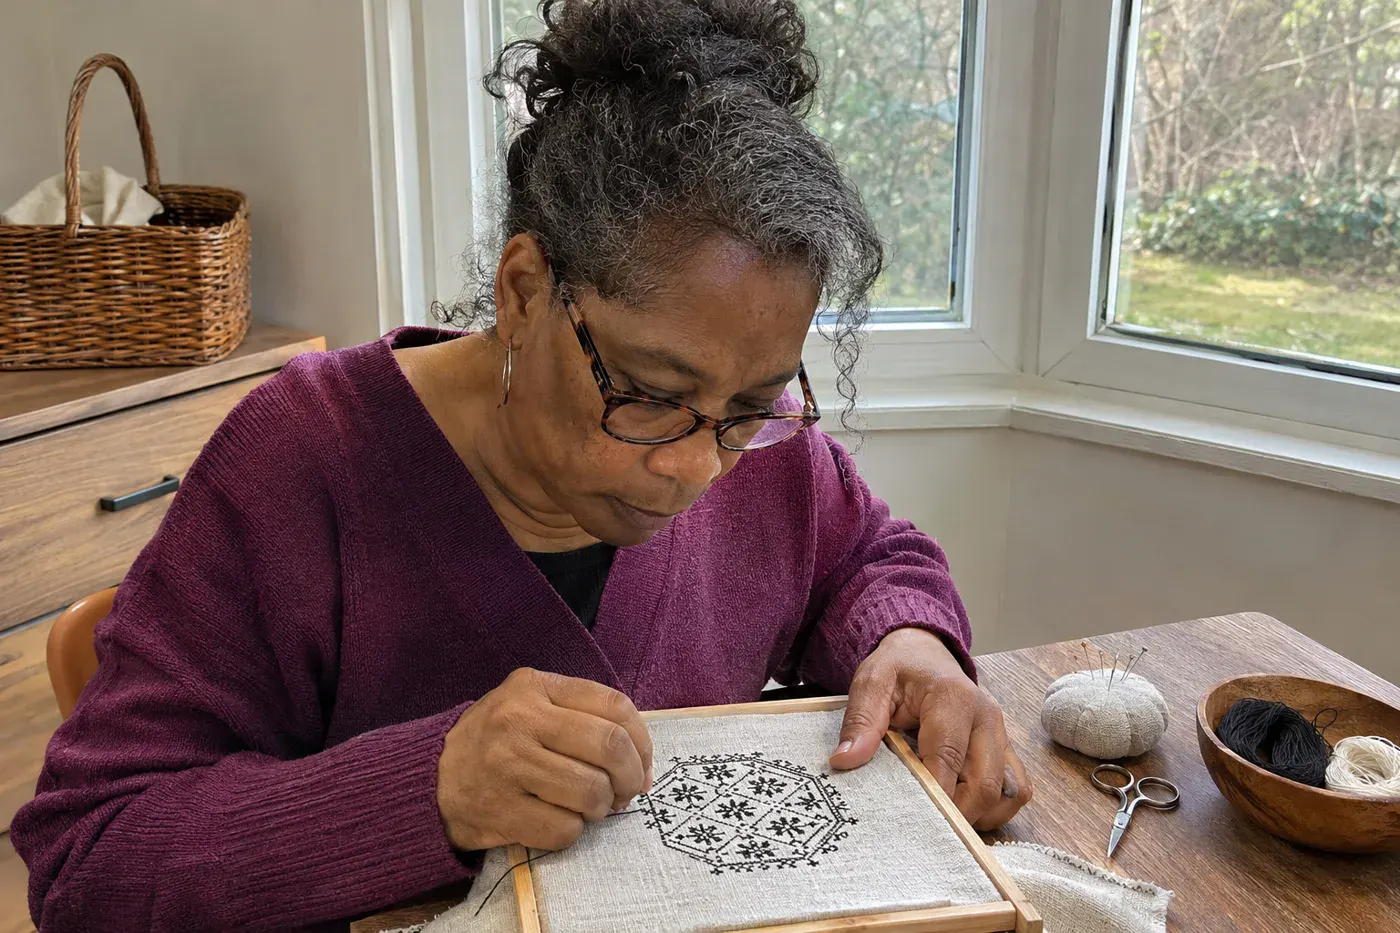
A blackwork piece stitched in red or blue thread is still blackwork. Sarah Homfray, a UK embroiderer who says she’s “trained in traditional English hand embroidery techniques,” puts it plainly: “So black work is the style of stitching, not necessarily the color.”
Blackwork is counted-thread embroidery from 15th and 16th century England, worked in repeating patterns on even-weave linen, often 28- or 32-count. Its main stitch is double running, also called Holbein stitch, which makes a reversible line.
That gives you a test. Turn the piece over. If the back shows the same neat lines as the front, double running stitch is the likely answer.
Whitework is its opposite number. “So, it’s white thread on a white background as most white work is,” Homfray says. In the 1800s whitework was prized as a cheaper substitute for lace on household linens, and it came back between the 1910s and the 1960s.
You may have heard that Catherine of Aragon brought blackwork to England. The Embroiderers’ Guild of America calls that “likely a myth.”
#8 Hardanger embroidery on table runners
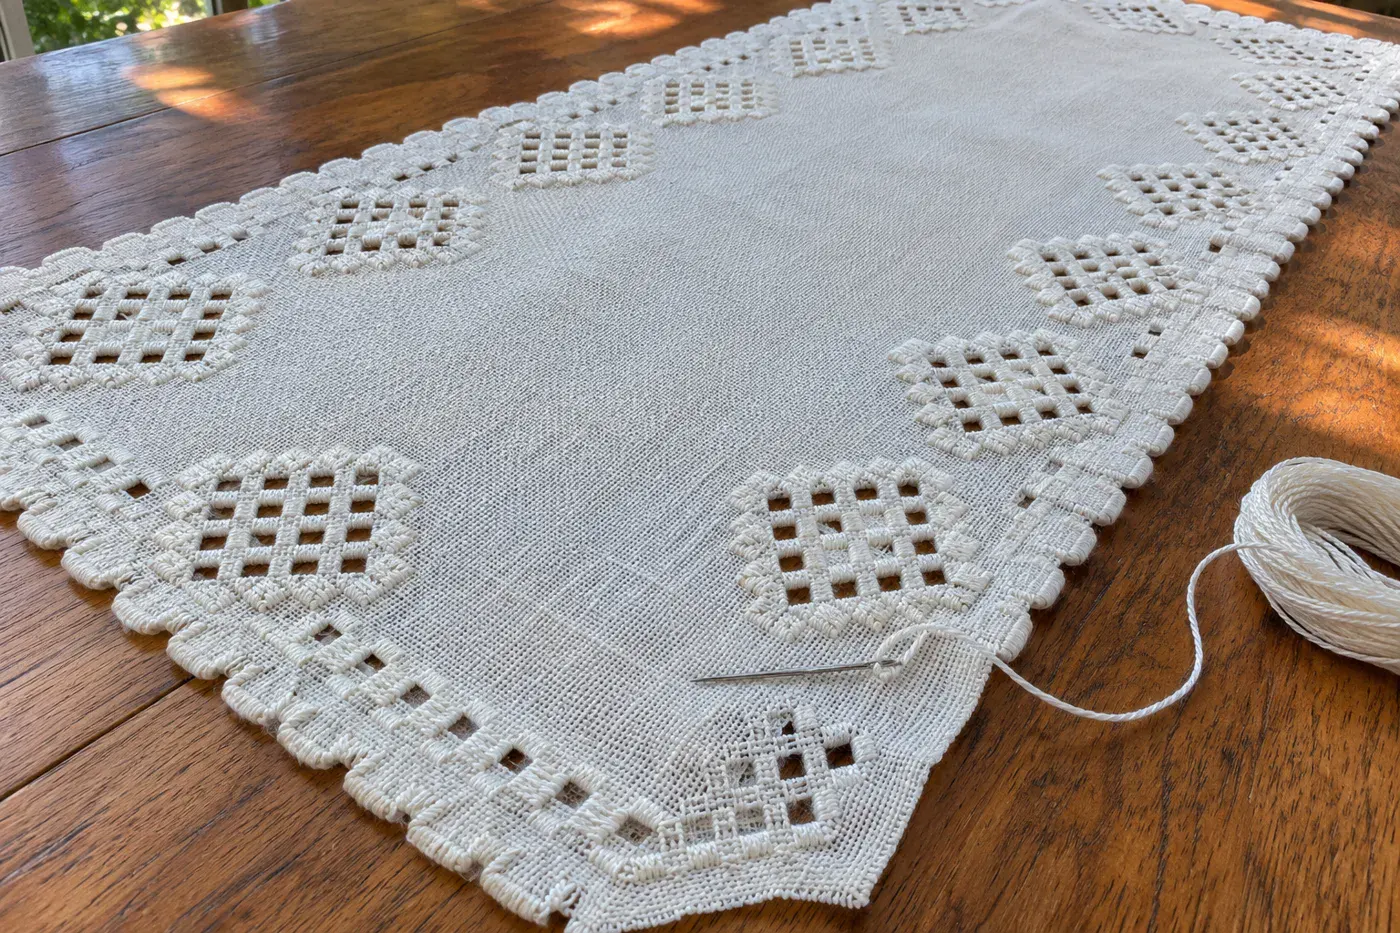
Count to five. The neat little squares framing the open windows in a Hardanger runner are called kloster blocks, and each one is five parallel satin stitches over a group of four by four threads. Five stitches, four threads, every time.
Hardanger comes from the Hardanger district of western Norway, where it flourished from 1650 to 1850.
Today it’s worked on 22-count evenweave, with pearl cotton #5 for the blocks and #8 for the fillings. Those three numbers are most of your shopping list.
For a teacher, Vesterheim, the Norwegian-American museum, has run Hardanger classes online. Its beginner-friendly “Introduction to Hardanger Embroidery,” taught by Shan Rayray over three Tuesdays, was listed at $170, or $155 for members.
#7 Stumpwork raised and padded embroidery
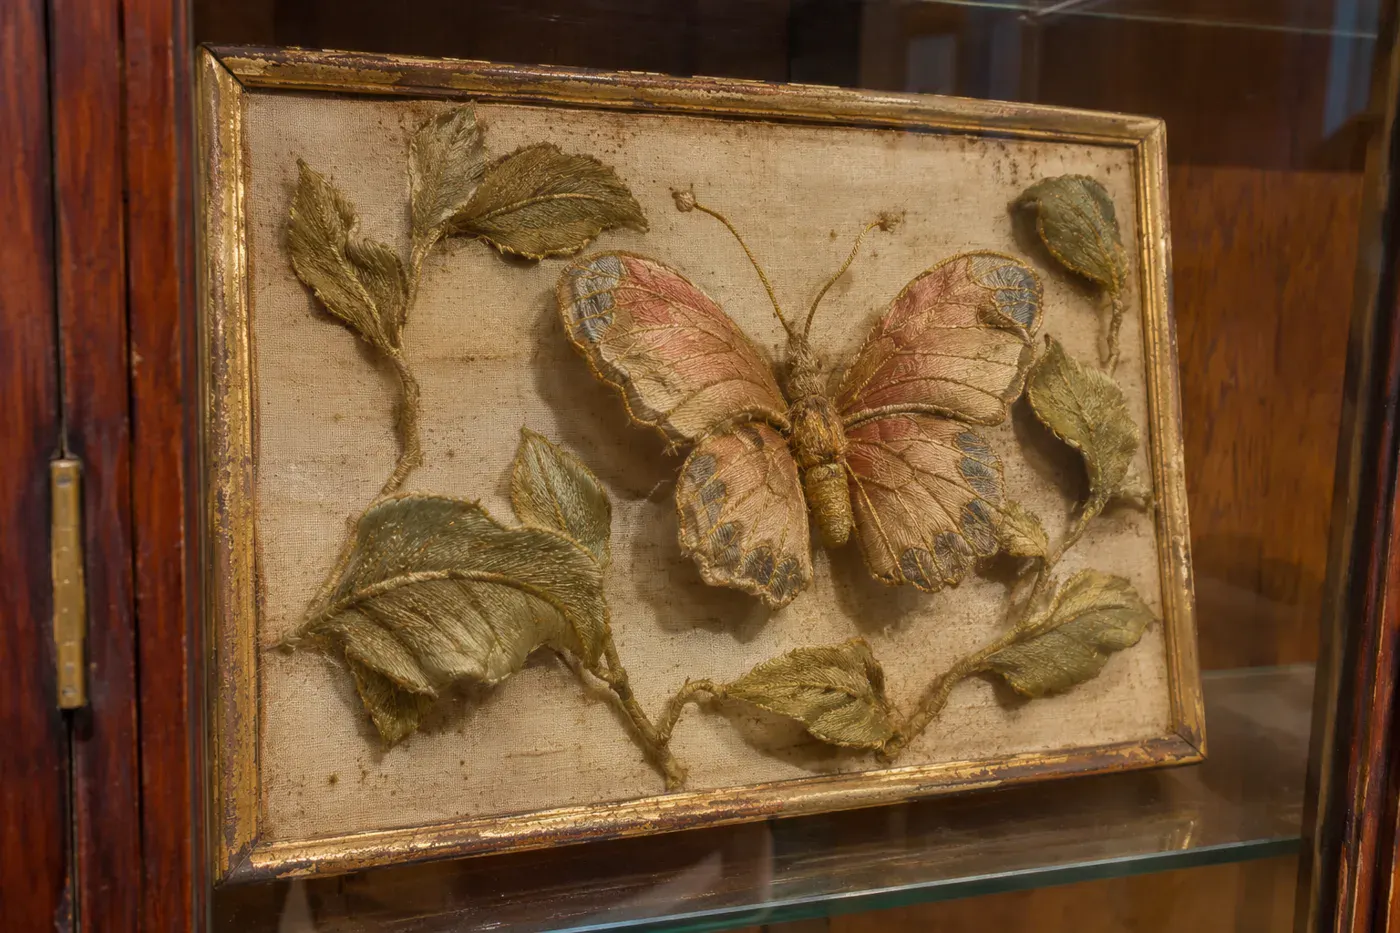
Wings that stand off the fabric, petals you could catch a fingernail under: that’s stumpwork, and the trick is that those parts were never stitched on the picture at all.
Each shape was worked separately as a “slip,” then padded with cotton, wool or carved wooden shapes, sometimes edged with wire, and attached. Sarah Homfray describes the same idea: padding, stuffing and wired shapes such as wings and leaves that make embroidery three-dimensional.
In the 17th century, when it peaked around 1650, nobody called it stumpwork. It was “raised work” or “embosted work.” The name stumpwork came in the 1800s. It covered caskets, pictures and mirror frames.
To learn it, the Royal School of Needlework offers a self-paced online video course, Introduction to Stumpwork, that ships a complete kit to your door. It’s meant for confident beginners or intermediate stitchers, so expect more steps than flat embroidery, since every slip gets stitched, padded and fixed down.
#6 Silk shading, or needle painting, on pictures
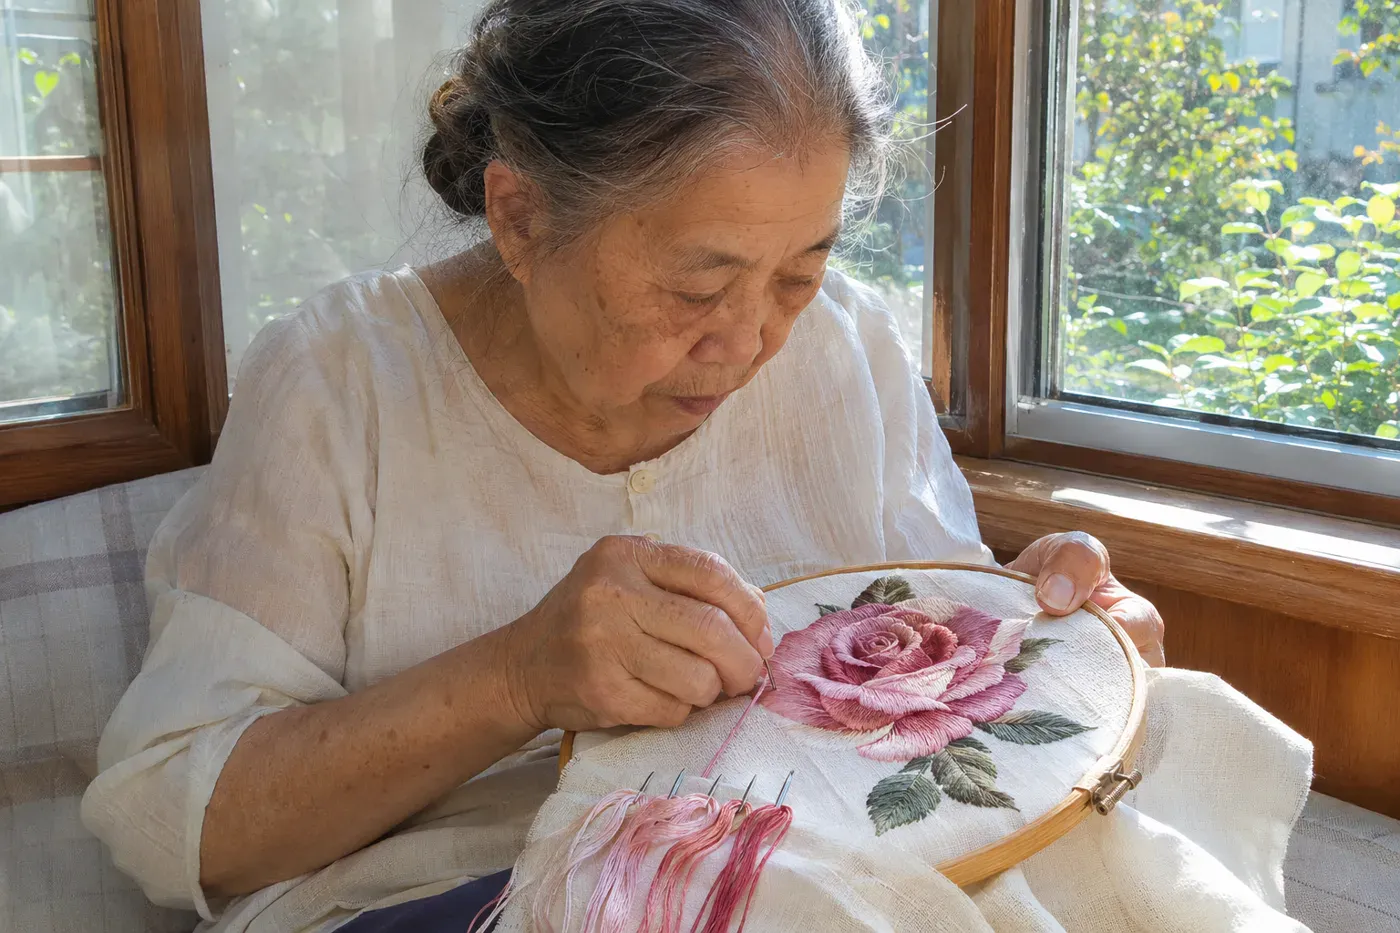
The stitch in those shaded flower pictures is long and short stitch. You probably learned it years ago. The hard part was the needles.
Stitchers kept several needles “in play” at the same time, each threaded with a different shade, so they could blend one color into the next like paint. Today it’s usually worked in stranded cotton, often edged with a hidden split stitch.
There are two kinds, and you can tell them apart on an old picture. In natural shading, both the stitch angle and the color change, so the stitches turn with the curve of a petal. In tapestry shading, the stitches all stay vertical.
Thread every shade before you start. It’s the habit that makes the blending possible.
To practice, the Royal School of Needlework’s shop sells kits with threads, fabric, needles and a step-by-step booklet, such as a silk-shading fox for £28.50, priced in British pounds and sometimes out of stock.
#5 Swedish huck weaving on hand towels
You need no hoop, and nothing shows on the back. That’s why the zigzag border on an old hand towel looks just as clean when you flip it over.
Swedish huck embroidery, also called huck weaving, slides floss or perle cotton under the little raised threads on the surface of huck cloth, passing stitches under the weave without going through to the back. All it takes is a blunt cross-stitch needle. It came to North America in the 20th century and went onto towels, napkins and aprons.
The fabric is still sold. In 2024 Mary Corbet found cotton huck toweling 17 inches wide for about $7 a yard from eQuilter.
She has two warnings. Huck towels sold for cleaning “are not always high quality,” and the raised threads on linen huck are harder to see. Start on cotton.
#4 Hairpin lace on a U-shaped loom
That metal U in the knitting bag, with a bar you can slide off the top, is a hairpin lace loom. The craft started on an actual U-shaped hairpin.
You wrap yarn around the two parallel rods and hold the loops with crochet stitches down the middle, a line called the “spine.” Then you join the long strips into scarves, shawls and afghans. If an afghan in the closet is made of strips of long loops with a crocheted line down each center, now you know.
It turned up on finer things, too. Charlene Marietti, writing in PieceWork about her grandmother’s handkerchiefs, says “the frilliest ones in my collection have hairpin lace inserted between crocheted stitches.”
There’s a free vintage teacher waiting. C. J. Bates & Son’s booklet Discover The Excitement Of Hairpin Lace is on Project Gutenberg. It calls for a Susan Bates or Marcia Lynn loom in 1½-, 2-, 3- and 4-inch widths and 4-ply knitting worsted, with projects from afghans and stoles to a baby sacque. Its joining instruction is the whole trick in one line: “Insert hook in 2 right loops of 1st strip and pull through 1st 2 left loops of 2nd strip.”
For more, the Antique Pattern Library, a Canadian nonprofit, offers free scans of public-domain craft books for personal use. Before you start, measure the width of your loom; the booklet sizes its projects by it.
#3 Darning socks over a darning egg
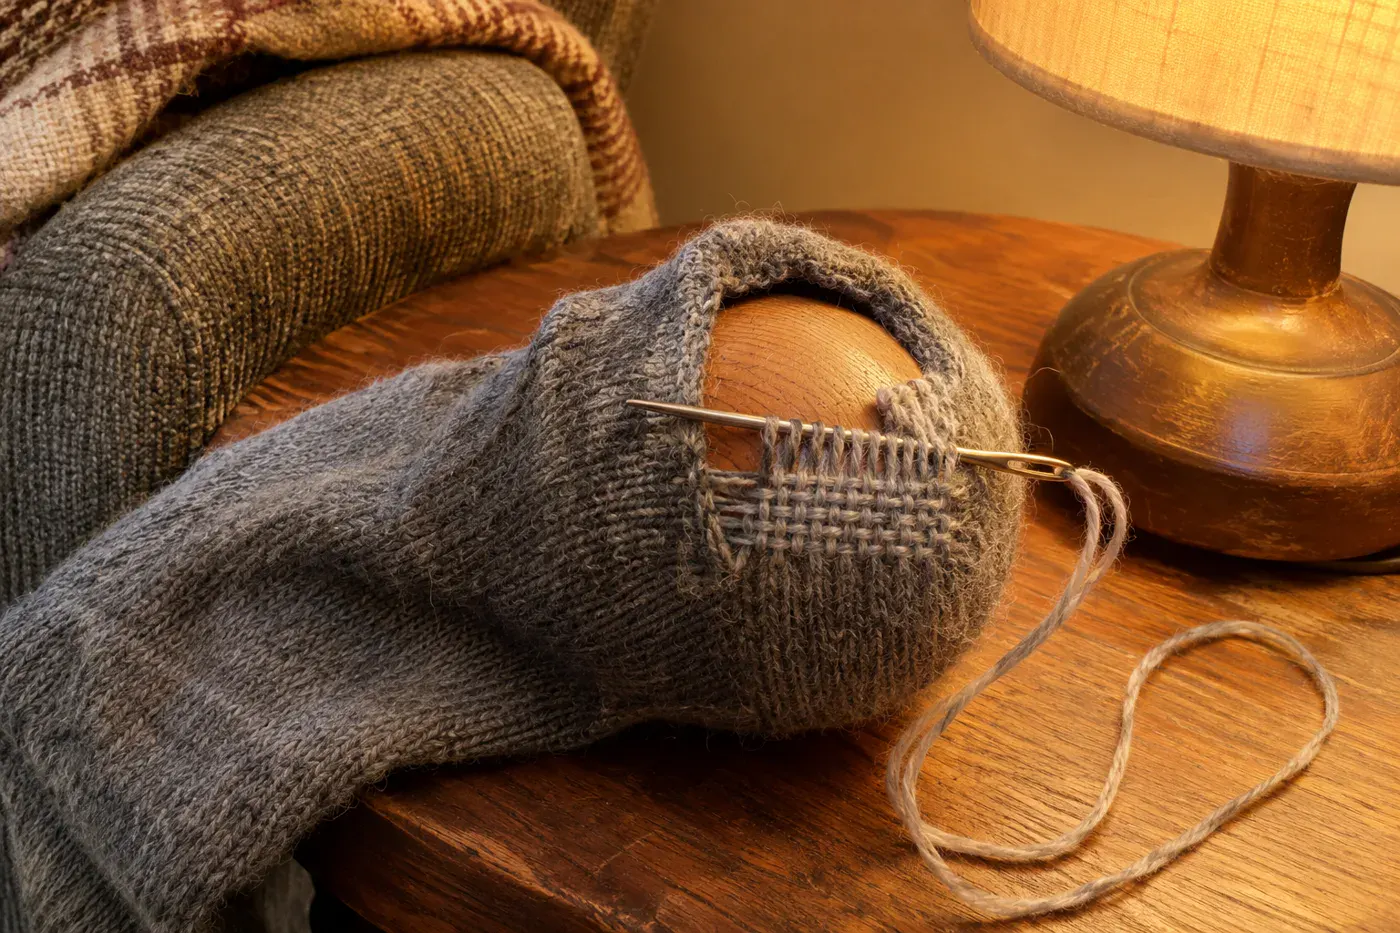
The darning egg looks like a wooden toy, and it may have been the hardest-working thing in the basket. You slipped it into a heel or toe to “hold the fabric taut while holes were carefully stitched and rewoven,” as one antiques dealer puts it. The darning mushroom did the same job, with the sock stretched over the cap and gathered around the stalk.
Darning repairs a hole with needle and thread alone. You lay rows of running stitches across the gap, reversing at each end, then weave across them with a blunt darning needle.
Then nylon socks arrived, so cheap that you’re more likely to discard than darn, in one blogger’s words. Lani Inlander, a Washington, D.C., personal stylist, told the Washington Post in 2026: “I think Americans moved away from mending because clothes cost less and it’s easier to replace things.”
Mending is swinging back. In the same article, Rebecca Harrison, who owns Old Flame Mending in Pittsburgh, says, “Now mending something has become a values thing.” Having a professional mend a garment runs about $40.
And the people paid to sew by hand are a small group. The government counted about 3,390 of them nationwide in 2023, roughly 3 in 10 fewer than in 2019, and most of those jobs are in factories and alterations work.
The free lesson is 140 years old. The Mending chapter of Thérèse de Dillmont’s 1886 Encyclopedia of Needlework is online free, and back then DMC darning cotton came in 18 sizes. Her best advice still holds: “The thread must not be drawn tightly … leave loops at each turning, to allow for the shrinking of the thread in the washing.”
#2 Smocked dresses for little girls at Easter
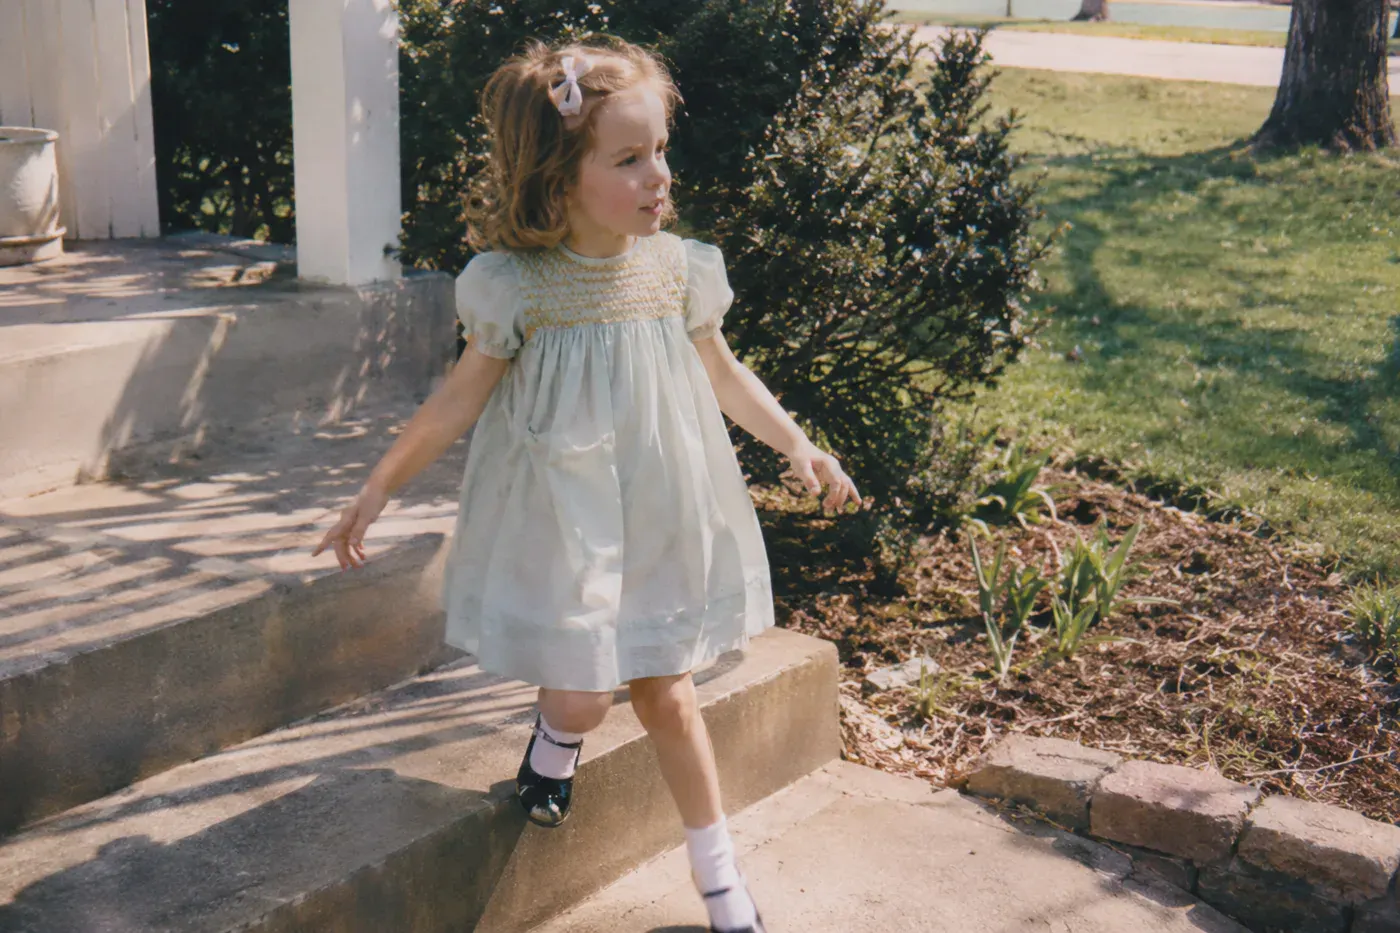
Those rows of tiny stitches across a little dress yoke were doing a job. Smocking is an embroidery technique that gathers fabric so it can stretch, and it was used before elastic existed. The name comes from the smock-frock farm workers wore.
The common stitches are cable, stem, outline and honeycomb. Iron-on dots for marking the gathers were sold by 1880. Pleating machines with 16, 24 or 32 rows have been used at home since the 1950s.
Sarah Collins, a fashion professor at the Savannah College of Art and Design, says Southern families “have pictures of their great-grandparents, grandparents, and parents wearing smocked clothing as little kids.” She says smocking lost its appeal nationally somewhat in the mid-20th century, but was revived in the 1970s. Lisa Hawkes, a former president of the Smocking Arts Guild of America, gives the practical reason it lasted down there: “A batiste dress or short jon-jon is cool and comfortable and thus more practical in the Southern heat.”
Before you cut anything, get the math right.
Smocking math and care
- Cut three times the finished width, and up to 3.5 times for some fabrics and patterns. Never twice.
- Pre-wash and press first. The Smocking Room warns a panel “that shrinks unevenly after the work is done is not recoverable.”
- Turn a finished garment inside out. Rows of elastic thread on the back mean shirring, not hand smocking.
- Wash cool and gentle, “never twist or wring the smocked panel,” and reshape the pleats while damp.
For a first panel, The Smocking Room recommends a high-quality quilting cotton.
Teaching yourself from a quick video is where most people stall. Viewers of one fast smocking video on TikTok said again and again that they couldn’t see how to get from one stitch to the next and asked for a slower, step-by-step version.
A slower teacher exists. The Smocking Arts Guild of America has local chapters you can find by ZIP code or state, plus online tutorials, correspondence courses and a group “Smock Along.” It isn’t free: membership is $45 a year, and each correspondence course carries its own fee on top, such as $107 for Exotic Smocking. Laura Jenkins Thompson, a Charleston smocking designer, says it simply: “Smocking pieces are heritage pieces that can be passed down.”
#1 Tatted lace edging on hankies and pillowcases
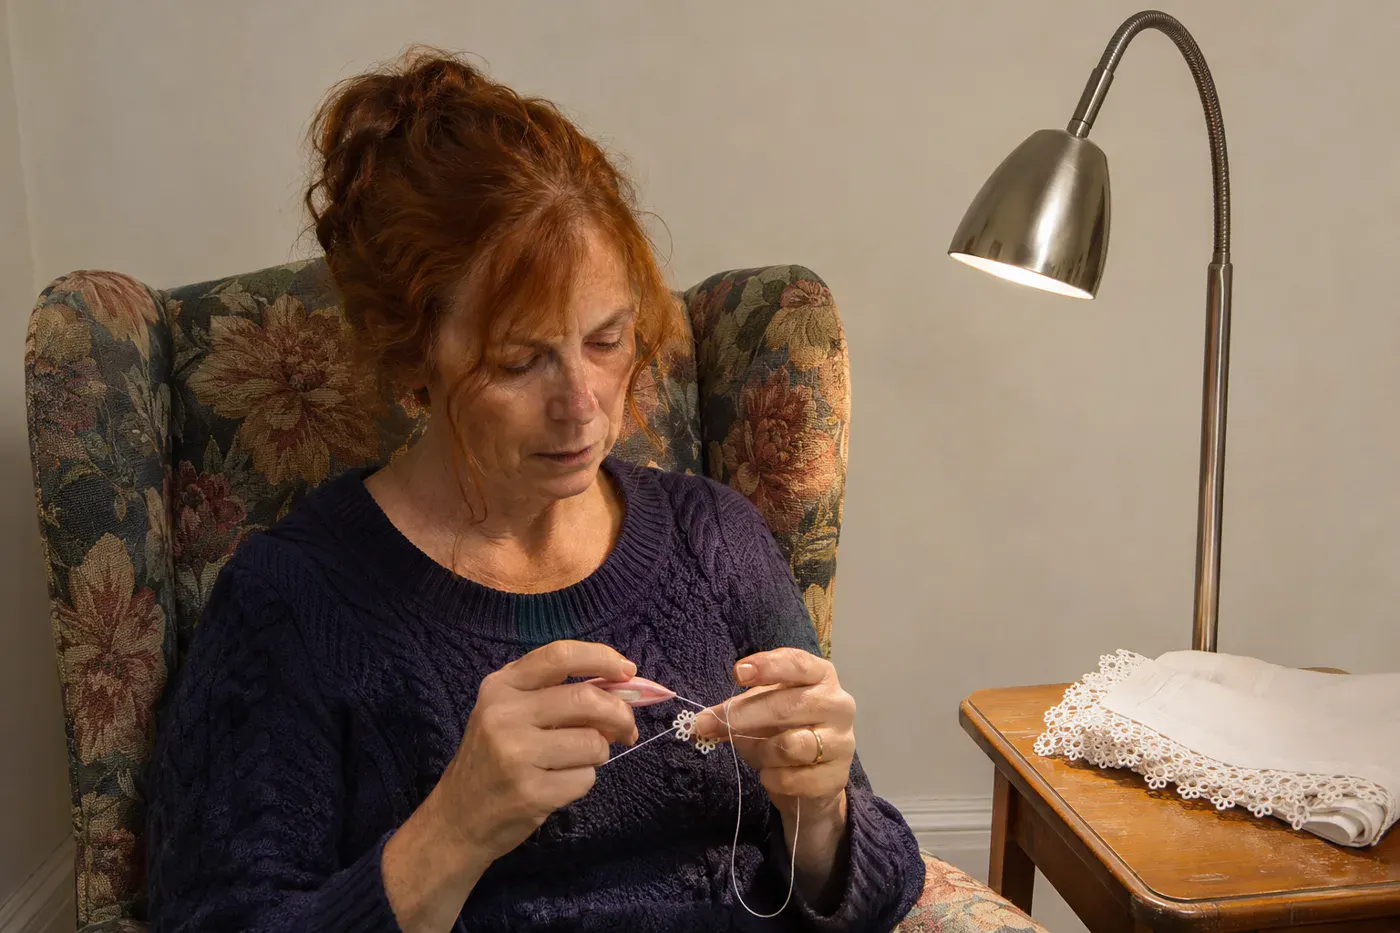
Look closely at that pillowcase edge. If it’s made of little rings and curved chains, each one trimmed with tiny loops called picots, and the whole thing looks almost too even to be handmade, you’re holding tatting. The shuttle in the box made it.
Tatting is lace built from a series of knots and loops, and that’s why it lasts. The shuttle is a small boat-shaped tool, historically metal or ivory and under 3 inches long, that carried the thread through every knot on that edge. Tatting had a big following in the first half of the 1900s, on edgings, doilies and collars, and faded as machine lace got cheap.
Here is how to tell it from crochet, which is the mistake almost everyone makes first:
| Look for | Tatting | Crochet |
|---|---|---|
| How it’s built | Knots tied around a thread | Loops pulled through loops |
| Overall look | Fairly uniform rings, chains and picots | Varies widely, can mimic many laces |
Both rows come from lacemaker Angela Rockwood’s plain comparison.
Now the honest part about learning it. Barbara Foster, who founded the tatting supply company Handy Hands, writes: “Although tatting can seem difficult to learn, there is only one stitch, the double stitch.” The catch is that the stitch is a real knot. As author Michelle Scott puts it, “once you make a mistake, it is nearly impossible to fix it.”
The hardest move is the “flip,” when the knot has to transfer onto the right thread. The Ring of Tatters, a tatting society founded in the UK in 1980 with members worldwide, suggests two contrasting threads so you can see whether you got it: done right, “the stitch will be the colour of the ball thread, not the shuttle thread.” Start with size 10 thread, it says, because “you can more easily see the stitches,” then move to 20.
Needle tatting is the easier door. The stitches sit on a long needle and get pulled off over the eye, and they unravel easily until you close a ring, so a mistake isn’t permanent. It’s been documented since an April 1917 article in The Modern Priscilla. Foster says after one five-hour class, she and a friend were making rings, chains and picots. Several tatters on Reddit say they gave up on the shuttle and came back to it later by way of the needle.
If you’d rather use a shuttle, a new one is cheap. Clover’s tatting shuttles run about $6.95 for a two-pack, and their “curved point picks up picots with ease,” so you’re not juggling a separate crochet hook.
If nobody in your family can teach you, you’re in good company. A woman in Reddit’s tatting group who taught herself as a child wrote: “It was hard to learn: all I had was the book. My mom didn’t crochet, knit or tat.” The Ring of Tatters can put you in touch with a local tatter or group and sells a “Learn To Tat” DVD. Dillmont’s 1886 Encyclopedia of Needlework, which has a tatting chapter, is free on Project Gutenberg, and the Antique Pattern Library holds free scans of old tatting books.
What about that worn hanky with a perfect edge? Don’t re-tat the lace onto new fabric. A vintage J. & P. Coats leaflet, Edgings for All Purposes, says simply: “Whip edging on handkerchief.” Experienced tatter Carolyn Kotlas sews her edgings on by hand for the same reason, “because the tatting will probably outlast the hanky,” and that way she can take it off and use it again.
A family member keeping tatted linens from a farm handed down through seven generations said that’s the whole reason she learned: “I wanted to learn to tat so I could replace the beautiful borders on new textiles.” Snip the stitches holding an old edging, press it, and whip it onto a fresh pillowcase.
The bottom line
Every skill above used to pass from one pair of hands to the next across a kitchen table, a porch or a church basement. A lot of that teaching stopped a generation ago. What took its place is a patchwork: guild chapters, free scanned booklets from the 1880s on, and people on video who learned from a book and a pile of tries.
So ask yourself a different question than which one to learn. If somebody opened your own sewing basket years from now, which piece would they hold up and not be able to name?
Make that one first. Then fold it in beside the old linen you learned it from.
Bonus: four more things to check and make
Look at the hem of an old pillowcase. A row of tiny bundled threads just inside the turned hem is hemstitching: threads were pulled out beside the hem and the rest gathered with stitches as the hem was sewn.
Lay an heirloom garment such as a christening gown flat, not on a hanger, somewhere cool, dry and dark with acid-free tissue in the folds. Mary Lynn Ritzenthaler, chief of the National Archives conservation lab, warns that “washing and dry cleaning can have unintended consequences; colors may run or bleed.”
If doilies aren’t your style, make small things. Lace makers on Reddit turn old skills into snowflake ornaments, bookmarks, earrings, trim for T-shirt collars and cuffs, and patches for jeans.
Keep a tiny project in a pencil pouch for the waiting room. Lace makers on Reddit say working in public starts conversations with strangers, and some keep a simple piece just for that.
Questions people also ask
What is the easiest needlework to learn?
Of these old skills, chicken scratch and Swedish huck weaving are the gentlest places to start, and tatting is the hardest. Needlework writer Mary Corbet calls chicken scratch fun and easy, since the gingham check does the counting. Huck weaving needs no hoop and nothing shows on the back. Tatting is tough because a mistake is “nearly impossible to fix,” in author Michelle Scott’s words.
Is tatting harder to learn than crochet?
For most beginners, yes, at first. Tatting has only one stitch, the double stitch, but it’s a real knot that’s hard to undo once tied, unlike crochet’s loops. That’s why many people start with needle tatting, where stitches unravel easily until a ring is closed. The Ring of Tatters suggests two contrasting threads so you can see whether the “flip” worked.
How can you tell if old lace is tatting or crochet?
Tatting is made of small knots tied into rings and chains with picots, and it has a fairly uniform look. Crochet is loops pulled through other loops and can imitate many kinds of lace, so it varies much more. Lacemaker Angela Rockwood lays out the difference side by side.
How much fabric do you need for smocking?
Plan on about three times the finished width, so a 30-inch piece smocks down to roughly 10 inches. The Smocking Room calls 3 to 1 the minimum and says some fabrics and patterns do better at 3.5 to 1. Pre-wash and press first, because a panel that shrinks unevenly after smocking can’t be saved.
Can you wash tatting and smocked clothing?
Usually yes, with care, unless it’s a true heirloom. Everyday smocked clothing can go through a cool, gentle cycle, as long as you never wring the panel and you reshape the pleats while damp, according to one brand’s care guide. Tatting is durable lace, and experienced tatter Carolyn Kotlas sews edgings on by hand so they hold up and can be moved later. For a true heirloom, the National Archives warns that washing and dry cleaning can have unintended consequences, since colors may run or bleed.
Where can you learn tatting or smocking today if no one in your family knows how?
The Smocking Arts Guild of America has a chapter finder by ZIP code or state, online tutorials and correspondence courses. The Ring of Tatters can connect you with a local tatter or group and sells a “Learn To Tat” DVD. The full 1886 Encyclopedia of Needlework is free on Project Gutenberg, and the Antique Pattern Library has free scans of old instruction books.