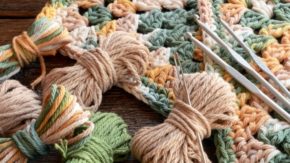
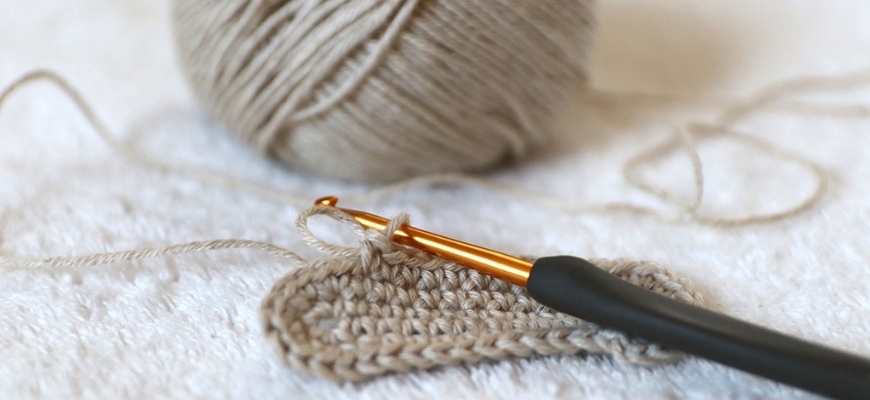
My favorite part of any crochet project is getting to select and put together a beautiful finishing edge. Most store-bought and online patterns will only provide instructions for plain, straight edges. However, choosing a more intricate border helps to achieve a polished look and can add a lot of extra style and personality to any crocheted piece.
I’ve put together this list of 11 crochet edges to have in your arsenal, so whether you’re working on a large-scale Afghan or a simple washcloth, you’ll always have a large variety of finishes to choose from.
Tips for Crochet Edgings
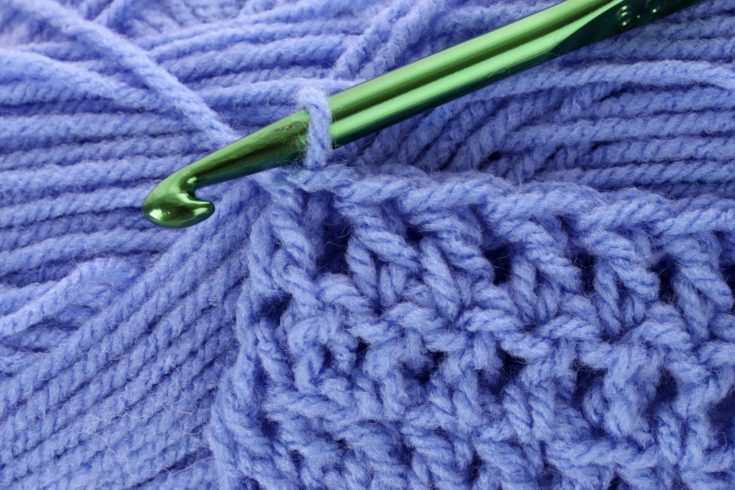
Before you begin any of these patterns, it’s best to work a row of single crochet first, so that you have a straight line to start with.
Each of these patterns is designed to use the simplest possible stitch pattern to achieve the desired edge. I’ve included suggestions for the number of stitches and multiples these edges can be worked on, however all of these patterns can be easily adjusted to any project.
During your straight stitch row, simply add extra stitches evenly across to achieve the desired number. You can also skip an extra stitch or two to achieve a smaller number of stitches. Just be careful not to increase or decrease too many, as this will warp the shape of the piece.
Common Abbreviations
The following abbreviations are used in most crochet patterns and will be used throughout the edgings described below.
- Ch — Chain stitch
- Dc — Double crochet
- Rep. — Repeat
- Rev. — Reverse
- Sc — Single crochet
- Sl. St. — Slip stitch
- St. — Stitch
Simple Edges
Crochet edgings range from the simple and beginner-friendly, to the extremely complicated and intricate. These simple crochet edges are suitable for first time crafters as well as anyone looking for a quick way to polish off a project.
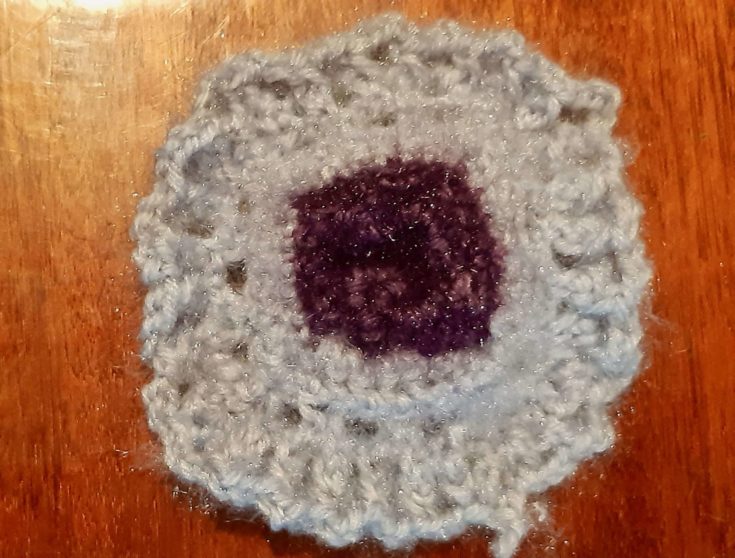
Shell Stitch Border
Shell stitch is one of the most common finishes used on blankets, pillowcases, and kitchen towels. Also known as a scalloped edge, the shell stitch border earns its name from the dainty row of partial seashells it produces. It creates a feminine, vintage look that is easy to adjust to any pattern or stitch combination.
The shell border is worked over a multiple of four stitches in the round.
Pattern: *Sc first st. Skip 1. 5 Dc in the next st. Skip 1. Rep. from * working all the way around to end. Fasten off.
To work in multiples of 5, simply skip 2 stitches on one side of the 5 Dc shell or work 2 Sc stitches at the beginning of the pattern instead of 1.
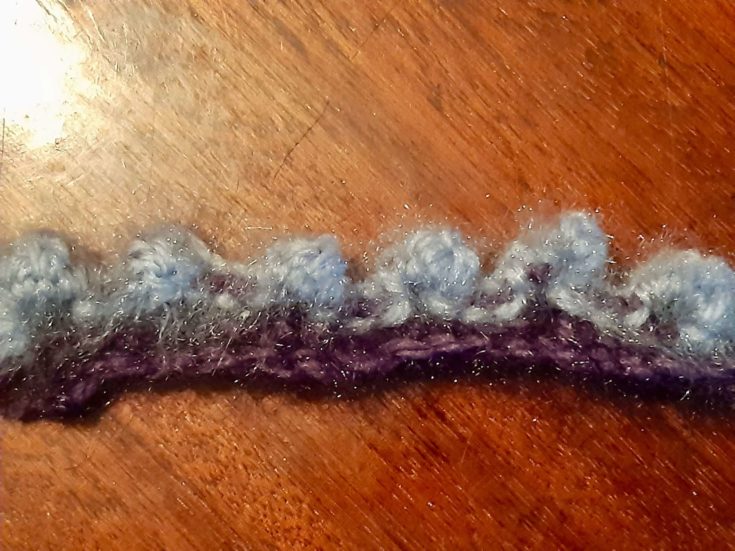
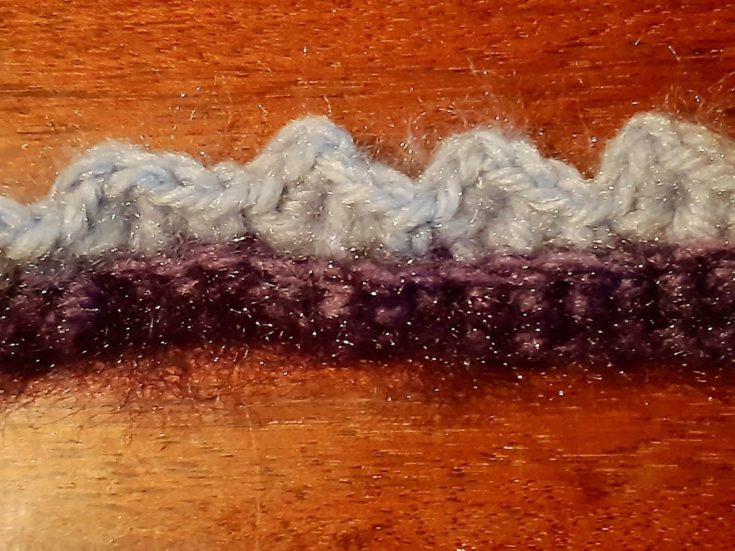
Blanket Stitch
Despite what its name might suggest, the blanket stitch is not reserved purely for afghans and crocheted blankets. In fact, the name is derived from the blanket stitch in embroidery and is used to create a modern, contemporary look.
It is a very simple pattern that is often used for finishing projects with otherwise uneven edges, such as crochet projects that contain lots of shells or V-shapes. Try using a bold, contrasting color for a more impactful design.
The blanket stitch can be worked over any number of stitches. One of the more common combinations is to work in multiples of 4 with three regular Sc stitches, followed by one spike stitch.
Pattern: *Sc first three stitches. 1 spike stitch. Rep. from * to end and fasten off.
The spike stitch is an alternative to the Sc, where you insert your hook about 1/4 inch below the edge before performing a normal single crochet. You can play around quite a bit with this pattern by changing the number of regular stitches in between spikes. You can also try inserting your hook lower down to create longer spikes.
Ruffled Crochet Edge
Ruffles are one of the most versatile ways to finish off a crocheted project. They are pretty, lacy, and feminine, without coming across as boring or old-fashioned. Almost any stitch pattern can be turned into a ruffled edge, and you can play around with the size of your ruffles to create really customizable borders.
Below we’ve included a very simple ruffle pattern. However, there are lots of variations you can try if you’re looking for something a little more complex, including multi-tiered ruffles and fancy V-shaped ruffles. You can also try experimenting with different yarns for an interesting pop of color.
Ruffles can be worked over any number of stitches. The trick is to simply work extra stitches into each stitch of the original pattern.
Pattern: Ch 3. *3 Dc in the first st. 4 Dc in the next st. Rep. from * working around the entire piece. When you get to a corner, finish the row with 3 Dc instead of 4 to avoid too much frill at the corners. Ch 2 at the corner. Continue working around the piece until the end. Sl st into the third chain of beginning Ch 3 to finish off.
Picot Edging
Picot edging falls somewhere in between the scalloped edge and ruffles. It consists of tiny, oval-shaped bumps called picots that are worked across a row with even spacing.
These little nubs add an interesting textural detail to otherwise simple crochet projects, and are perfect for doilies, blankets, and snowflakes. They can be worked over any number of stitches depending on how far apart or close together you want the nubbins to be.
Pattern: Sc 1. *Ch 3-5 st. Sl. St. into the first Ch st. made for 1 picot. Work 2-3 Sc. Repeat from * until the end. Finish your final picot on the second to last Sc. Sc 1.
Crab Stitch
The crab stitch makes a great finishing edge for blankets and other large-scale projects, as it combines durability with a unique finish. The pattern produces a corded edge, a type of border with a unique twist that resembles medieval and renaissance corded applique. It offers a more sophisticated finish.
The crab stitch can be worked over any number of stitches.
Pattern: Work 1 row in Sc. At the end, do not turn the piece. Ch 1. Skip 1 st to the right, and Sc in Rev direction, crocheting into each Sc st. from the previous row. Sl st into the Ch 1 from the previous row and fasten off.
The crab stitch can also be worked in the round, however, this is much more complicated and not suitable for beginners.
Advanced Edges
These incredibly intricate and beautifully detailed edges are suitable for advanced crochet crafters who don’t mind devoting hours to those special finishing touches. Each of these edges amazing crochet borders requires a well-developed understanding of crochet stitches and a certain level of patience. However, these quirky designs are well-worth every extra minute spent.
Block Edging
This unique pattern is called block edging because the stitches look like a series of blocks leaned against one another on a diagonal. The blocks are made up of Dc stitches crocheted in chunks, which produce a bold, contemporary border perfect for garment cuffs and crocheted jewellery.
The block edge is worked over a multiple of 4 stitches plus an additional three.
Pattern: Ch 3. Skip the first three stitches. *Make 1 Dc in the next St. Ch 3. Make 3 Dc around the stem of the previous Dc for a total of 4 Dc made. Skip the next three stitches. Rep. from *working all the way around to end. Sl st into the third chain of beginning Ch 3 to finish off.
The same pattern can be used with treble crochet for slightly chunkier blocks. These blocks are also common inside larger patterns. To incorporate a block into the middle of a pattern, simple crochet into the corner of each little block and chain stitch to get from one block to the next.
Pom-pom border
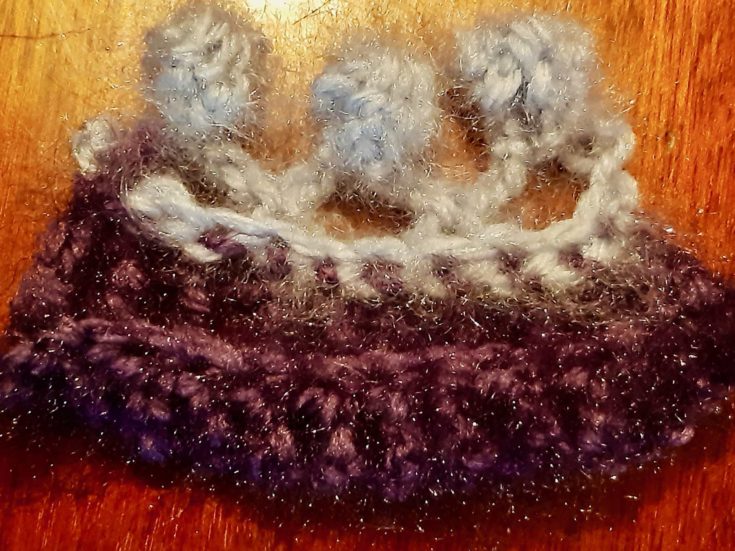
If you’re looking for something a little more fun and cuter than the average blanket border, then this pom-pom design is the perfect option. The pom-pom blanket is not only adorable, but is suitable for smaller children, as the loops are small enough that children’s fingers won’t get caught or tangled. Try this pattern on a multi-coloured or rainbow blanket for an even brighter finish.
These pom-poms can be worked over any number of stitches in a manner similar to picot edging.
Pattern: *Sc 1. Ch 6 st. 3Dc in third stitch from chain, holding last Dc on hook. You will have 4 stitches on your hook. Yarn over and pull through all loops to form a cluster st.
Ch 3. Make a second cluster stitch in the loop from the first cluster stitch. Sl. st. where the first cluster begins to join the two. Ch 3. Rep. from * working around the piece to end.
Cherry Blossom Edging
The cherry-blossom edge is one of most delicate and intricate patterns used in crochet. It is frequently used in both patterns and borders to create beautiful blossoms that are perfect for baby clothes, wedding veils, christening gifts and more.
Unfortunately, the cherry blossom pattern is not for the faint of heart. Several rounds of crochet work are required in order to achieve the desired pattern. Fingering-weight yarn works better as the thinner yarn holds the floral shape more easily.
Pattern: *Sl. st. in the top corner of the blanket. 3 sc in the corner, sc evenly across to the next corner. Rep. from * four times around all four sides, ending with a Sl. st. in the first Sc.
*Sc 1, Ch 3, Sc 1 all in the corner. **Ch 3. Skip 2 stitches. Sc.1. Rep. from ** evenly across the row until the end. Rep from * for each of the four sides.
* Sc 1, Ch 3, Sc 1 all in the corner. **Ch 3, Sc 1 in the next stitch. Rep from ** across to the next corner. Ch 3. Rep from * around all sides, ending with a Sl. st. in the first Sc.
Sc 1, Ch 1 (This counts as 1 beginning Dc). * Ch 3, Sc in side stems of previous Dc. Ch 3, Sc in previous Sc. Ch 3, Sc in previous Sc. Sc in the side stem of previous Dc one more time to close the cherry blossom. Dc in the same stitch. 1 Dc in the next stitch. Rep from * around the blanket without doing anything in the corners.
When you reach the beginning of the piece, finish by Sl st in the 1 beginning Dc.
Granny Square Afghan Edge
Granny square edges are the classic border used on all traditional Afghans. They make great borders because they employ flat edges, making it easy to connect granny square motifs within a pattern as well as on the border of any project.
While the simplest granny squares are made using standard, single crochet stitches, the versatility of this pattern makes it a great option for advanced crafters looking to experiment with variations in style. Afghan squares can easily be personalized with additional colors or used to polish off an otherwise busy piece.
Pattern: Ch 1. Work 1 Sc stitch in each st all the way around the piece. At the corner, work 2 Ch stitches to turn the piece and then continue Sc evenly through the row. Sl. st. to the first Ch stitch.
* Ch 1. Work 1 Sc stitch in each st all the way around the piece. At the corner, work 1 Sc into the second Ch st created in the previous row. Ch 2. Work 1 Sc into the second Ch st that you just created, and then continue Sc evenly through the row. Sl. st. to the first Ch stitch.
Repeat from & until the edging is as thick as you would like it to be. Experiment with using different colors each repeat or selecting different border thicknesses.
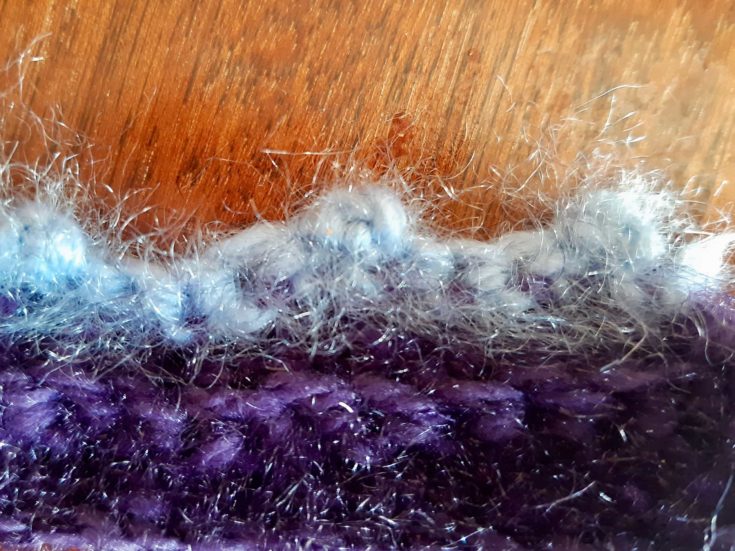
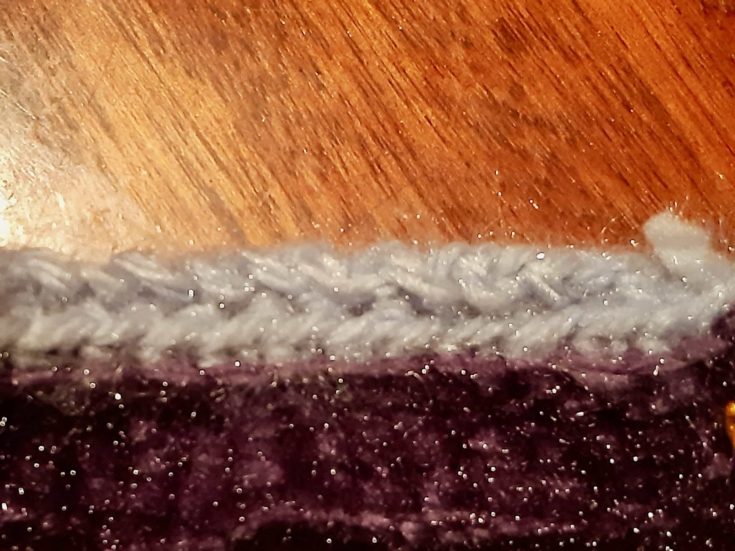
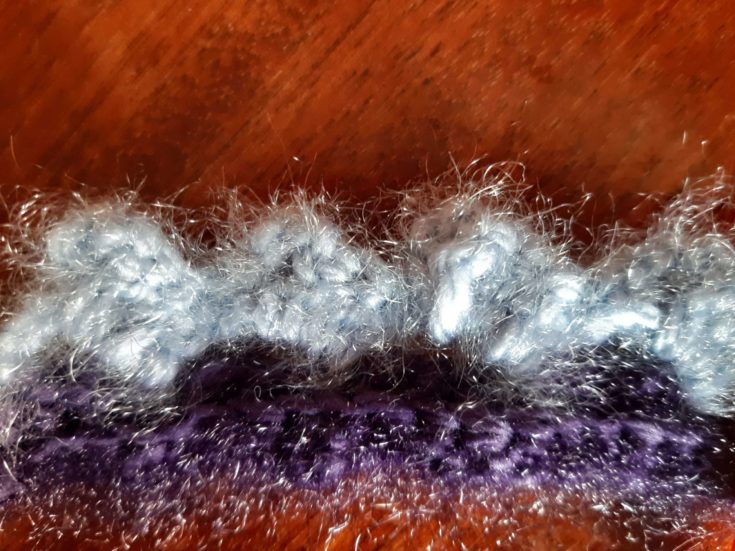
Crocheted Bobble Edging
The bobble edge is a combination of pom-pom and picot edging that adds a fun, but not overly childish touch to sweater cuffs and casual blankets. It is also a great option for baby blankets as there are no open loops for children to get caught in.
Pattern: Ch 1. Sl. St. into the first stitch. Ch 2.
*Yarn around the hook. Insert hook into the first stitch. Yarn around the hook and pull through. You will now have three loops on your hook. Yarn around the hook and pull through two of these loops, leaving two remaining on the hook. You are essentially making an incomplete Dc.
Yarn around the hook. Insert the hook into the same first stitch. Yarn around the hook and pull through. You will now have four loops on your hook. Yarn around the hook and pull through two of these loops, leaving the remaining three on the hook.
Yarn around the hook. Insert the hook into the same first stitch. You will now have four loops on your hook. Yarn around the hook and pull through all four loops.
Ch 1. Sl. st. into the same first stitch to join the bobble. Skip 2 stitches. Sl. St. into the next stitch. Ch 2. Rep from * working all the way around the piece until the end.
Triangle Crochet Edge
Finally, the triangle crochet edge is perfect for any time you’re looking to give an edgy feel or funky finish to a project. It works well for scarves, baby blankets, cozies, pillows and more, and can be used to achieve a more gender-neutral aesthetic.
There are lots of variations on the triangle border, including the beautiful cathedral edge. However, this simplified version of the pattern is easy to memorize so you’ll always have it ready in your arsenal. The triangle edge is worked in multiples of 4.
Pattern: Ch 1. Sc in the first stitch. *Skip 2 stitches, Dc 2 in the next st. Ch 1.
Work 2 Sc around the stem of the second Dc stitch you just made, working down the post and towards the base. Sc in the next stitch. Rep from * working around the piece until you’ve reached the end. Finish with a Sl St in the first Sc.
Conclusion
Whether you’re new to the art of crochet or an advanced crafter, understanding a number of different crochet edging techniques is the key to making your projects stand out. If you know how to create these 11 edges, then you’ll be able to progress to really exciting and cutesy versions like this amazing chicken border.
What do you think? Did you enjoy this list? Let me know which crochet edge you liked best in the comments and be sure to share this article with your crafty friends.