Learning to properly finish your pieces is an essential part of any woodworker’s journey. However, this final step in the woodworking process is often overlooked as beginners struggle to master other pyrography techniques.
In this tutorial, we will teach you how to finish a wood burning project and go over all the information you need to know to properly seal your pieces. If you’ve ever wondered what the best finish is for wood burning, or been confused whether to stain your project before or after wood burning, then this article will help you find the answers you need.
Supplies You’ll Need To Follow This Tutorial
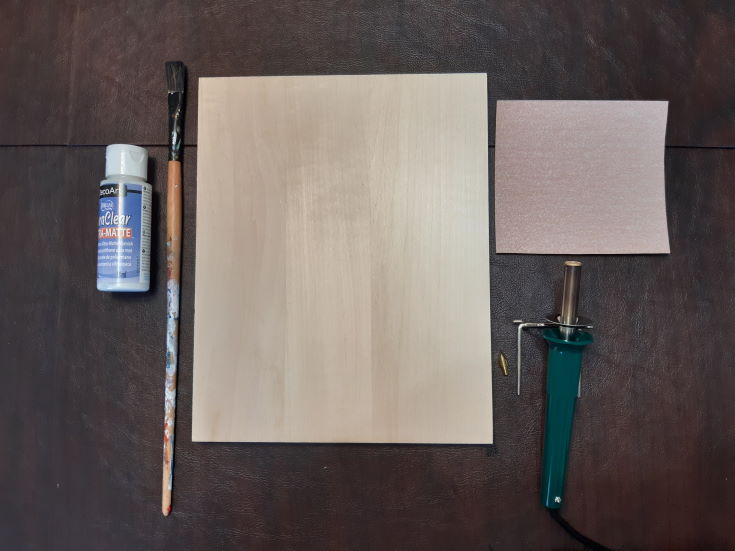
In addition to your standard pyrography supplies, you will also need a few specialized materials for sealing and staining the burnt wood. Here are all the things you’ll need to get started:
Wood Finish
A wood finish is any coating material applied to the finished art piece to protect it from dirt, oils, moisture, and light. There are a number of different options when it comes to wood finishes, and the type you select will depend on what kind of project you are working on.
Some of the most popular options are:
- Polyurethane:
Polyurethane is a liquified plastic available in either spray or brush on forms. It can be found in glossy, semi-matte, or matte formulas. It is highly durable and easy to apply, making it the best all-around option for all kinds of projects, including furniture pieces and other high traction surfaces.
Polyurethane is either oil or water-based. While oil-based versions are more durable, they also add a distinct yellow hue to the wood and have a very strong, unpleasant smell.
In this tutorial, we will use a brush on polyurethane as this is the most cost-effective, durable, and versatile finish available.
- Paste Wax:
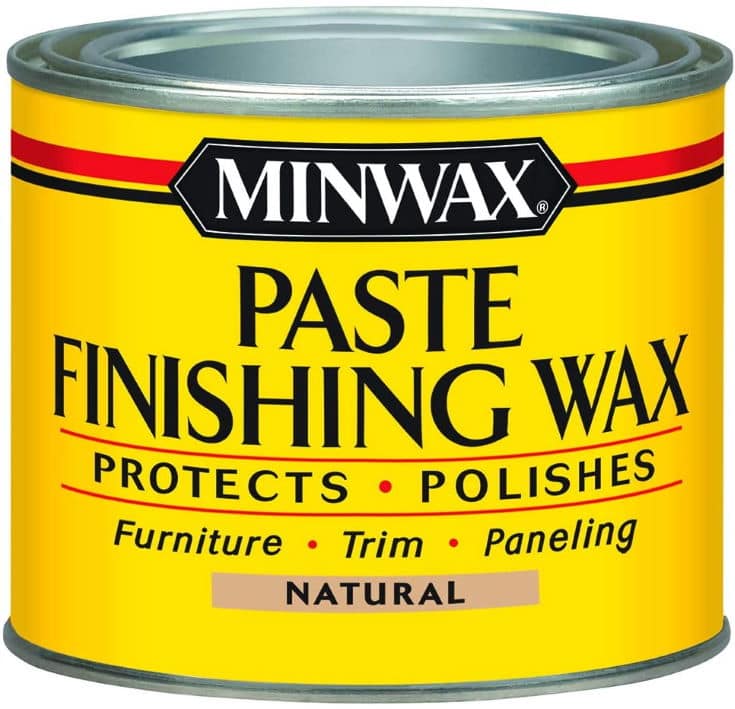
Paste wax is a creamy wax that is specifically designed for woodworking and can be buffed into the wood to give it a vibrant shine and extremely glossy appearance.
Unfortunately, paste wax is not as durable as synthetic products like polyurethane, and does not protect the piece from moisture, heat, or scratches. Some workers still use paste wax because of its lengthy tradition in woodworking and unparalleled shine, but it is not a recommended sealant for preserving pieces long-term.
- UV inhibitors:
Sun exposure can also affect how a woodworking piece holds up over time. If you are planning on displaying a piece outdoors, then you should consider a varnish that contains UV inhibitors.
Spar urethane, a more durable form of polyurethane, is the most common UV inhibitor. This is the best sealant for outdoor use as it has all the properties of polyurethane but also offers added protection against sunlight. However, this kind of heavy-duty varnish is likely overkill for indoor projects.
- Lightweight Oils:
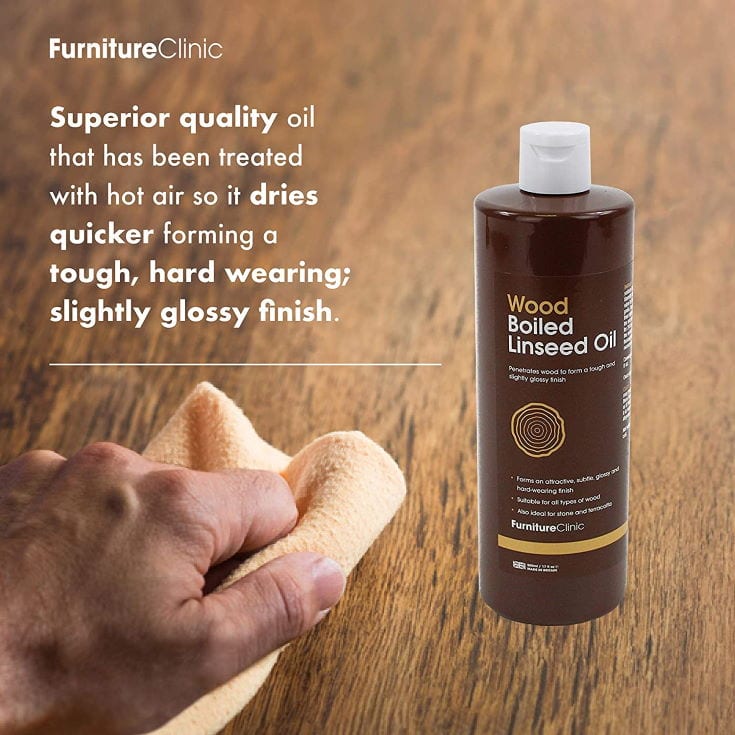
Lightweight oils such as linseed oil or cooking oils can also be used to finish a woodworking project. Oils bring out the natural grain and color of the wood and are easy to apply.
They are best used on projects like cutting boards that come into contact with food or are often exposed to high heat. This is because oils offer a food-safe, albeit less durable finish, preventing the wood from warping or cracking due to moisture, but not sealing it from dirt, scratches, or wear.
Sandpaper
In order to prepare your completed piece for any kind of varnish or finish, you will need to use fine-grit sandpaper to remove any rough spots or imperfections in the wood. Sandpapers in the range of 180-220 grit are best.
Lint-Free Cloth
You will also need a thin microfiber cloth, like a glass cleaning cloth or cloth wipe for electronics, to remove any excess sanding dust or eraser rubbings without getting lint fibers caught in the wood.
Brush
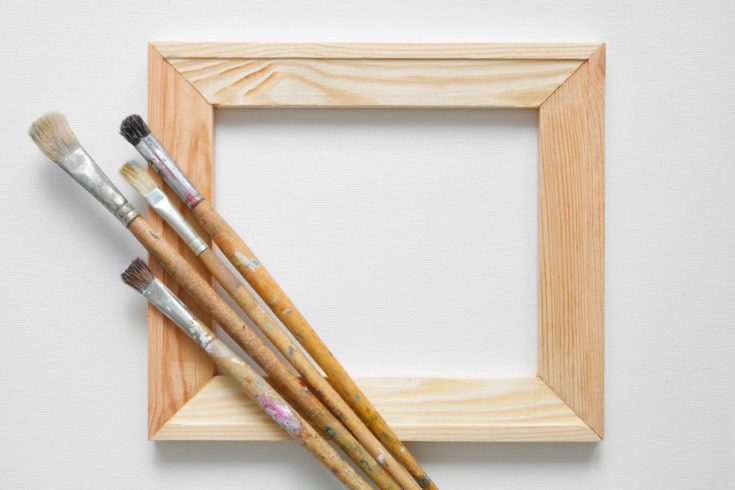
Finally, you will need a brush to apply the wood finish. Sponge brushes and large, square paint brushes work best.
If you are using spray-on polyurethane, then you will not need a brush and can simply apply the product directly using the aerosol can.
Optional Wood Stain
Wood stain does not have any sealant properties and is therefore completely optional when it comes to finishing any pyrography project. You can use a light wood stain to add color to your piece or to bring out the wood’s natural colors.
You should be very careful when applying wood stain, as darker stains will detract from the burned design and make it difficult to distinguish fine details in the work.
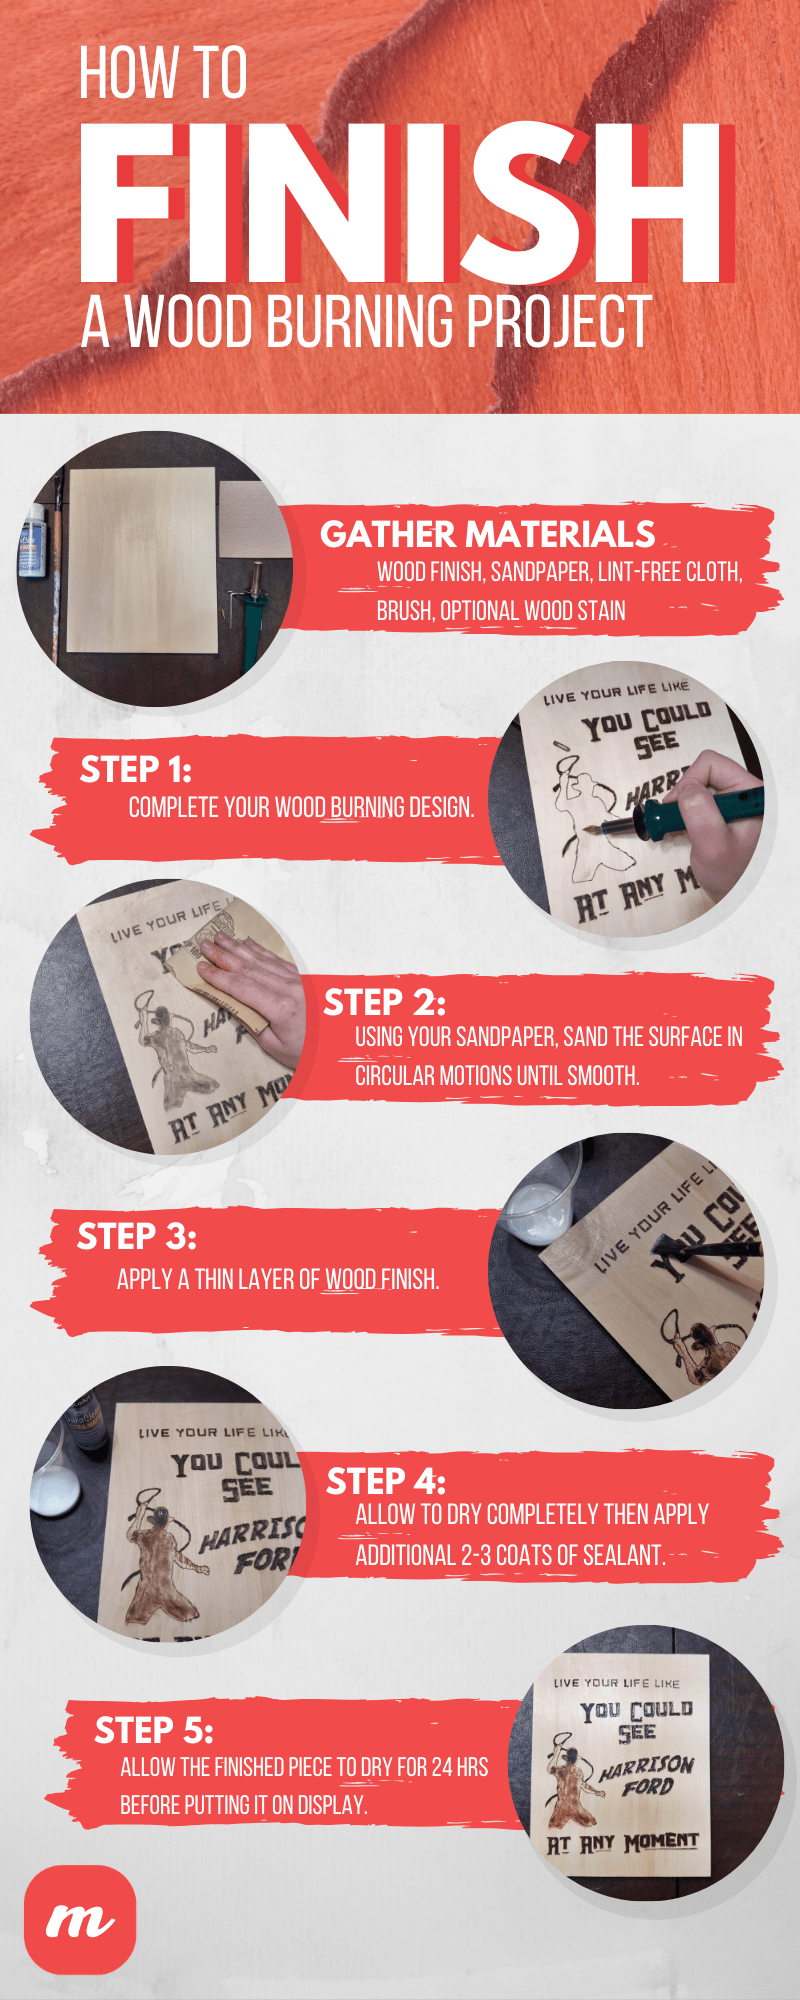
How To Finish A Wood Burning Project
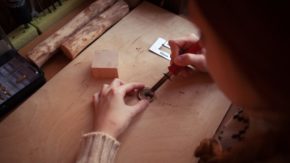
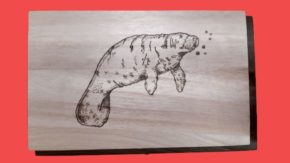
Step 1: Complete Your Wood Burning Design
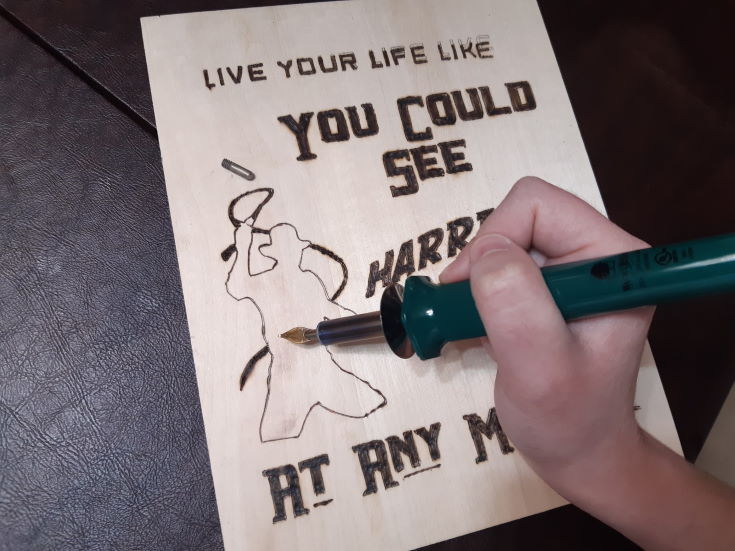
Before you can apply any kind of finish, you will need to complete your wood burning design. This includes any final aesthetic touches or alterations you may wish to incorporate into the project, such as shading or wood scorching.
Be sure to read up on wood burning tips and techniques, and perform a practice trial on a similar piece of wood, before you burn your final design.
If you plan on adding a wood stain, you should apply it with your paint brush once all of your burn markings are complete, using thin layers and long, smooth strokes. Allow your piece to cool and your stain to fully dry before moving on to the next step.
Step 2: Prepare Your Wood
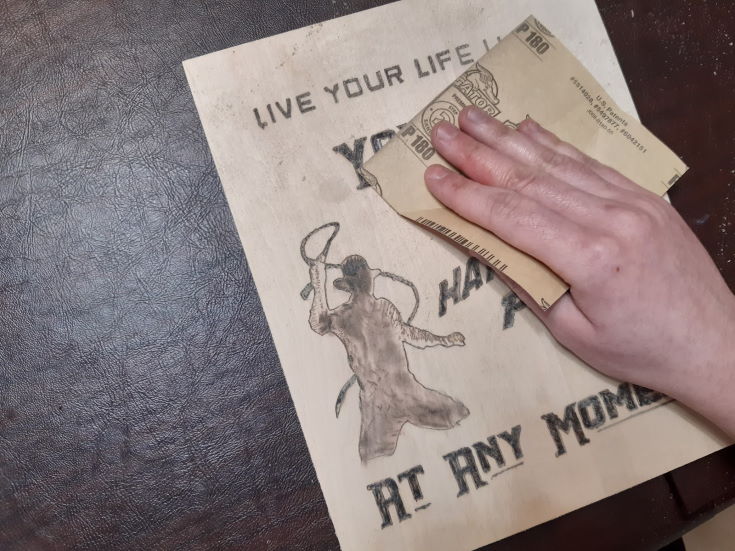
After you have completely finished burning your design, you will sand the surface in order to prepare it for sealing. This step is especially important because the pyrographic process raises the wooden fibers and creates imperfections in the surface that must be removed in order for the sealant to work properly.
Apply your sandpaper using gentle, circular hand motions all across the surface of the wood. If any pencil markings are still visible, you can try to remove them with a standard eraser, or carefully sand them off.
Continue to sand the surface until it is smooth to the touch and there are no rough edges, gritty patches, or visible pencil markings. Use your lint-free cloth to remove any sanding dust from the surface.
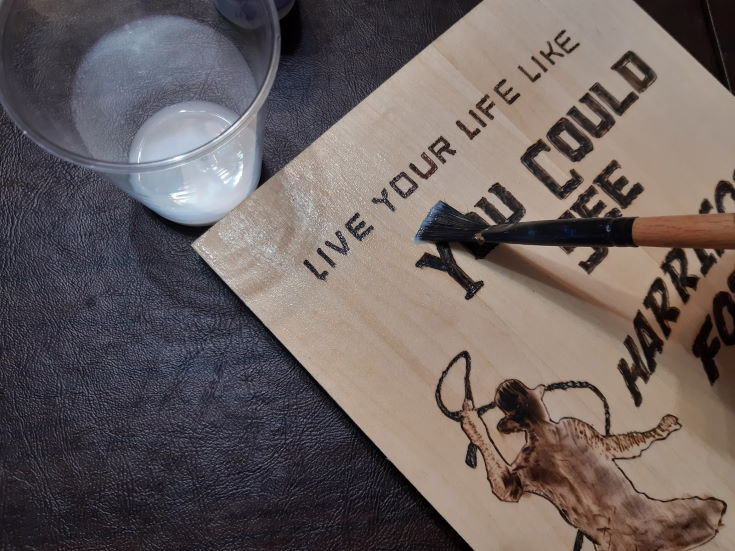
Step 3: Apply The Wood Finish
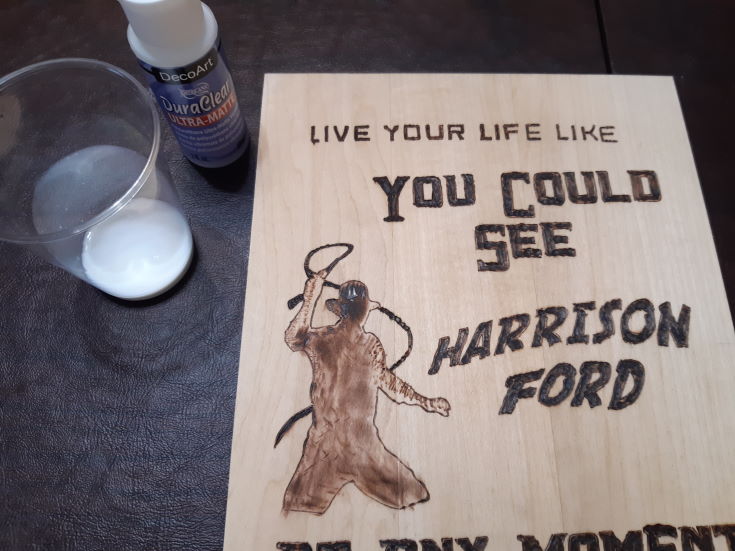
Next, you will apply the first layer of wood finish to the piece. If you are using spray polyurethane, you can apply the finish directly from the aerosol can. Spray in even passes, making sure to hold the can a few inches from the wooden surface to achieve suitably thin layers.
For brush polyurethane, pour a small amount of sealant into a plastic cup. Be careful not to dip your brush directly into the bottle as some woods leach color and this will contaminate the sealant.
Apply a thin layer of wood finish to all sides of the piece using long, smooth brush strokes. Be careful that your workspace is well ventilated, as oil-based products emit a strong smell.
Step 4: Apply Additional Coats
You will need to apply between 2-3 coats of sealant in order to properly protect the wood. Using multiple thin coats ensures that the surface of the final piece is uniform and that all areas of the project have received equal amounts of the varnish.
Allow the finish to dry completely before applying additional coats. Re-sand the wood with a very gentle sanding technique in between layers, making sure that the surface is smooth and uniform each time. Remove dust and excess sealant particles periodically with your lint-free cloth.
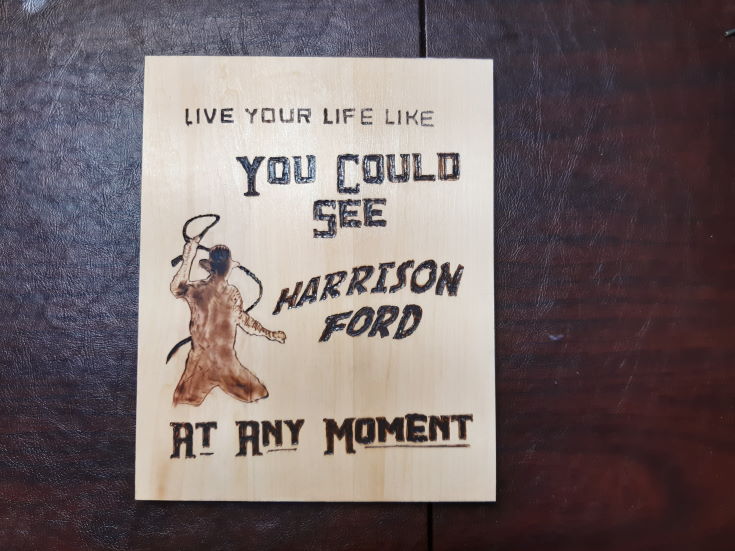
Step 5: Allow The Piece To Dry
After you have applied your last coat of sealant, you should allow the finished piece to dry for 24 hours before putting it on display. After this point, you can add accessories like metal hangers for wall art or hinges for wooden chests.
Although sealant adds a durable, protective layer to any pyrography piece, it does not mean that your project is completely bulletproof. Continue to treat the final product with care and avoid extreme temperatures.
Conclusion
Properly sealing your wood burning projects does not require a tremendous amount of skill or knowledge of complex finishing techniques. However, applying a durable sealant is essential to achieving polished, professional-looking work that will hold up over time.
When finishing your wood crafts, select a varnish that is appropriate for your specific project, and exercise patience in applying several thin coats for a handmade piece that will last a lifetime.
Did you enjoy this tutorial? Let us know your thoughts in the comments and be sure to share this article with pyrography artists and woodworkers alike.
**Also see our post on basic wood joints.**