Pyrography is a fun and easy art form that anyone can try at home. Not only is it a great creative hobby for relieving stress and practicing mindfulness, but it also produces some of the most unique and professional-looking art pieces.
In this tutorial, we’ll teach you how to wood burn and use a woodburning tool. We’ll go over all of the basics, from supplies you’ll need to techniques you can use in your work. By the end of this tutorial, you’ll be well on your way to creating the woodburning project of your dreams.
Supplies You’ll Need To Follow This Tutorial
There are a number of different supplies you will need before you can start practicing pyrography. Here are all the things you’ll need to get started:
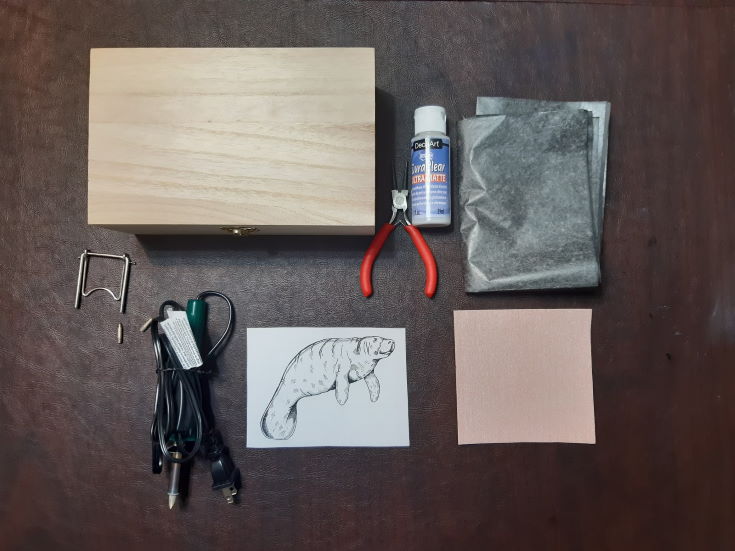
Pyrography Pen And Metal Tips
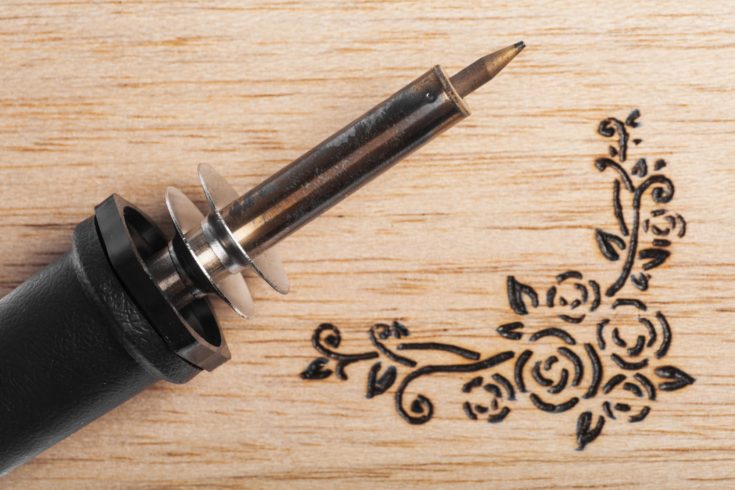
The main tool used in all woodburning is the pyrography pen. This electric tool is fitted with pyrography tooltips that are then heated and used to carve lines into the wooden surface.
All of these tools can be found in a beginner’s pyrography kit, which typically contains a pyrography pen, an assortment of metal tips, and some optional extras such as a stylus or metal stencil. These kits are great for beginners, as they offer an easy introduction to the art form at a reduced cost.
While there are a wide variety of metal tips available, each of which can be used to create a range of stylistic effects, most pyrography projects can be completed using only four tips.
Dot Tip
This cone shape tip is used to create detailed work, including straight lines, light curves, and fine dots. When pressed directly into the wood with force, the dot tip can be used to create deep holes and perfect circles.
Shading Tip
The shading tip is used to shade large surface areas and create light to dark shadows. Beginners should familiarize themselves with the other tips and complete a few projects before moving on to this tip, as shading is one of the most difficult skills in pyrography.
Calligraphy
Calligraphy tips either have a rounded top or a long pointed edge and are good for creating curved lines and writing natural letters.
Universal Tip
The universal tip is the most versatile and commonly used in pyrography. When held at different angles, the tip can produce lines of varying thicknesses, making it suitable for outlining and drawing all kinds of woodburning patterns.
Wood
When choosing wood for pyrography, look for a lighter variety with an even grain. Softer woods like birch, basswood, pine, and maple are easier to work with and will produce a higher burn contrast. Wood with the uneven grain can make it challenging for beginners to create straight lines or well-defined curves.

Pre-fabricated wood products like wooden boxes and wooden boards that you can find at a craft store are best for beginners, as they are usually made from very soft wood, don’t have noticeable grain, and don’t require any additional sanding.
You should always have an extra piece of wood that you can use for practice and to test out your tools.
Transfer Paper
Although it is possible to create your own designs by drawing directly onto the wood, many pyrography artists prefer to choose patterns from graphic images or woodburning pattern books and transfer these onto the surface.
Transfer papers include carbon paper, graphite paper, and certain kinds of tracing paper. Graphite paper is preferable as it leaves less residue and produces more accurate designs, however, all of these options are suitable and the terms are sometimes used interchangeably.
Sandpaper
Sandpaper is used to smooth out the wood after burning in order to prepare it for finishing and remove any excess wood shavings or burn residue. Choose sandpaper in the range of 180-220 grit.
Pliers
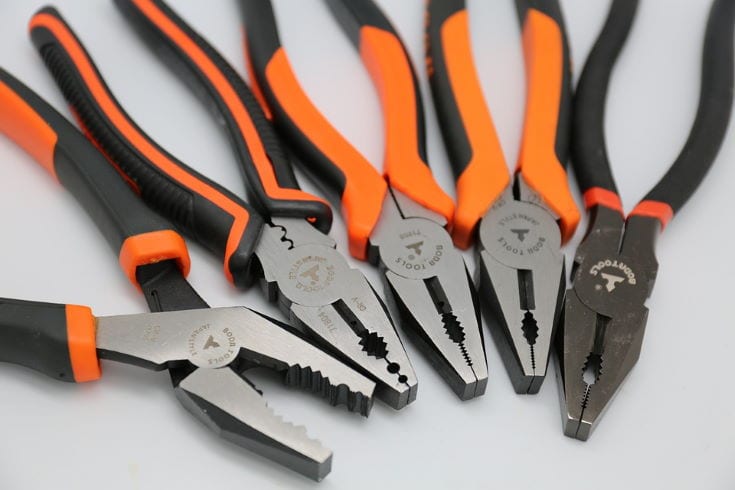
You will need a pair of small pliers in order to safely change the tips on your pyrography pen while it is still hot. You can then place hot tips in a metal or glass dish to cool off while you continue working.
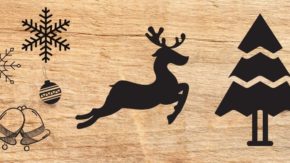
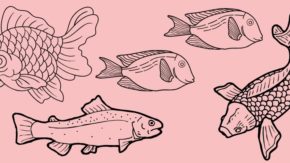
Design Or Artwork
When choosing a pattern for your first pyrography project, select a design that has a lot of clean, well-defined lines and a fair amount of negative space. If you’re feeling creative, you can draw your own pictures onto the wood directly.
Wood Finish
Finally, you will need a suitable wood finish to seal and protect your finished art piece.
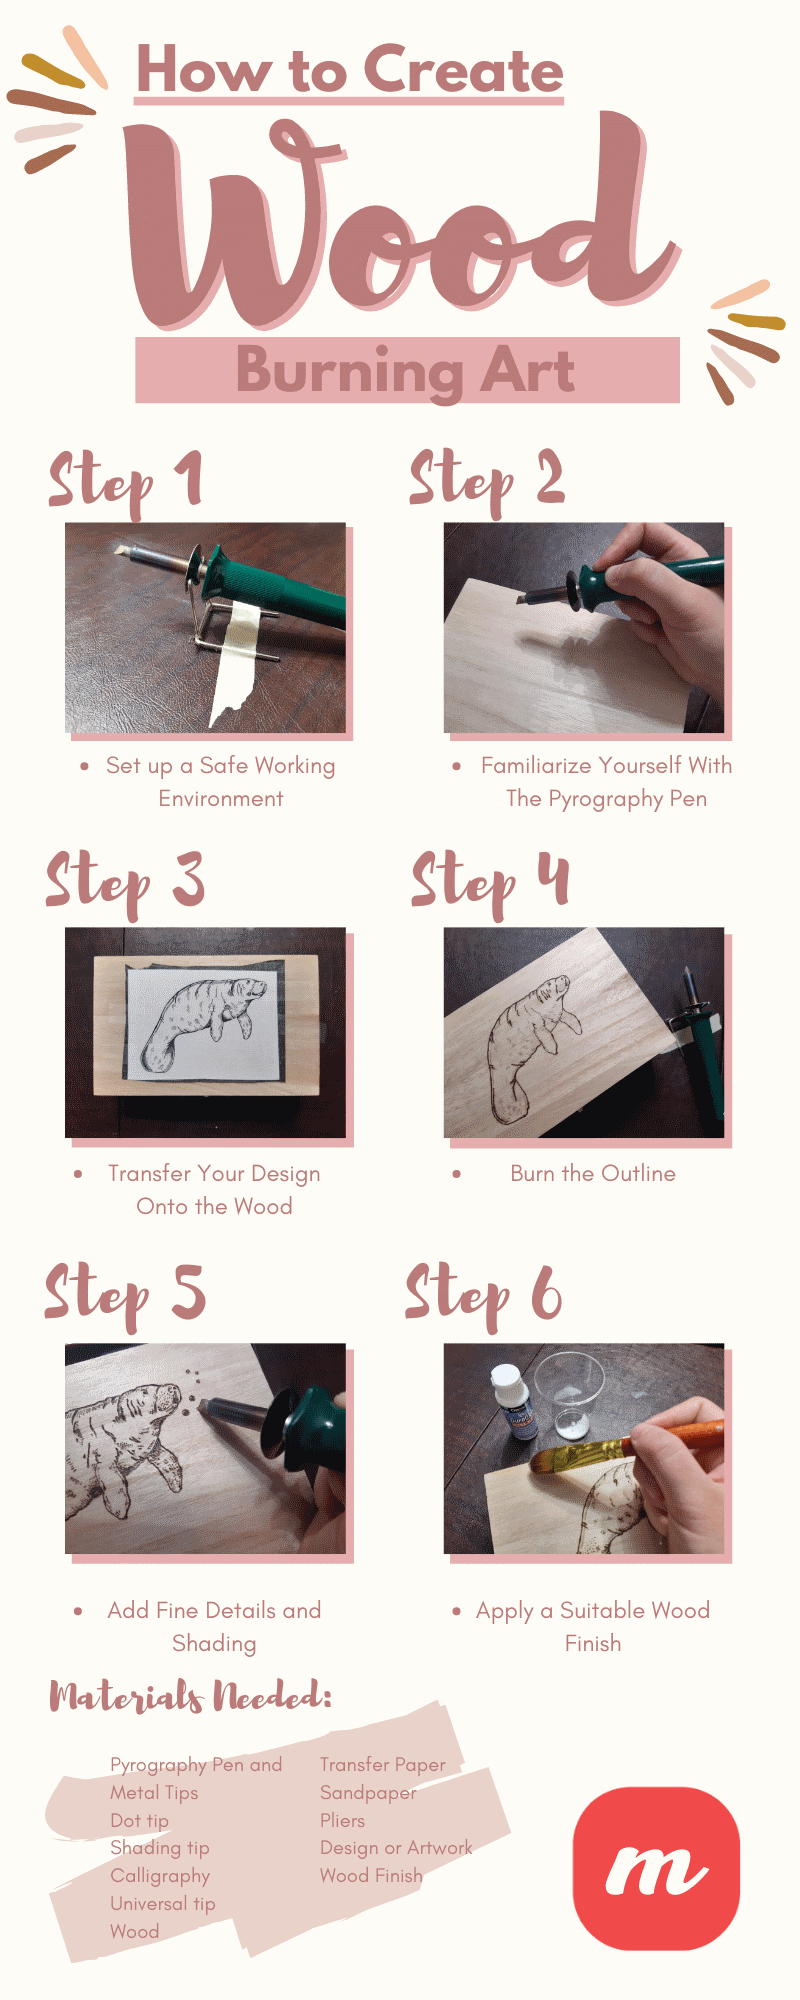
How To Burn Wood
Step 1: Set Up A Safe Working Environment
Before you can begin a pyrography project of any kind, you need to ensure you have a safe and functional working environment. This is extremely important, as the pyrography pen warms up to a temperature of about 700F and can cause severe burns if not properly cared for.
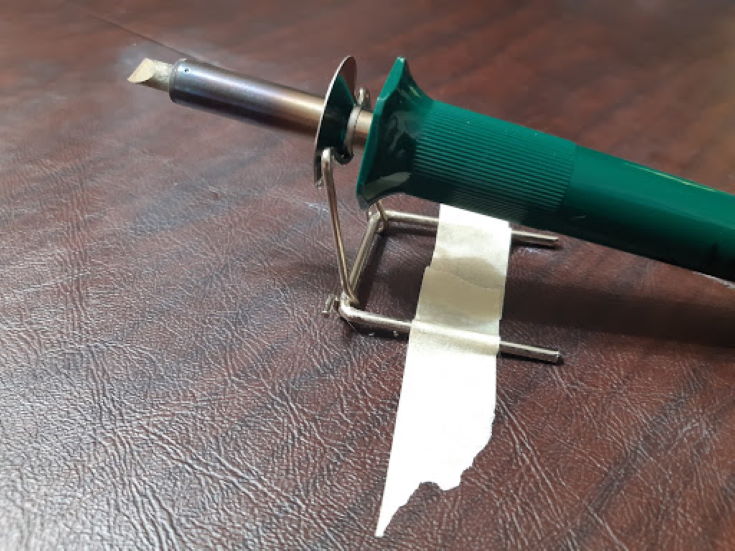
Make sure you have a large workspace and that the pen is kept far away from any flammable materials. You should also have a spot ready to rest the pyrography pen down if you need to take a break while burning or change tips.
Many pyrography kits will come with a metal stand specifically made for this purpose. Be sure the stand is firmly taped to your working surface so it does not accidentally slip when you put down the woodburning tool. You can also use a fire-resistant surface like a ceramic bowl to hold the pen.
Finally, make sure there are no young children or pets nearby while you are burning.
Step 2: Familiarize Yourself With The Pyrography Pen
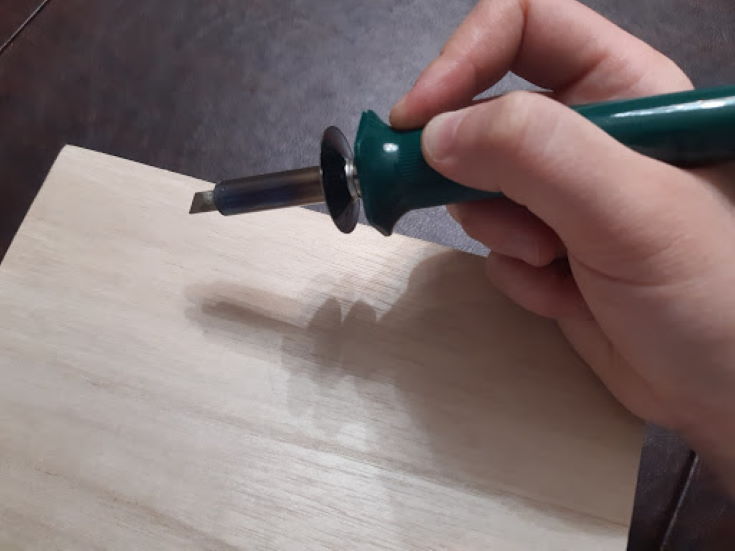
Pyrography, like all art forms, takes time and practice to get used to. Before you begin working on your final art piece, take some time to familiarize yourself with the instructions on your pyrography pen.
Plug the woodburning tool into an electrical socket and let it rest on the stand you’ve set up, allowing it to heat up for at least 5 minutes. When the tool is sufficiently hot, place the tip gently onto the surface of your scrap piece of wood and practice making curves, straight lines, and geometric shapes.
Move your hand at a slow and steady pace. The slower you go, the more control you have over your lines and the darkness of the burn. The tip should only be gently touching the surface. If you apply pressure, the pen will burn a deep hole into the wood.
This is the perfect time to experiment with different woodburning tips and techniques before moving on to a formal project.
Step 3: Transfer Your Design Onto the Wood
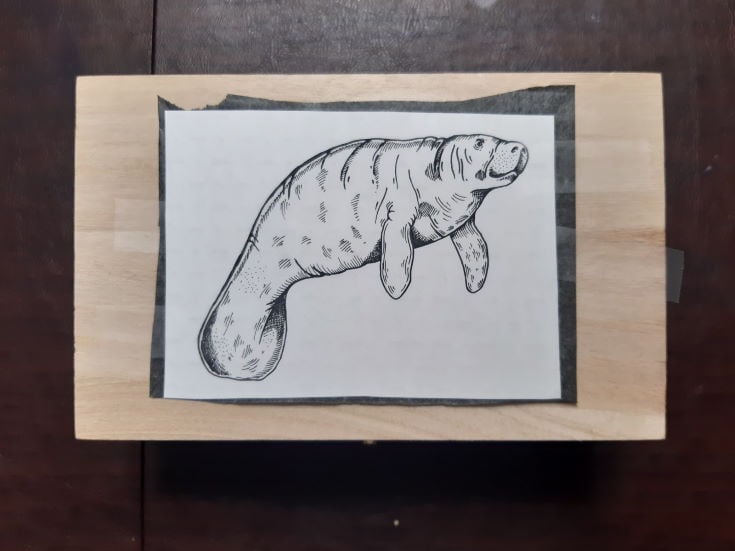
Once you have learned how to use a woodburning tool, you can move on to creating your art piece.
If you are using a raw piece of wood, then you should begin by lightly sanding the surface and wiping away any sanding dust with a paper towel or thin cloth. Pre-fabricated wood products do not require additional sanding.
Next, tape the transfer paper securely to the wood. Affix your design to the transfer paper, being careful to keep the image well centered. Using a pen or stylus, firmly trace over the image, making sure that you go over all the lines and details you want to include.
Step 4: Burn The Outline
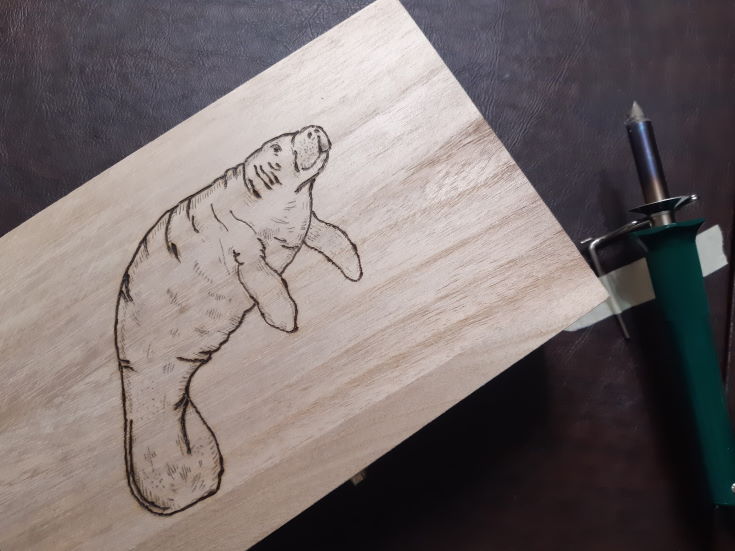
After you have finished transferring your design, remove the image, and transfer paper from the wood. You are now ready to create your project!
Begin by burning the outline of the design, following the lines you have just traced onto the wood. Always start with the outline or the simplest part of the design before moving on to finer lines and details.
Step 5: Add Fine Details And Shading
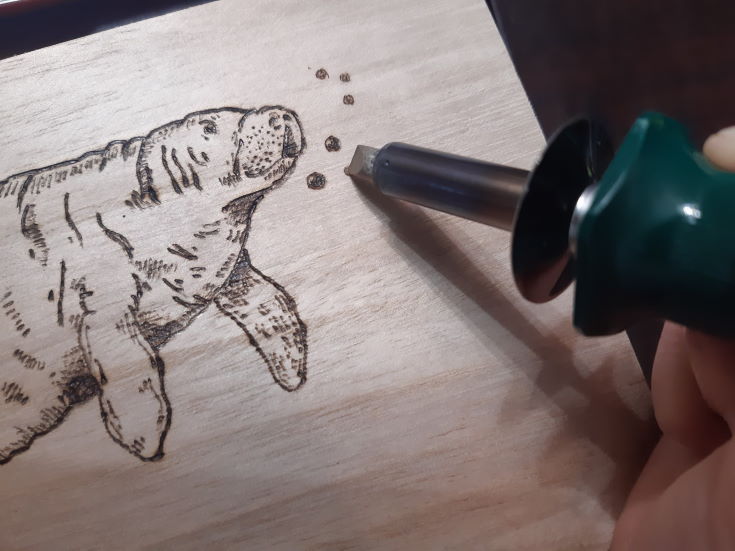
After you have burned over all the lines in your design, you can move onto fine details such as shading, cross-hatching, or gradients. Some pictures will require a lot of detail, while others may only require a few smaller lines and touch-ups.
If you are a beginner, then you will likely want to avoid patterns that require lots of textural details and shading, at least until you have a few projects under your belt and feel comfortable working with different types of tips.
However, there are a number of ways to achieve shading effects while still using a universal tip. Use the pointed end of the tip to create finer lines and add small textural details to your piece. Once again, you can practice on a scrap piece of wood before committing to burning your finished work.
Step 6: Apply A Suitable Wood Finish
Once you have completely finished your pyrography work, you will prepare the piece for a coat of protective varnish. Use your sandpaper to gently remove imperfections and raised fibers in the wooden surface, sanding in gentle, circular motions all across the top.

Once the surface of the piece is completely smooth to the touch, use a cloth or wet paper towel to remove any excess sanding dust.
When the wood is clean, you can apply a wood finish to preserve the completed project and protect the piece from warping or becoming damaged over time. Brush or spray polyurethanes work best as they are highly durable and easy to apply.
Wait 24 hours for the wood finish to fully dry before displaying your piece!
Conclusion
Pyrography is a fairly simple but extraordinarily rewarding art form that anyone can try at home. All it takes is a little bit of patience and practice to create your own wooden pieces. Once you have gotten the hang of working with a pyrography tool and have completed a few projects, the possibilities for woodburning art are endless!
Did you enjoy this tutorial? Let us know your thoughts in the comments and be sure to share this article with any aspiring pyrography artists or DIY crafters.
Check out our infographic and don’t forget to share!
Where can I pick up a book for designs. I am looking for native art prints