Are you looking for a springtime craft you and your kids can make together as a family? Are you tired of expensive and complicated crafts that require tons of different materials, only to leave behind a big mess afterward?
This cardboard tube bunny rabbit family is the perfect craft for celebrating spring. It is simple to make and uses recycled materials, so you can teach your kids the importance of reusing old household items all while having fun. It can also be as simple or as elaborate as you like, making it a great decorative craft for both kids and adults looking to exercise their creativity.
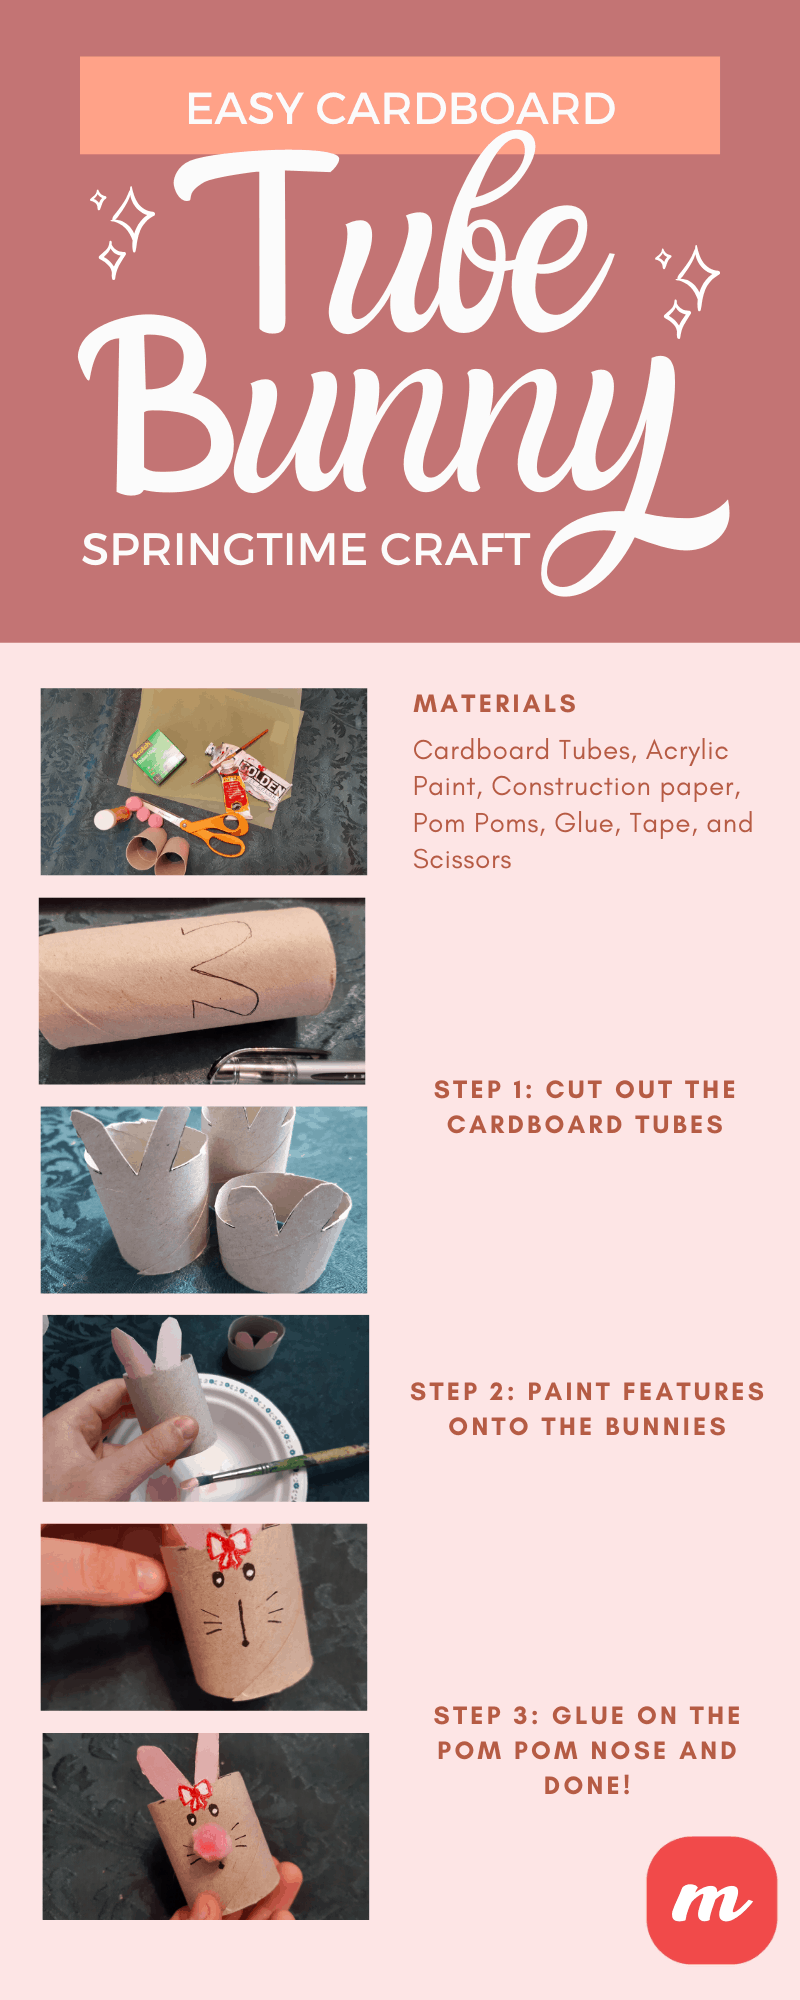
Materials You Will Need
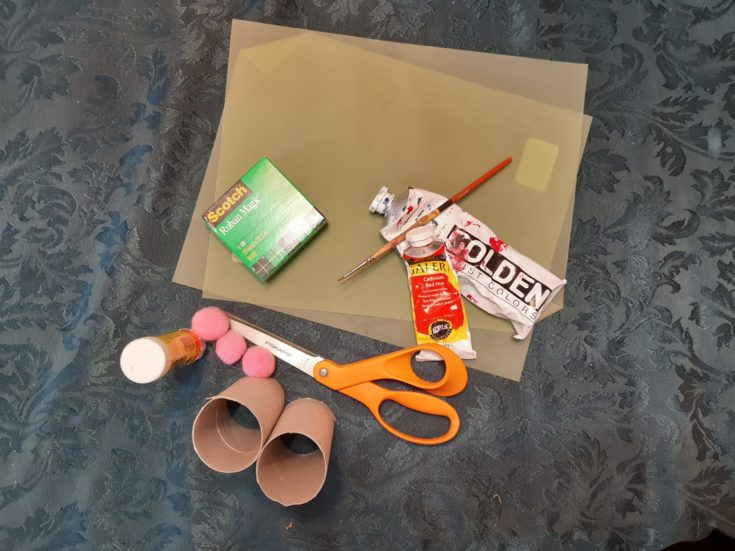
The supplies for this craft will vary depending on your personal preference and what you have available at home. For our version, we will only be using the most basic supplies: cardboard tubes, paint, pom-poms, and construction paper. However, we have included some suggestions for other materials you can use to make your rabbit family even more special.
-
Cardboard Tubes
For this craft, you will need empty cardboard tubes from toilet paper, paper towel, or wrapping paper rolls. Be sure to plan ahead and remember to save the cardboard tubes from your used rolls. If you are using toilet paper rolls, you will need at least three tubes for a family of three bunnies.
If you are making this craft as a family, consider making one rabbit for each family member!
-
Acrylic Paint
You will also need acrylic paint and some small paintbrushes. Student-grade acrylic paint works best because it is sticky and can be applied directly to the cardboard tubes without damaging them or losing color vibrancy. Use a selection of small round brushes for adding fine details.
If you have really young children, then you can substitute markers or pencil crayons for paint.
-
Construction paper
To create the grass and any additional details such as eyes, rabbit paws, or a cute little carrot, you will need construction paper in various colors. You can always paint directly onto the tube, but construction paper adds an extra level of 3-dimensionality that will help your bunnies pop.
In this version, we are using a light green construction paper, but you can also use other springtime colors like blue, pink, purple, and orange for unique, multicolored rabbits. If you do not have construction paper, you can also use colored sticky notes or tabs.
-
Glue, Tape, and Scissors
White glue and ordinary scotch tape work best for this craft. You can also use a hot glue gun, but this is only suitable for adults and older children. Be sure to use safety scissors if you are making this craft with your kids.
-
Pom Poms
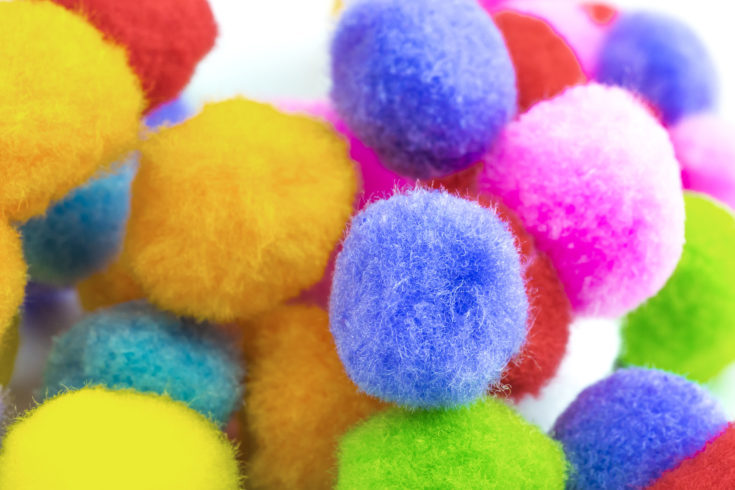
Finally, you will need one pink or white pom-pom for each bunny in the rabbit family. You can use the smallest sized pom poms you can find, or use slightly larger ones for an oversized, cartoonish effect.
-
Optional Extra Materials
There are lots of different ways to customize this craft. If you want to make your rabbits more elaborate, you can use googly eyes, straw to make 3D whiskers or colored craft foam for oversized teeth and ears.
You can also substitute colored feathers or popsicle sticks for ears, and even make an adorable, miniature carrot out of orange and green pipe cleaners.
Stickers, sequins, beads, and glitter are all optional materials you can use to bedazzle your bunnies once they are finished.
How to Make a Cardboard Tube Bunny Rabbit Family
Step 1: Cut Out The Cardboard Tubes
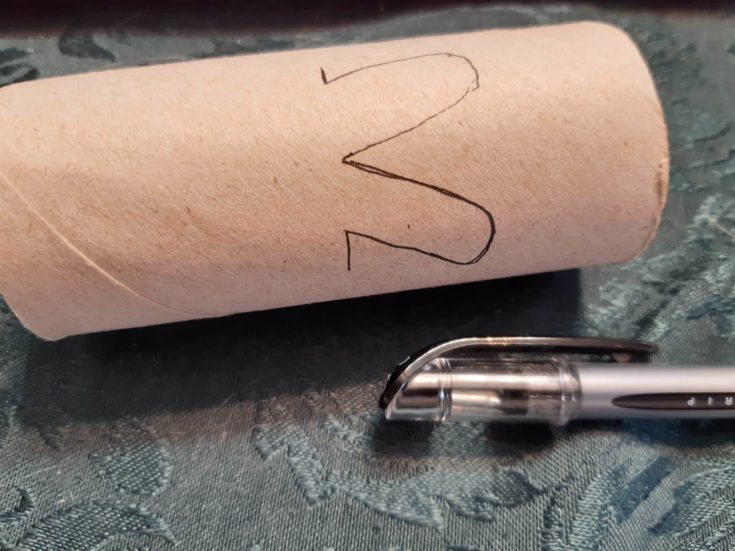
To begin, you will cut the cardboard tubes into rabbit shapes. With a pen or a pencil, make a mark at roughly the halfway point of one of the tubes. Draw two long oval-shaped ears around this halfway mark. If you are bad at drawing, you can use your first or pinky finger to trace out the shape for the ears.
Cut the tube in half, being careful to cut around the ears you have just drawn. Because the tube is thick and awkwardly shaped, this works best when you make several small cuts, removing small sections of cardboard at a time.
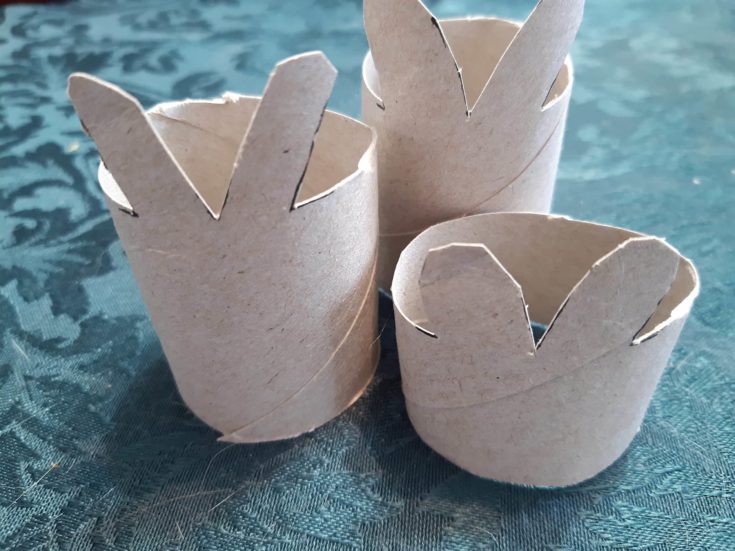
Repeat this step for each of the rabbits in the family, using a separate tube for each. For the babies and children of the bunny family, cut the tube at roughly one third instead of one half for a slightly smaller body.
Step 2: Paint Features onto the Bunnies
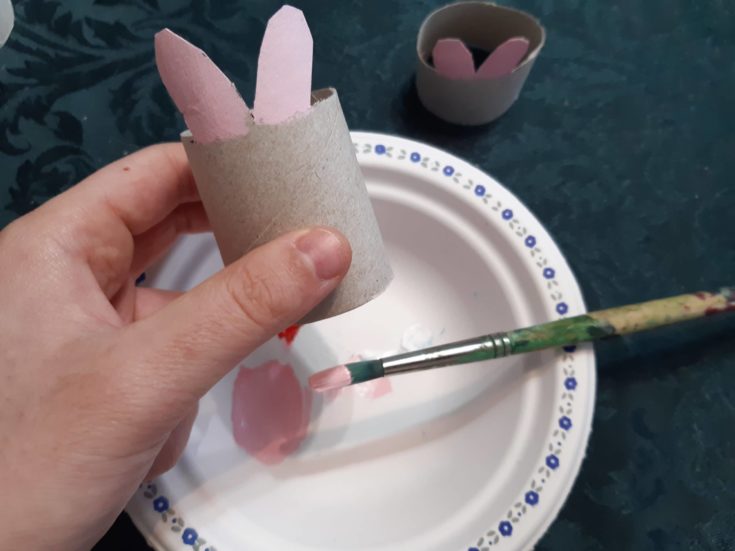
Next, you will paint the ears and facial features onto each of your bunnies. Take a small amount of pink and paint the ears, being careful not to let the pink paint get on the rest of the tube body.
Using a fine detailing brush, paint eyes, a mouth, and whiskers in black. If you have shaky hands or do not own a small enough brush, you can use a simple sharpie or black marker instead. Add little white dots in the center of each eye to act as pupils.
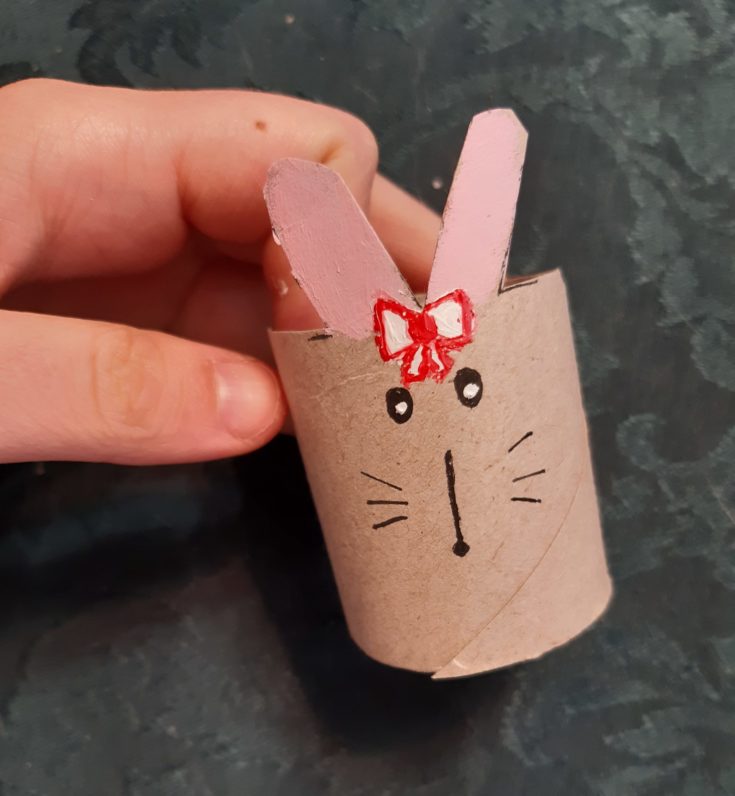
This is where you can start to get really creative with this craft. If you want, you can paint the entire tube a solid color like blue or pink, adding details in white and black as you see fit. You can also add accessories like bows to some of your bunnies. In this version, we have decided to only paint the ears for a more subtle look. But this part is entirely up to you to add glitter and color as you see fit! Just be sure to leave a space for the nose.
Step 3: Glue on the Pom Pom Nose
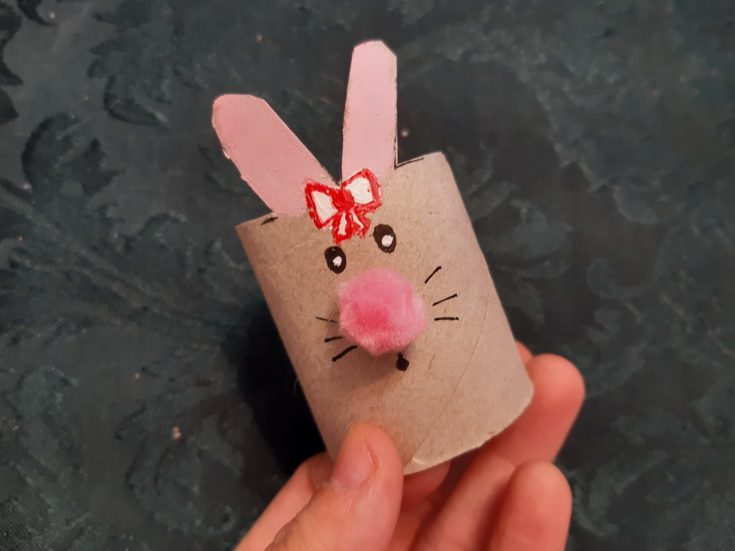
After you have finished painting, it is time to glue on the pom-pom nose. If you are using larger pom poms, begin by trimming the edges until the nose is the desired size for each tube bunny. Be sure to allow each nose sufficient time to dry before moving on to the next one.
At this time, you can also glue on some of the optional extras like googly eyes, straw whiskers, and foam buck teeth. Pom poms make the cutest noses, but you can also use beads, sequins, and stickers as you see fit. If you want, you can even add a white pom-pom at the back to serve as a tail.
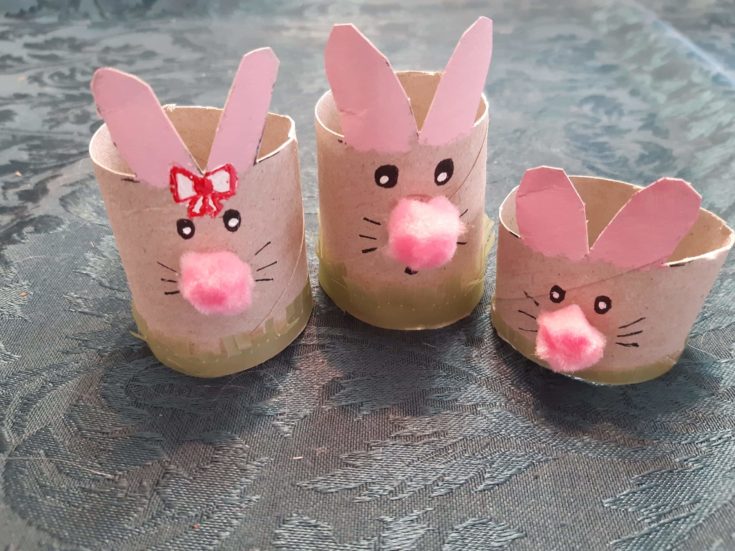
Step 4: Cut out and add the grass
The last step is to add a grass fringe for the rabbit to poke out of. Begin by measuring out a section of green construction paper to wrap around the tube. A standard cardboard tube is roughly four centimeters in diameter, so you will need a band of paper that is at least 12.5 cm long.
Cut out a rectangle of green paper and then add slits along the top edge to create a grass-like fringe. Run your finger along the top edge to fluff up the grass before gluing or taping the rectangular strip around the circumference of the cardboard tube.
Your bunny family is now complete!
Conclusion
These cardboard bunnies made from old toilet paper rolls are great crafts for the whole family to enjoy. Because the materials are so simple and user-friendly, even toddlers and preschoolers will be able to have fun making these, especially because they can be personalized and decorated however you like. They also make great home decorations for springtime or Easter!
What do you think? Did you enjoy this tutorial? Let us know your thoughts in the comments and be sure to share this project with anyone who enjoys DIY crafts!