Rocks are for more than filling in spaces in the yard and giving the roots of our plant’s room in pots that have no drainage. Painting rocks is a fun way to spend an afternoon together and the activity in itself is good for you. Gardens love insects and adding some ladybug rock art to your yard is cute and entertaining.
There are advantages to giving your creative side a canvas to flourish. When I focus my energy on painting some ladybug rocks you’d be surprised at the benefits it brings to your life. Creative outlets are wonderful for productivity and overall happiness.
This project, creating ladybug rocks is fun and easy. It could serve as a fun activity at any gathering from a child’s birthday party to a baby shower.
What You Will Need To Follow This Tutorial
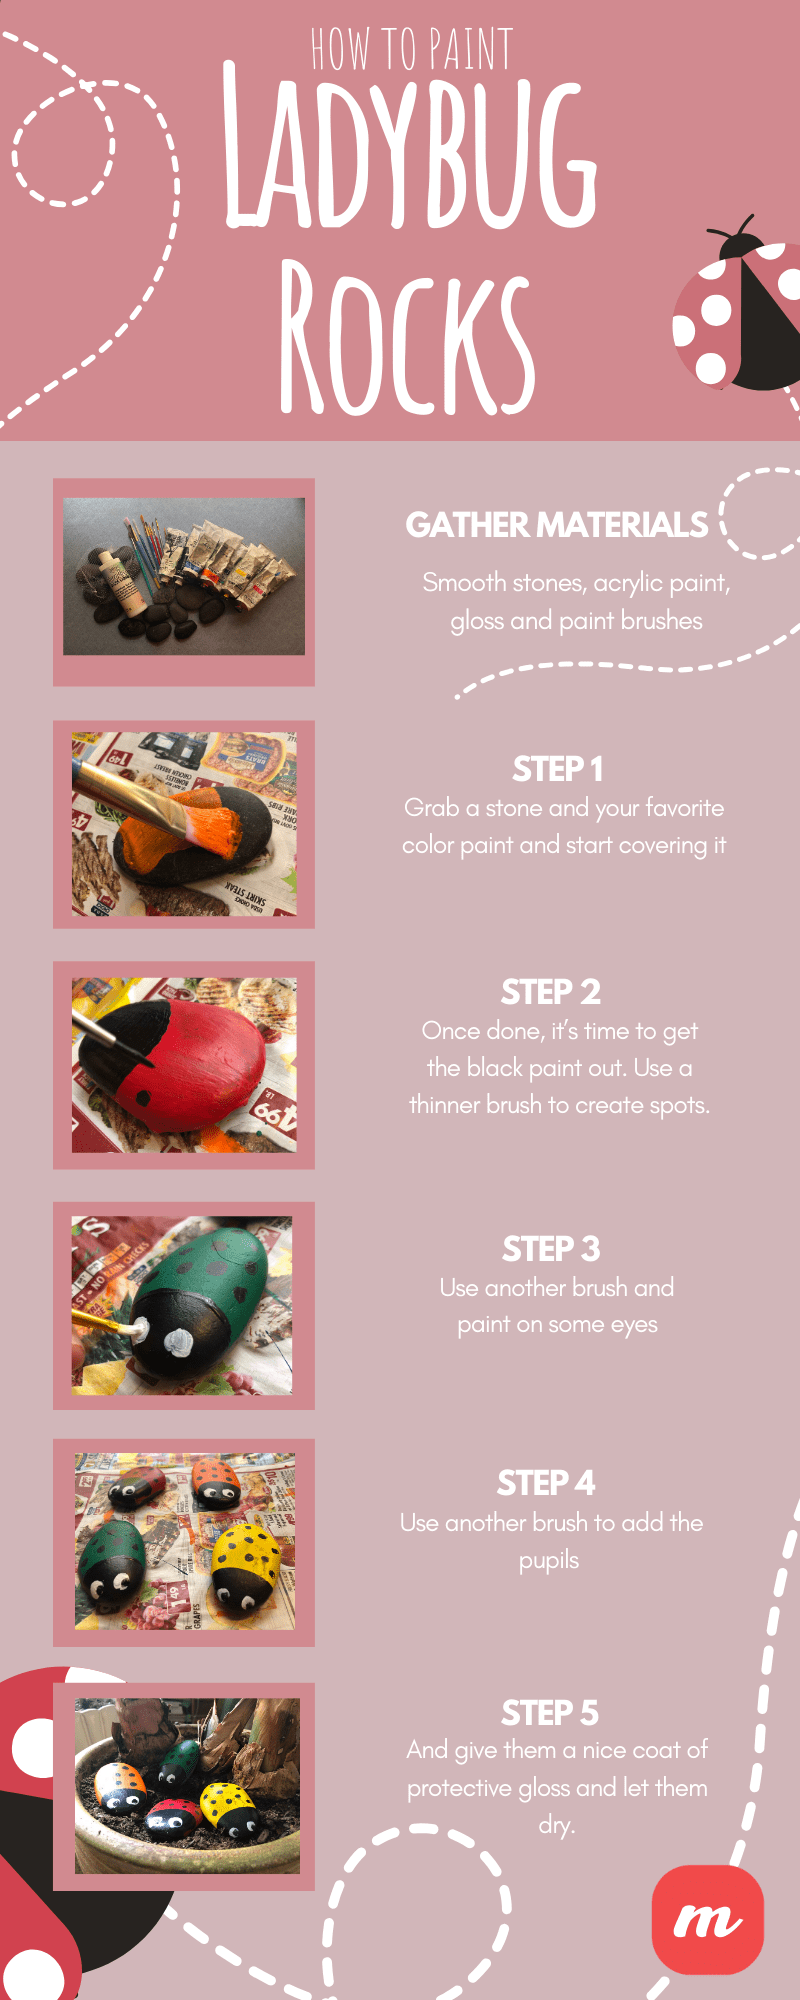
There are few items that you need to start ladybug rock painting today. It depends on what you might have laying around your craft area.
Here’s a list of the basics.
- Smooth stones
- Acrylic paint
- Gloss
- Paintbrushes
What Kind of Rocks Can You Paint?
You can paint any rocks if you want. The key is to have the right paint. But we will get to that later. For this project you need smooth rocks, the kind that are used for hot stone massages. You want them to be round and smooth to give your ladybug painting ideas the perfect canvas.
Where Can I Get The Rocks?
I got my rocks on Amazon because I wasn’t sure where in my area to find these for a reasonable price (the nearest craft store is rather pricey).
What Kind of Paint Do I Use So I Can Keep These Outside?

My ladybugs, which we will see in a minute, are staying inside for now, but I used acrylic paint for several reasons. One, I had a ton of it laying around from other projects and didn’t want to purchase any outside specific paints if I could skip it.
Two, because, when I did some research I found that acrylic paint is fine for outdoor projects. Unfortunately, I moved ahead with my project and then found that using acrylics that are specifically made for outdoors would be best for your ladybug painting ideas.
How To Paint a Ladybug Rock
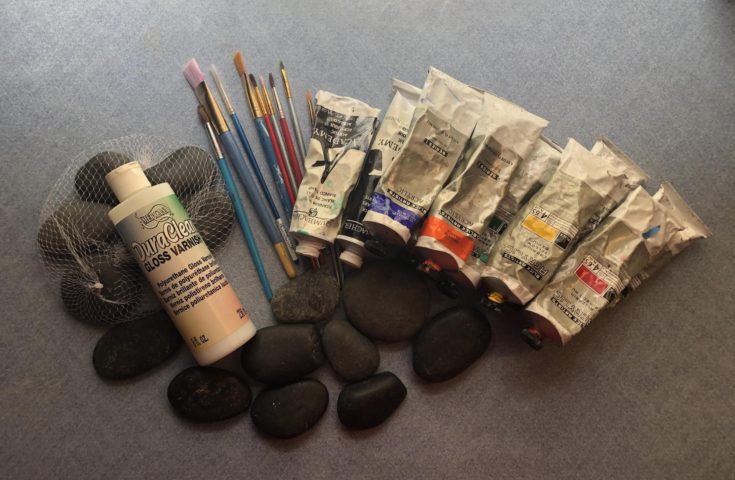
Step One
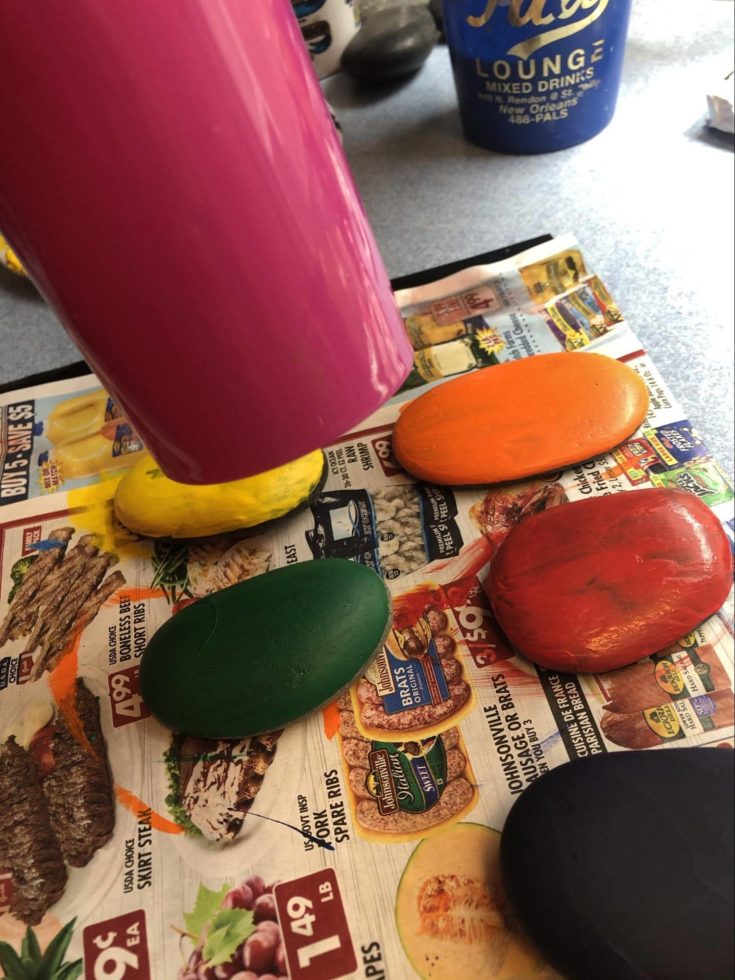
Grab a stone and your favorite color paint and start covering it. I did five of them in an array of colors. Some of the paints, like green and orange, went on smoothly, while yellow and red kept lumping up on me. This may have been due to my trying to use older paints for this project.
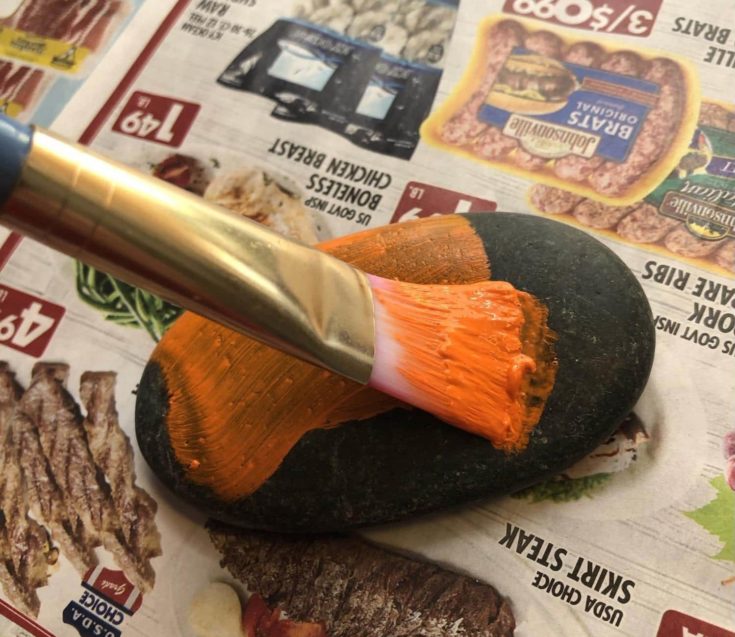
I decided to do several coats to remedy the lumpy colors and, in the end, I think I did about five coats each. The blue was the weirdest of all. It painted on smoothly but, when it dried, the color was too dark.
As you can see in the above picture, the blue is vibrant, but that’s only because the paint is wet. When dried, the color seemed black/blue. You can also see how difficult it was to get an even color from the yellow. But I decided to move forward with another coat since I am an artist who enjoys working the mistakes into the final product.
When you are applying several coats of acrylic paint it’s nice to have a blow dryer handy. Second, third, and fourth coats are not only easier to apply when the previous coat is dry, your paint won’t start to clump up. You can use this hair appliance to dry a new coat as opposed to waiting around.
This photo illustrates just how black the blue rock looked after drying.
Step Two
Once you have the colors you want it’s time to get the black paint out. Use a medium-wide brush to paint out a little head and then use a thinner brush to create spots.
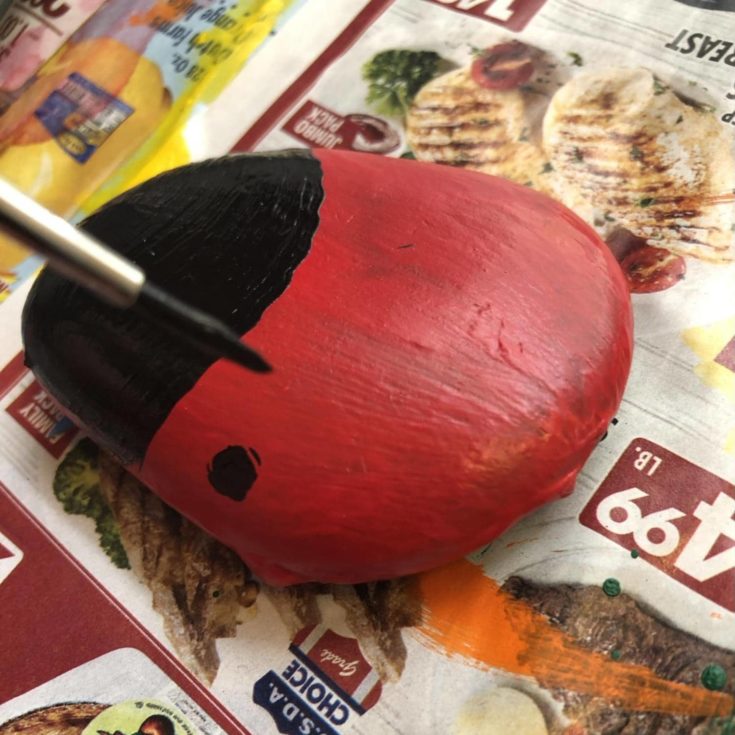
This was the point where I abandoned the blue rock because the color difference wasn’t sharp enough to warrant moving on. I would suggest, if using blue paint, lighten it up with white to be a sky blue or possibly start with a coat of primer.
Step Three
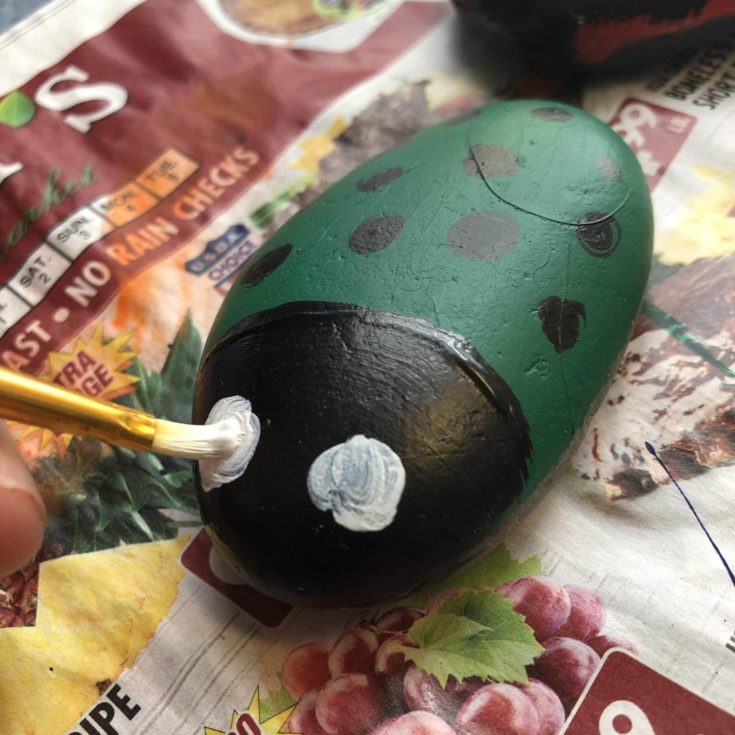
Once each had a head and spots I took another brush and painted on some eyes.
Step Four
Then I added the pupils and had some seriously cute little ladybug.
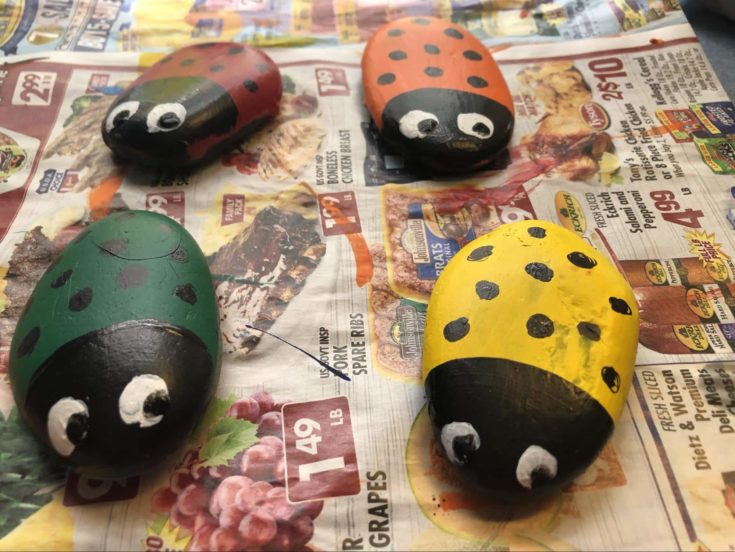
I was proud that I was able to use some of the imperfections on the yellow one in the final product. I got so excited I took my new friends and put them into a plant in my living room. I did this BEFORE I applied a coat of varnish and one of the clumps of red paint smeared all over my little yellow buddy.
You can see my mishap in the picture above. I’m not surprised. That little yellow guy looked worried the whole time. He knew he was doomed.
Step Five
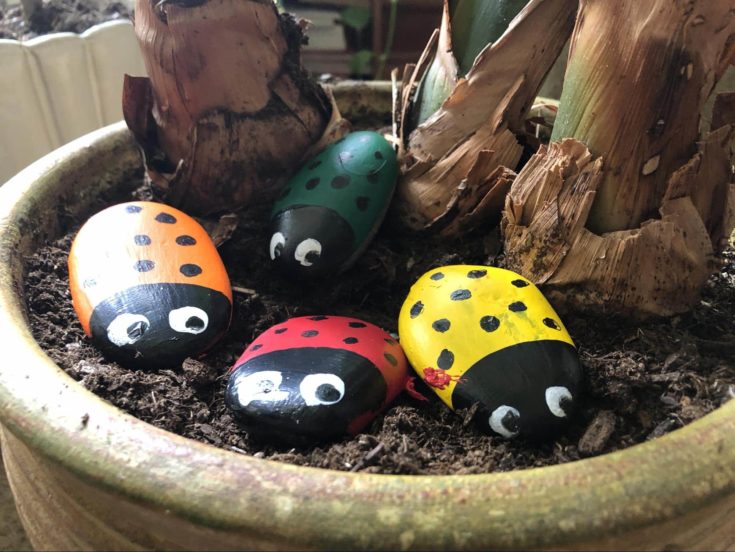
So I took my three final friends, orange, green, and red, and gave them a nice coat of protective gloss and let them dry. I think they will find a permanent home in my fairy garden.
Conclusion
If you are a crafty person this is a project you can pull out at any time because you probably have the materials you need right in your home. I only needed the stones, which is why some of mine came out clumpy.
That said, there are so many other things you can paint on these stones. Your imagination does not have to be limited to ladybugs alone. I’ve seen flowers painted on them. With a thin enough brush, you can imitate some of your favorite art pieces. Of course, that would take a long time and a certain level of expertise only some have. I am not one of those people.
But I can create adorable little ladybugs to keep my banana tree happy.