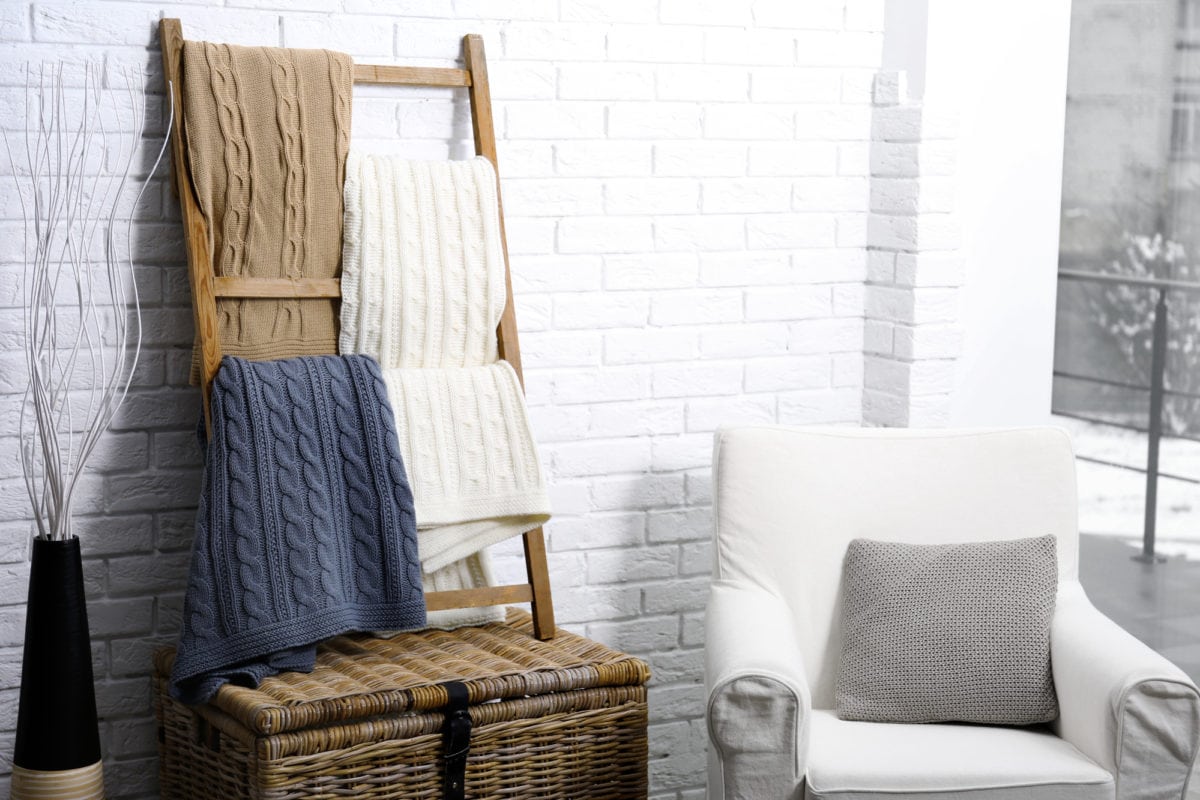
Blanket ladders are a space saver and a fantastic accent piece that adds character to the room’s decor. They are used to hang blankets, throws, linens even towels. It looks exactly like a traditional ladder but with a farmhouse or rustic personality.
If you are looking for a solution to keep your blankets organized without occupying more space, a blanket ladder is perfect. The best thing about a blanket ladder is that they are very easy to build. It could be your next DYI project.
Let’s start your step-by-step tutorial on how to make a blanket ladder.
What Will You Need? (Blanket Ladder Supplies)
- (3) 2×4 boards (You can pick whatever size, as long as you have enough to cover the two long legs of the ladder)
- Miter saw (check out more miter saw options here)
- Nail gun
- 2-inch nails (24 pieces to be safe)
- Wood stain of your choice
- Wood glue
- Triangle
- Sander
- 220-grit Sandpaper
- Tape measure
- Clamps
- Rags for cleaning
- Latex Gloves
Steps To Build a Blanket Ladder
Once you have gathered all the supplies, you can start going through this step-by-step tutorial to build your blanket ladder.
Time to begin your woodworking assignment!
1. Cut the Legs of the Ladder
We suggest you choose a ladder length that you think is suitable for your space. But for some directions, you can cut your beams to be 6 ft, as we believe 7ft could be too long. Keeping it in between is also not a bad idea.
For the horizontal support for your feet on the ladder, known as the rung, you can choose a length of 15 inches.
Ideally, you should hang 3 to 4 blankets and leave the top and bottom ones empty. So a total of 6 rungs. Remember, this is just a suggestion; you are welcome to make as many as required.
The width should be between 18 and 12. 18 is perhaps too broad, with 12 being too narrow. 14 is a great width, but if you like chunky, 16 is appropriate.
Use a compound miter saw if you have one to cut the beams and rungs of the blanket ladder. Even if you don’t own a saw, you could take it to the nearest hardware store for them to cut it for you.
2. Determine Space between Rungs
You must plan this before drilling holes. Tip: measure the gap between the rungs twice, just in case. Here’s the trick – we have always found that measuring your beams out and laying your rungs helps to ensure that you leave the exact space in between each of the rungs.
Always use a measuring tape to confirm even distribution between the rungs. Make sure you are marking the points you are going to drill.
3. Assemble the Rungs
In this step, you have attached the rungs carefully. The first thing you need to do is find the center point of your beams. Start connecting the rungs maintaining the center point.
You can use a countersink drill for this step. While you are drilling away, you need to add wood glue to screw the nails. Note: You could also leave the hole open, fill it later with a dowel and top it with some wood glue.
You need to confirm that you have some clams to bear the pressure on it until the glue dries.
4. Time to Sand Your Ladder
You should use 220 grit sandpaper to sand your blanket ladder. This is an easy step compared to the previous ones. For the blotches, you could switch to a rough grain to sand it down. But always finish with 220 grit for an even finish.
5. Stain your DIY Blanket Ladder
This depends on your preference. You can purchase a wood stain or any other stain according to your choice. Honestly, it depends on what type of finish you want.
This can be messy and fun, but keeping rags and using latex gloves help clean afterward. You probably do not need to buy a paintbrush, as using your hands (with gloves) and spreading the stain evenly does the job.
When wood painting, especially a ladder, your task is to rub the paint or stain on the wood or hardboard. Don’t forget to follow the instruction on the drying and coat of stain, which is usually written on the stained tub
Lastly
Apart from hanging blankets, a blanket ladder can be used for other things that help you keep your home organized. You could add hooks to hang your handbags, hats, scarves, or jewelry.
It could also be used as a decorative piece in your lounge area. You could even match the color of the blanket ladder to match your room or home decor. The possibilities are endless.
Before you go, if you decide to cut the legs and rungs of your ladder, make sure you are taking safety precautions. Now build away!