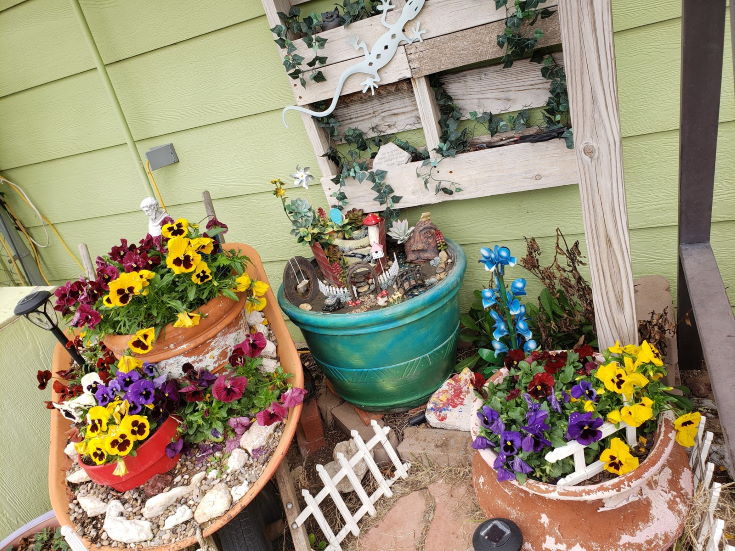
Fairy gardens have become a popular addition to backyard gardens, porches, decks, and waterscapes. They can be as small, or large, as you want them to be, and include miniature displays of just about anything you can imagine to make your ‘fairies” feel at home. If you have been wondering how to start a fairy garden outdoors, or what to put a fairy garden in, this article explores my own creation and garden making tips, as well as other suggestions you can take advantage of. Just keep in mind that your fairy garden should reflect your own personal style, and letting it all come together naturally is what often makes the best display.
What is a Fairy Garden
A fairy garden is a miniature outside garden complete with tiny living plants and flowers, home art projects, unique finds, and DIY crafts to create a pleasing addition to your landscape. The idea is to attract ‘garden fairies’ to your home, and thus bring good luck to your gardens. Because they are personalized and made to a smaller scale, they can be made in just about any type of container- big or small, or added to just about any area in an existing garden- porches and balconies included. Basically, they are tiny worlds filled with your own imaginative ideas. Many people wonder how to draw a fairy garden in advance, but I find letting your ideas come together as you work makes a much more unique, and creative finished project.
What You Need to Get Started
Wondering what supplies you need to build your mini display and start setting up one? I wondered the same thing despite having seen many different awesome images and ideas, and I suggest first looking through Pinterest or other online crafting sites to get an idea of shape and scope, and of what appeals to you. I was able to be inspired by gardens that incorporated broken planter pots and was reminded of the broken pottery I had that I was holding back for a craft just like this. Some items you may want to consider when planning what you are creating includes:
- Broken pottery or glass, teacups, plates, bowls, and tiles you may have been stashing to future craft projects. I had some very cool pieces that have been accidentally broken, but had sentimental value. This way I am able to still use them in a meaningful way.
- River rock and decorative stones can help with the creation of pathways, borders, and even little stone huts. I used them in my own creation in various ways and suggest having different sizes available to use them as you get inspired by your own work.
- Many hobby stores and online outlets keep ‘fairy garden’ supplies on hand and can be very inspirational to help shape out the larger structures you may want to include in your garden. Little houses, bridges, ponds, figurines, moss, and cool little details are readily available for cheap prices. Be careful though, they add up fast and you don’t want to buy more than can fit in your space.
- Simple plants and tiny flowering vegetation that you can either plant in your garden or place in small containers around it. I mixed and matched some decorative metal art and succulent choices due to the type of design I picked that limited planting space. I also took advantage of a few realistic plastic plants since I live in a very hot climate and not all leafy vegetation does well.
- Wooden materials and chips can be used to make fences, decorative arbors, and other details. I grabbed a handful from my garden and found they helped inspire some fun ideas.
- Since we live on a hobby farm, and my youngest child is a self-proclaimed ‘scavenger’ we have a tendency to also have a series of nuts and bolts, metal rotors, horseshoes, and other items that may have originally made their way into the trash if not for the collection we have accrued. If you ‘scavenge’ like items, take those out for inspiration as well.
- I also discovered that super glue, scissors, string, a drill, duct tape, and even some quikrete came in handy while I worked. These were all used as part of my troubleshooting solutions as I started to put together my garden.
Fairy Garden Crafts
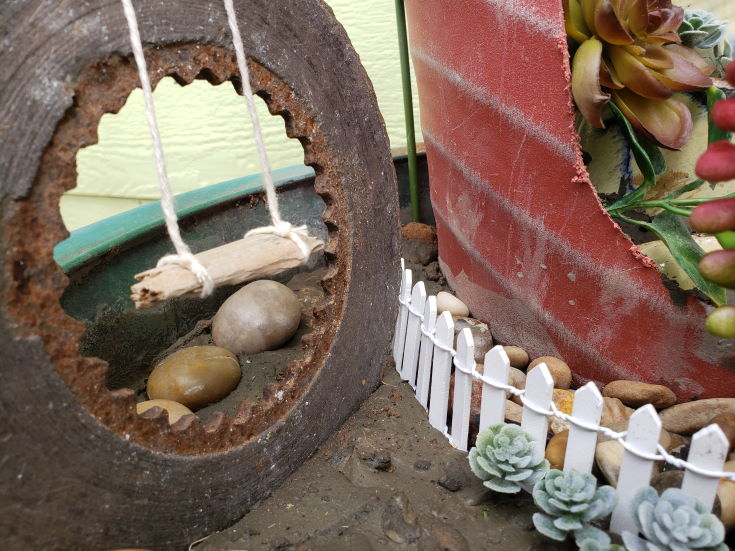
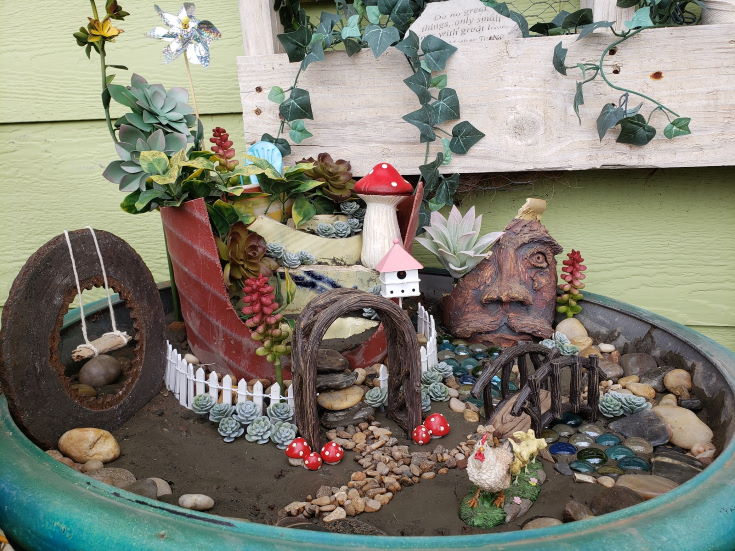
Many people also like to craft their own structures using many of the supplies I mentioned above. Although my garden was overall small and simple, I did find a way to incorporate an old wheel rotor as a garden swing. Other popular ideas include making your own arbor or trellis, a little house, fences, and other small structures.
What to Put a Fairy Garden In
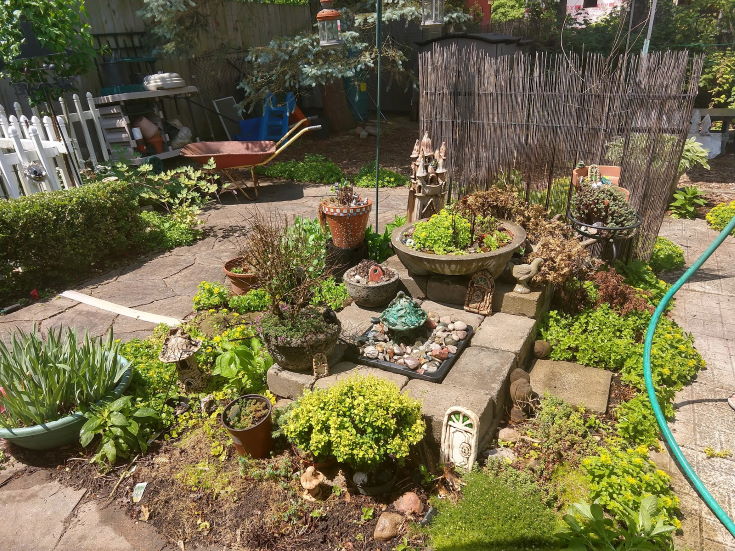
If you are looking to place your garden in something, you actually have many different ideas to consider. I used a large planter pot I had gotten as part of a collection of used pots at a garage sale years ago. It had been sitting in my garage as a catch-all and I was ready to finally put it to use.
You can also use an old wheelbarrow (I have a one made up as a planter!), birdbath, concrete blocks, old shelves, sinks, bathtubs, raised garden beds, old tires, or basically anything that can contain the space you want. Of course, you can also hide little gardens throughout your own established garden beds tucked into corners or under woody shrubs and small trees.
Where to Place Your Fairy Garden
You can place your garden just about anywhere you desire, but you may want to consider a few factors before committing to an area. To start, these are small, and delicate. The miniature details you decide upon may easily wash away in a rainstorm or even blow over. There are ways to secure your details (more on that later) but you also don’t want your garden to be flooded out or hold water. Depending on the structure of your garden, maybe rain is a part of how your garden grows and has great drainage! In my case, I could easily have standing water after a good rain due to how my roof slopes. I took care to ensure I have drainage, but I still didn’t want to lose the details I’ve provided and added a bit of overhead protection when it rains. In short, be mindful of location so all your hard work doesn’t have to be redone later.
Steps to Make Your Own Fairy Garden
The first suggestion I can make is to not rush. Make this a weekend project rather than trying to get it done in just a few hours. Even if you have a clear vision, taking your time as you piece together your ideas allows you to consider perspective and also add details you may not have originally considered. I set my area up and started playing with ideas before walking away for an evening. The next day I remembered a few helpful supplies I had and was better able to complete the garden.
Step 1: Pick a Container and Area to Place Your Garden In
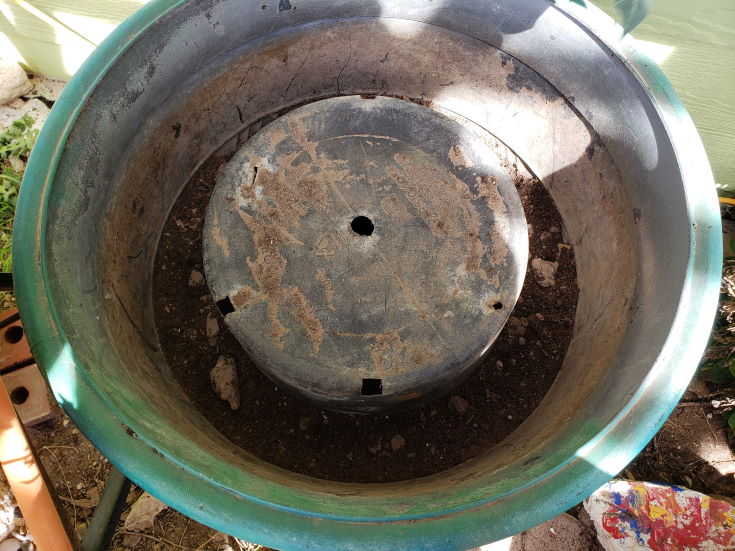
Choose your container or space to place your garden and designate the area for its creation. Be smart about how you are going to set your garden foundation up. I was not interested in pouring in yards of dirt into such a large pot, and simply took an old plastic pot from a nursery and turned it upside down to help fill space and provide a Ridgid support. You aren’t going to plant anything that requires extremely deep roots and so this works perfectly for most situations. You can do something similar with other types of containers as well.
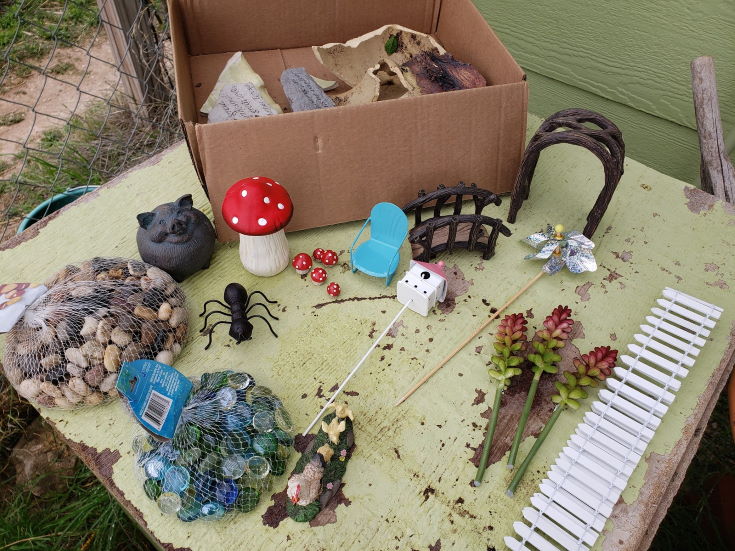
Step 2: Gather Your Supplies
As mentioned above, gather up the supplies you think you may use. Even if you are unsure of how to use them, having them in view can help inspire new ideas. I like to lay out what I am working with within reach to help me have a visual of my options and pick and choose as I go along. I find that some objects belong in a space, while others do not. Don’t feel like you need to use everything.
Step 3: Make a Basic Plan

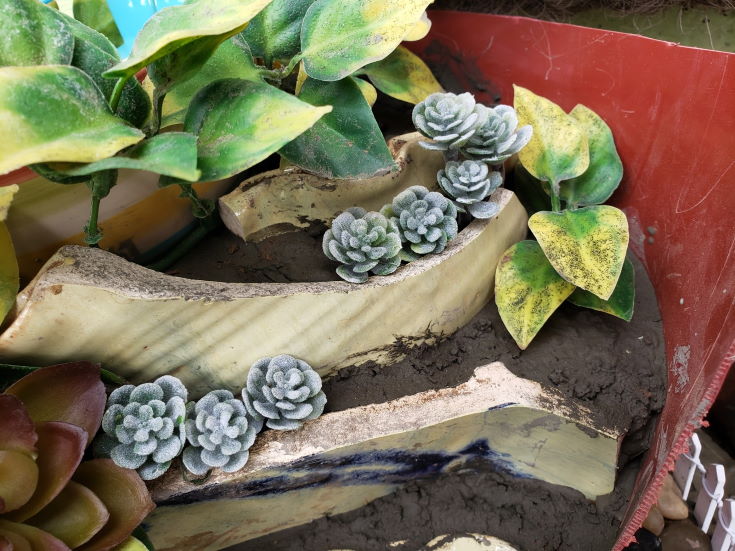
I knew I wanted to incorporate my broken pottery into the overall design, plus I wanted to add some depth to my garden. I was inspired online by the broken pot tiered gardens and took a sawzall to a sturdy old plastic planter and started layering. I will admit it took me a few tries and the need to walk away to find what I liked, but once I had it together I liked the overall concept.
Step 4: Smooth Out Your Working Surface
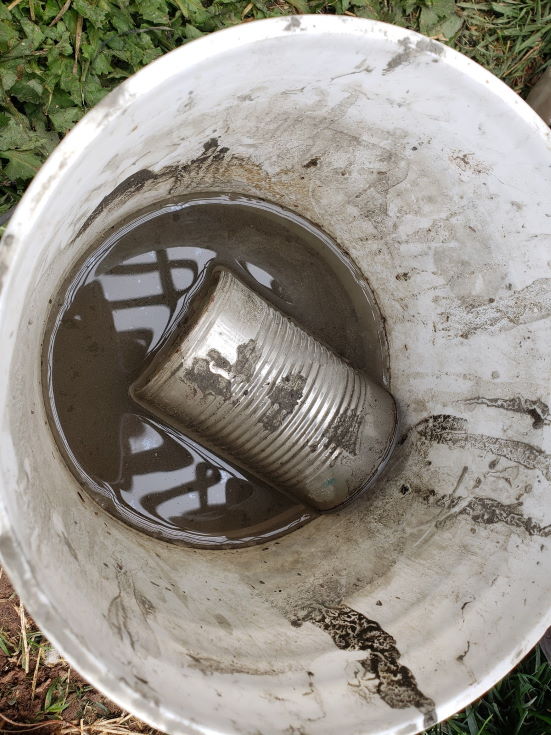
I like to have a clean canvas to work from, and once I had my main structure, I made sure to smooth out the dirt on my workable surface and remove any stones or lumps. I also discovered that I did not like the loose dirt I was working with and was concerned about drainage and rainfall. When you set up your garden the last thing you want to have to do is make it all over again. And even though I had a fairly protected area, I felt I needed something more sturdy – hence the quikrete. I made a quick slurry of water and quikrete and poured it over my tired pots and working surface. Although it kept it soft, it helped bind the loose local dirt I used and also allowed the rocks and other small pieces to be held in place. It stayed malleable enough as I worked, and I made sure to poke holes into areas I wanted water to drain and also water the few plants I was planning on using.
Step 5: Plant Living Vegetation
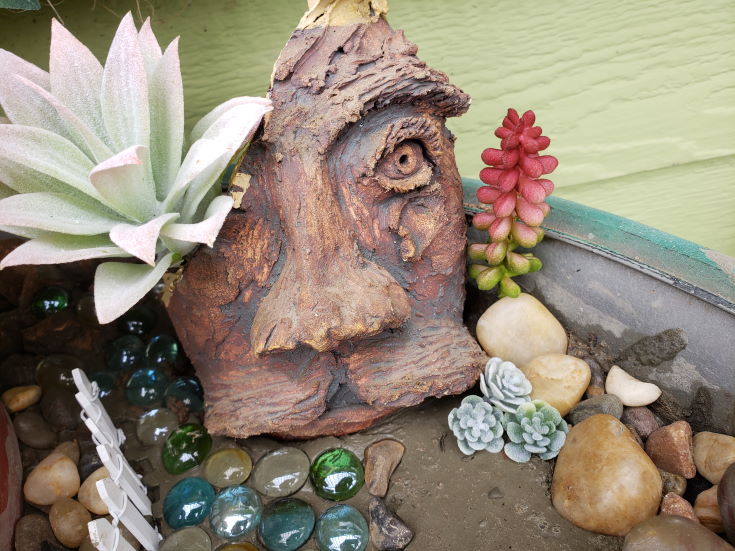
Determine which areas you want your living vegetation to go so you have room for its future growth. I only included some small living succulents throughout my garden and then interspersed some realistic-looking fake options to help keep maintenance low through the heat of a Southwestern summer.
You can also choose to keep plants in small containers to place where you see fit, or trade out with others through the changing seasons. Just remember plants do grow and so you should leave them some room!
Step 6: Create a Border
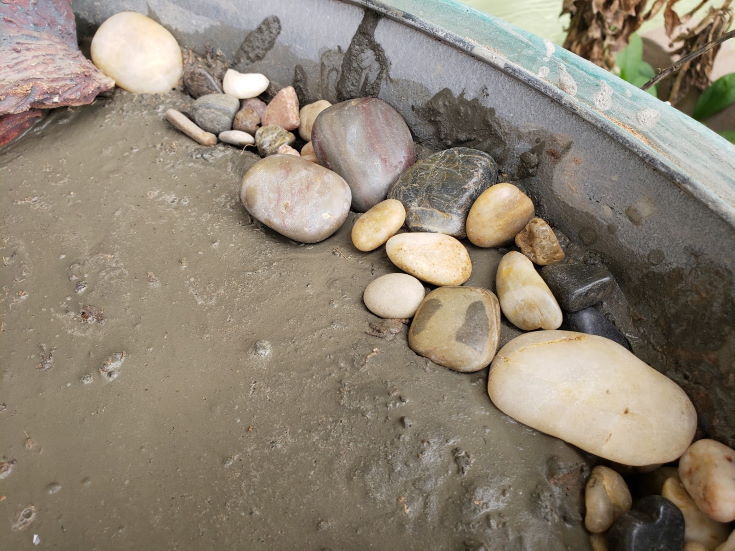
Even if you choose a well-defined container for your creation, as I did, you may want to create a border to help define and decorate your garden. River rocks can also work to disguise various features. I have drainage holes along the sides of my pot, and rocks are the perfect solution to help them blend in.
Step 7: Add Detail
Add pathways, rivers, and other details to your garden. Glue rocks to create stairways; paint rocks to mimic flowers, toadstools, and even insects; and add any small whimsical pieces you may have purchased. If you use a concrete slurry, you have the means to help secure your small, lightweight objects to keep them from being knocked over or ruined.
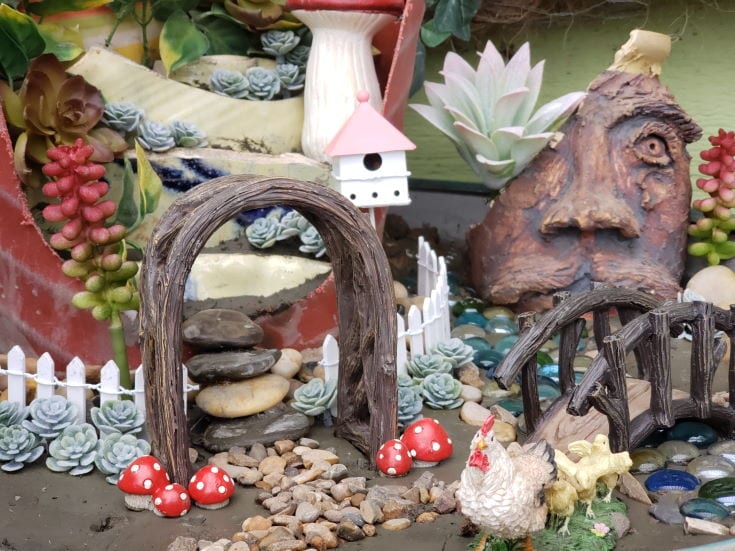
Also, since this is a garden for your fairies, you may want to include a place for them to relax. Small houses and huts are popular in larger areas, as are gazebos and lounging spots. I provided a vintage rocker at the top of my garden to oversee the rest of the yard! Hopefully, it’s comfortable enough to bring me luck!
Conclusion
This is a great project for kids and adults alike, and depending on what supplies you already have, it can be rather cheap as well. It is a fun, simple project, and a great way to express your own decorative techniques. In fact, you may find you want to make an entire village over time. Hopefully, this step-by-step tutorial provided some tips and ideas for you to get started on your own. If you find you are having trouble getting started, you can consider a fairy garden box as well that includes everything you need. We’d love to see pictures of your own gardens below. And, as always, please share!