Halloween is a fun celebration in our household and combines a mix of spooky with good humor to engage children of all ages to enjoy. Popular in many television and movie genres is the zombie apocalypse, and what better addition to your holiday decor than your own herd of Zombie Barbies (or other similar action figures and doll-like creatures)?
Inspired by The Walking Dead crafts floating around DIY crafting media sites, this step by step tutorial provides some creative suggestions and inspiring ideas to start making your own creations. Read on to see what sort of army of dolls you can get started on in preparation for Halloween!
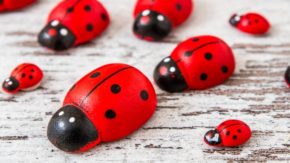
What You Need to Get Started
This is a great way to repurpose those figures your children no longer play with and avoid having them end up in the trash, or garage sale. There are various ways you can make your dolls come to life- or rather walk amongst the dead. The following supplies are what I used to create my zombie doll.
Plastic Doll or Action Figure
I raise boys who prefer dirt over dolls, and so my household is devoid of old worn out dolls and action figures. I was a bit limited in where to find a doll due to the rural area I live in, but was able to find the perfect subject at a local chain dollar store. You can also ask around your friends and hit up garage sales to build an army!
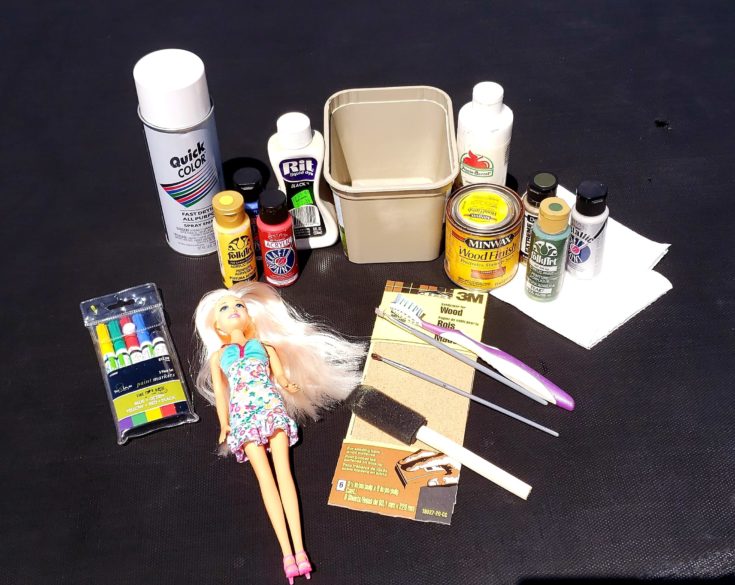
Plastic Tub
You may want a plastic tub that you can throw away after use due to what you pour into the water. Make sure it is big enough to fully submerge the number of doll clothes you have.
Dye, Stain, Paints
Consider what materials you have around that you can pour into the water to muddy it up to dye and wear the clothing. I used some old wood stain, a few drops of liquid clothing dye, and some paint all mixed together.
Small Paint Brushes/Old Toothbrush
You’ll want to detail your clothing and dolls after dying and painting them. Fine paintbrushes and old toothbrushes help make realistic details.
Acrylic Paints/Paint Markers
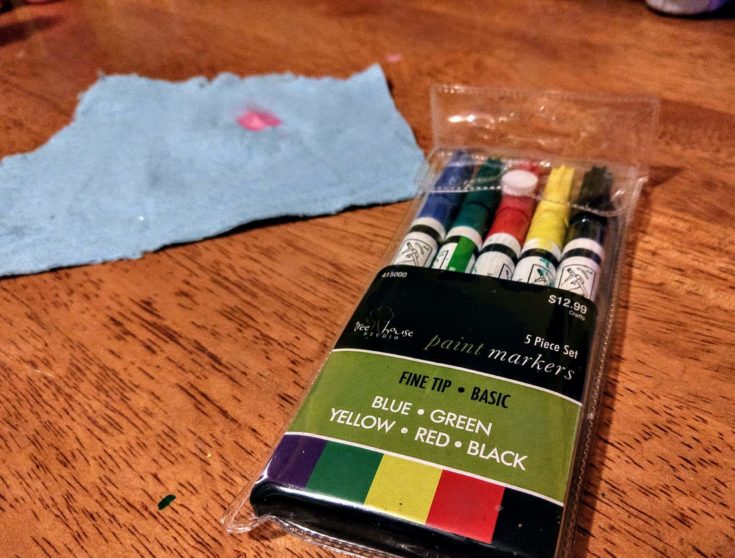
Have some acrylic paints and or paint markers on hand for detailing. Red, in particular, is probably a must-have!
White and/or Gray Spray Paint
In order to make your dolls and figures look bloodless and dead, you need to change their skin tone. Cheap spray paint is perfect for this job.
Paper Towels
These steps are a bit messy, so have a few paper towels on hand to help clean up the paint, and even use it to dab color on for detailing.
Creating Zombie Clothing
Dye and detail your clothing first so it can dry while you paint your doll. Remember, you want to make them look like they are old, worn, and disgusting. After all, Zombies are in a state of decay, and feed on flesh!
Step 1: Soak Your Clothes in Dye, Stain, and/or Paints

Fill your plastic tub with enough water to submerge the clothing, and add in whatever stains and paints you are using to help dye your clothing. The point of this step is to make the clothing dirty and worn looking. Mix the materials until your desired look is achieved.
Step 2: Remove Clothing and Allow to Dry
Once your clothing is good and disgusting looking, remove it and allow it to dry. Try to avoid wringing them out to keep from losing any of the colorations you’ve created. Instead, blot them a bit and then lay out to dry on an old towel or paper towels.
Step 3: Detail Clothing
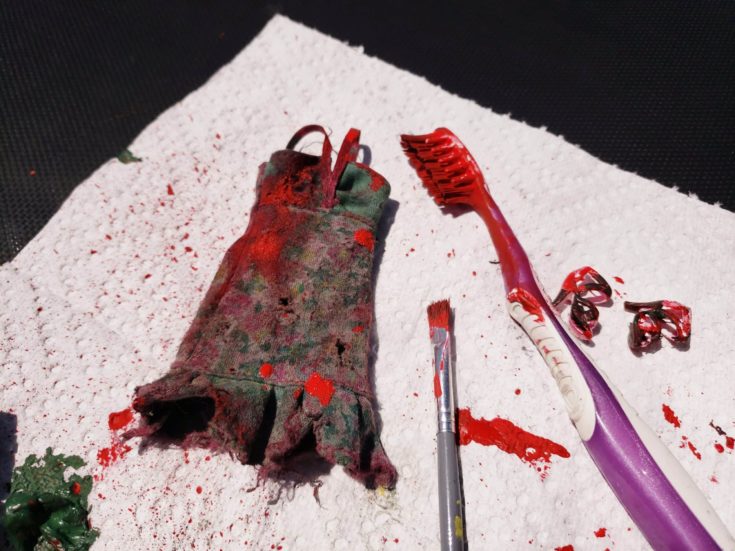
You can go ahead and start detailing your dolls next if you want, or wait a bit and finish up the clothing. The clothes don’t have to be completely dry to detail them, and you may prefer a damp canvas to work with as it can create interesting effects with paint detail.
This is where the fun begins! Use a scrunched up paper towel to add blots of muddy color to the clothing, dip a paintbrush in red paint to make blood splatters, or even create some tears and wear with some sandpaper.
Creating a Zombie Doll
Like the clothing, you can play with various ideas to create your walking dead members. Mixing and matching colors, painting on details, and otherwise messing with appendages to get the look you desired is all allowed!
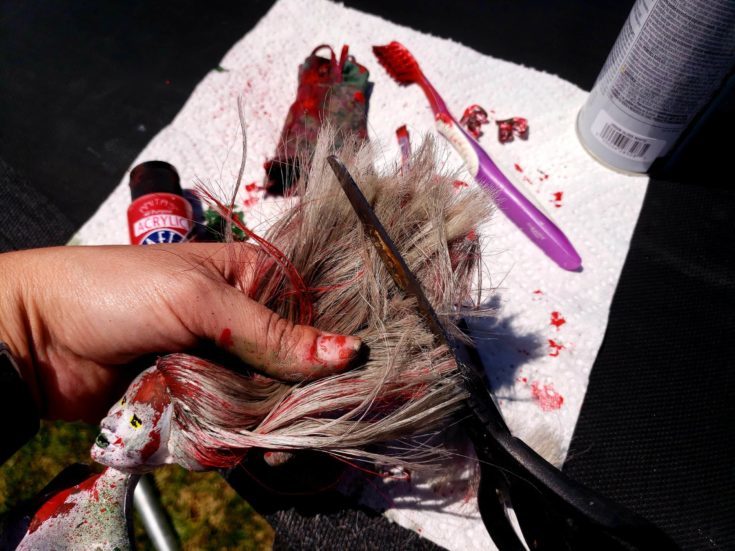
Step 1: Dip Doll Hair in Clothing Mixture
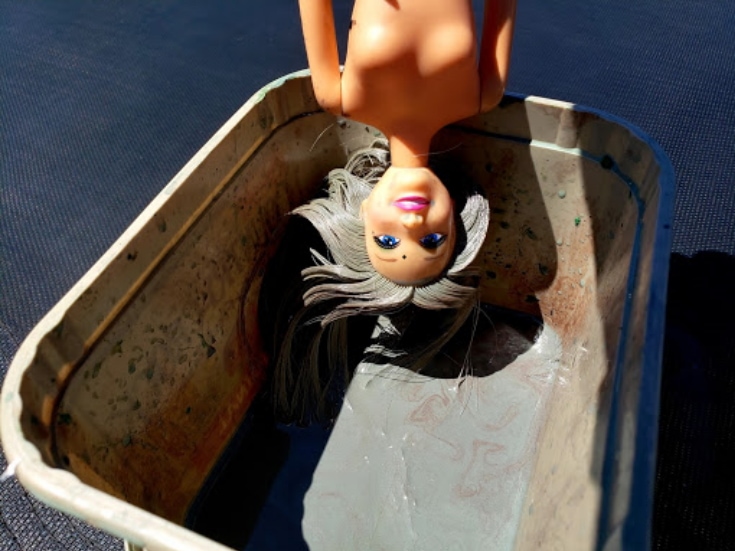
One way to start getting any long flowing locks morphed into something disgusting is by letting the hair take a dip in your paint/stain/dye mixture you use to create your clothing. Go ahead and dip the doll’s hair in there and swirl it around a bit. You can even add a bit more ‘mixture ingredients’ to get the desired look.
Step 2: Paint the Doll

Since your doll is dead, you need to make the skin tone look a bit less ‘alive’. Play with gray and white spray paints, and consider dabbing on color to get various effects as a foundation for further detail. I rubbed a bit of stain and black dye over the plastic and then spray painted the doll. When still tacky I dapped at the white paint with a paper towel and an ivy green paint to get a nice decaying look. Let dry before moving onto the next step.
Step 3: Detail the Doll
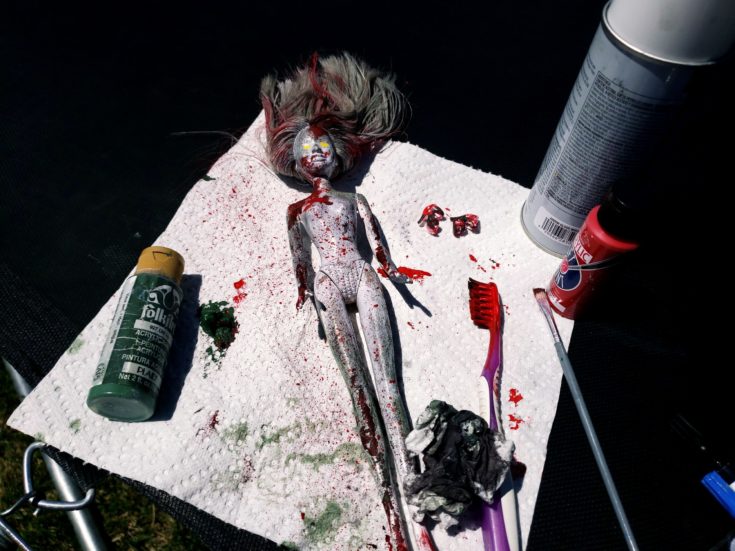
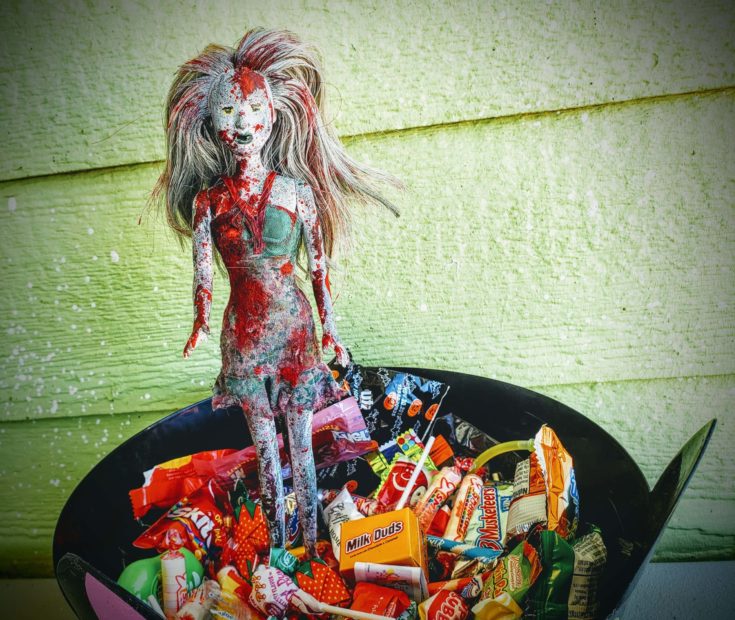
Now comes the fun part! Determine how nasty you want your figure to look and begin by creating wounds, bite marks, blood splatter, and, in short, body decay with your paint. Be sure to repaint dead, lifeless eyes as well! I used a yellow and then added some black for detail. Don’t forget to define her mouth. Paint pens work perfectly for this.
You can even cut hair (because seriously, this zombie isn’t going to have nicer layers than me), remove part of an arm, or make a deformed twist to a leg to make it even more grotesque. Be sure to paint any accessories, like shoes or jewelry. My doll came with a purse, but I didn’t think it was very realistic for her to drag that old thing around. Her heels, however, are definitely part of the ensemble.
Step 4: Dress Your Doll
Once everything is dry, redress your zombie, make any final finishing touches you desire, and prop her up as a display! You can use a doll stand, dowel, or even a sturdy twig. Also, feel free to add in some small twigs or other organic materials to the hair- after all, zombies roam through the environment looking for a meal!
Step 5: Display Your Zombie Army!
Create ‘herds’ or pop them into individual places that will surprise your guests and family members alike. Move them every so often to keep everyone on their toes!
On Halloween, line them up to your walkway, or surrounding your candy bowl with them to see if anyone dares to take a piece. No matter what you decide they are sure to be awesome and totally unique additions to your holiday decor!
Conclusion
Love this craft? Then what are you waiting for? Affordable and fun, it is an excellent way to add to your Halloween decorations. Whether you are a fan of the popular zombie genre and keep up with every show and episode, or just love the idea of having your own creations creeping around your home, this is definitely not a project to pass by.
We’d love to see your own creations! Please showcase them below! And, as always, please share!