That time of year is here again and, if you are anything like me, you put off your costume ideas and shopping to the last minute and are scrambling around for something fun, easy, and made from materials you just might find lying around your house.
I’ve already made these costumes and will tell you what you need, what to expect, and how to avoid the pitfalls I found with each of these costumes. I can tell you they are fun and you can even add your own creative twists if you like.
Here we go with three easy hand-made Halloween costumes that won’t cost too much.
Bat In The Neighborhood
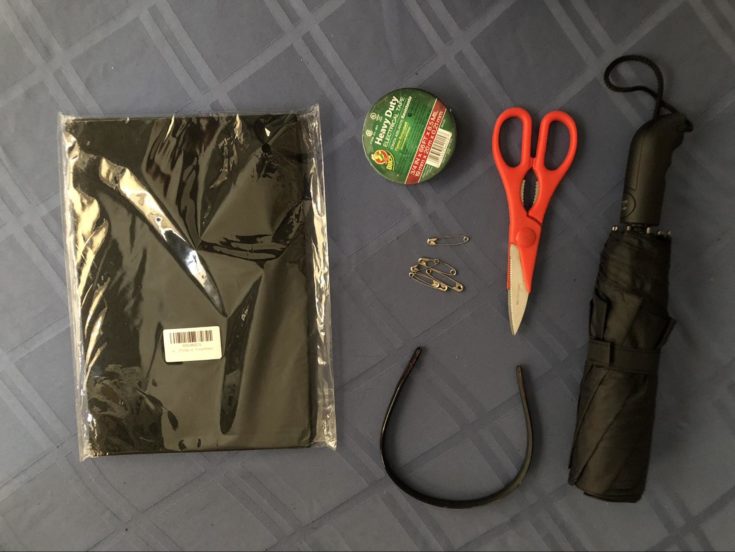
You know that ratty umbrella that’s been sitting in your stand unused when compared to it’s more colorful counterparts. Maybe it’s time to put it to better use. And you can do that by converting it into a truly creative and comfortable costume for your office Halloween party.
What You Need
- A black umbrella
- A black hoodie
- Black pants
- Black socks
- Black shoes
- Safety pins
- Black electrical tape
- Black felt with sticker back
- Black headband
- Scissors
Directions
Step One
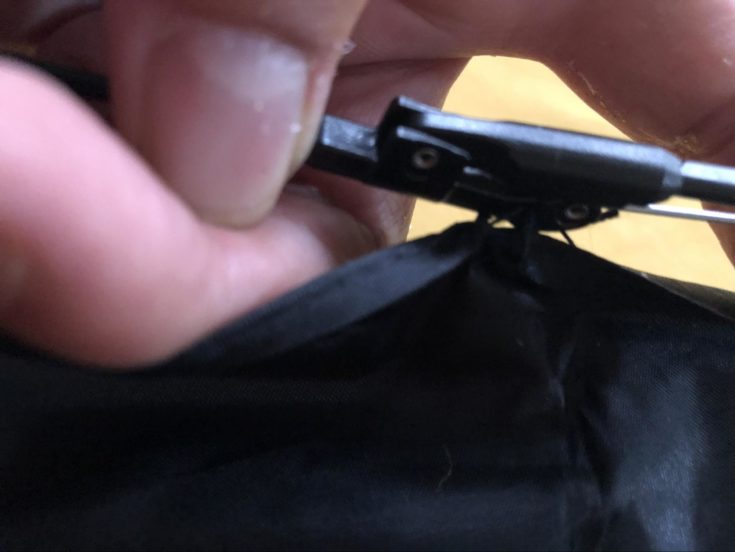
The first thing you need to do is cut the fabric off that umbrella. We all know they say it’s bad luck to open an umbrella in the house so if you are worried you can do this part in the yard. Open that umbrella and find a middle spine that goes from one side of the umbrella to the other. Take some good fabric scissors and cut the fabric free of the metal spine on either side.
Originally, I was planning on leaving some of the metal spines in the costume but they were too difficult to cut. I went with the option of freeing the fabric from the metal arms completely. As you can see in this photo, it’s only a few snips where the material is attached. At least that’s how it was for my umbrella. Not all umbrellas are created equally so take a close look at yours.
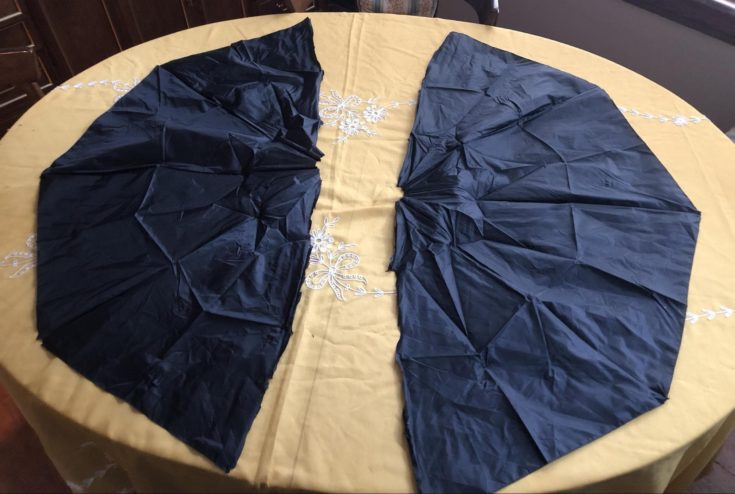
Once you have removed the fabric you should have two pieces that look something like this.
Step Two
Now you have to secure those wings to your black hoodie. The easiest way to do this is to put the hoodie on a large surface and put the arms out like a T. Then place the wings underneath so you can tell where you need to attach the wing to the hoodie.
You have a couple of choices when it comes to attaching your wings. You can put the safety pins inside the sleeves and along with the interior of your sweatshirt. Or you can just pin the wings to the hoodie and leave the pins exposed. I tried both ways and found it didn’t matter. That’s why we have black electrical tape.
However, you choose to do it, as long as the wings are attached to the underarm of your hoodie and along each side then you are doing fine. I will say that I originally thought I would only need a few safety pins to finish this project but it quite a few more than I anticipated. The good thing is the electrical tape covers them very nicely and can even secure some gaps in your wings.
Just a little side note, gaps in your wings are your call. By that I mean, if you leave holes where you have a scissor mishap or where you didn’t attach your wings to your hoodie your bat costume can get that decomposed look that puts a real shine on any dark Halloween costume. I chose to try and leave no gaps or holes with mine, as you will see.
Step Three
Now it’s time to make your wings. This is the point in the costume design where I had two choices, I could use a headband to secure my ears on my head or I could fasten them to the hoodie of the sweatshirt. I chose to use a headband so that I don’t have to keep my hoodie on the whole time, and the band fits nicely over the hood if you want to hide underneath it.
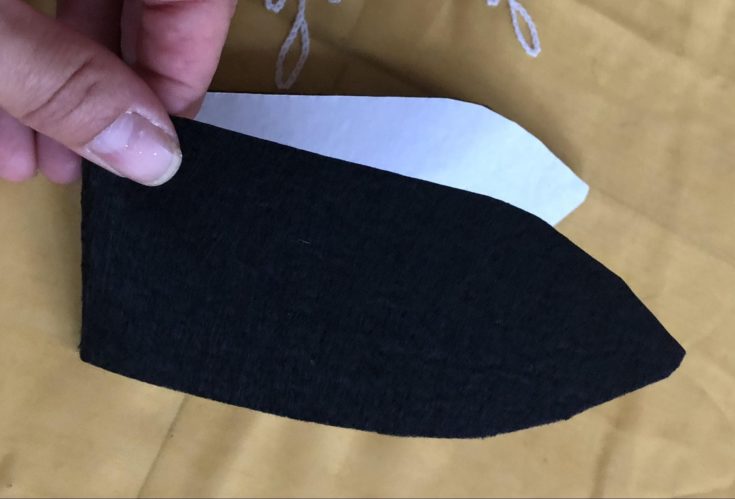
First, take one sheet of your felt paper with the sticky back and fold it in half. Then, starting at the folded end, cut out an ear. Bats can have large ears so don’t be shy. Plus, you need enough material to attach to your headband. When you are done you should have a piece that looks something like this.
You can cut the second ear freehand or you can place the first one, still folded, in front of the remaining felt and cut around it so that your ears will be even. I must add that, through trial and error, I needed to use the original ear otherwise my bat would have had significantly disproportionate ears.
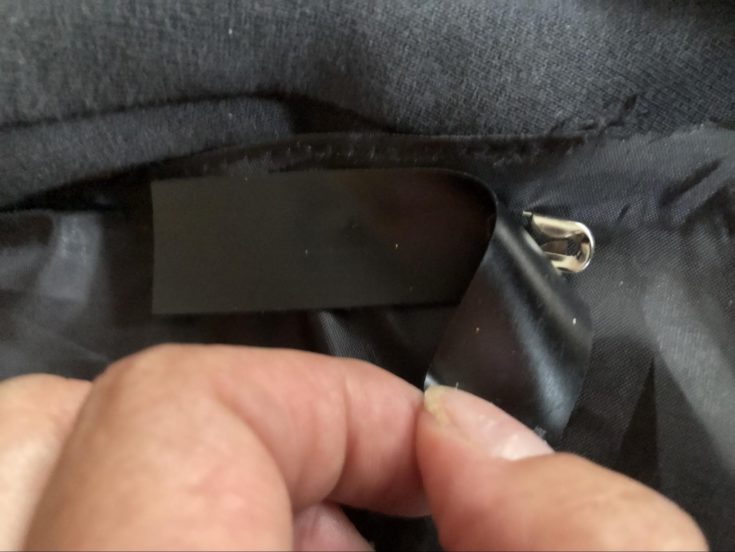
When you have both of the ears cut, remove the backing from one of the pieces and place it around the headband and bring the two points together. Be sure you leave room for the other ear and know you need some room for attachment on the bottom. This step requires patience and a soft touch.
Once that sticky backing is together it is impossible to pull it apart. If you place your ears wrong, which I did several times, you will need to cut those off the headband and start from scratch. So I highly recommend getting a package of felt paper to leave room for error. If you can’t find felt with adhesive backing you can use regular felt and a glue gun.
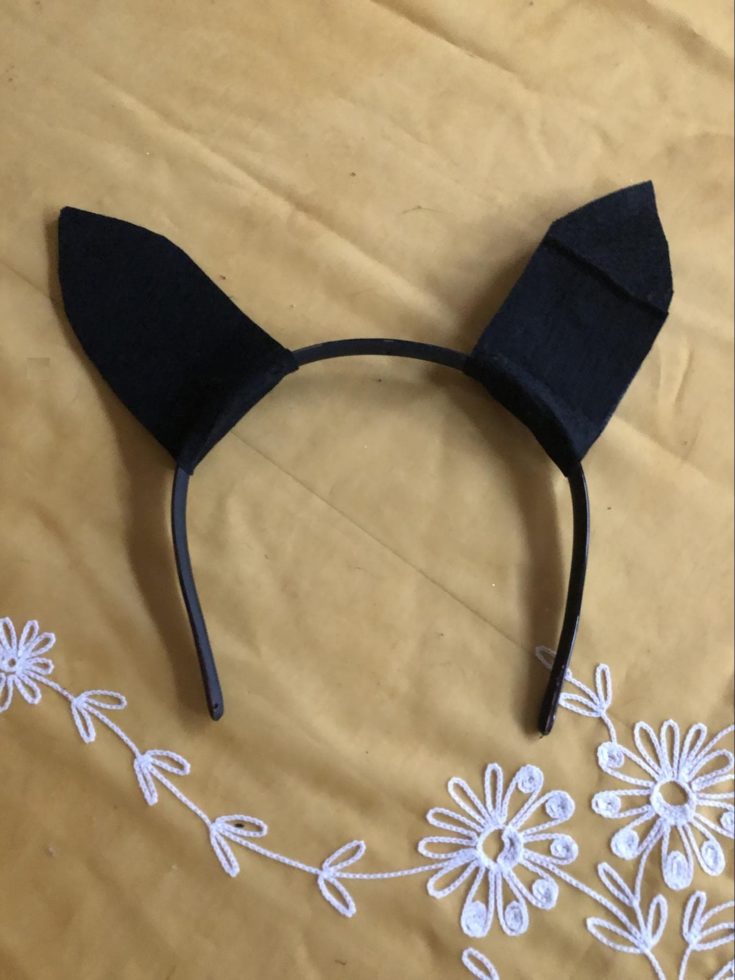
When you are finished your headband should look something like this.
Step Four
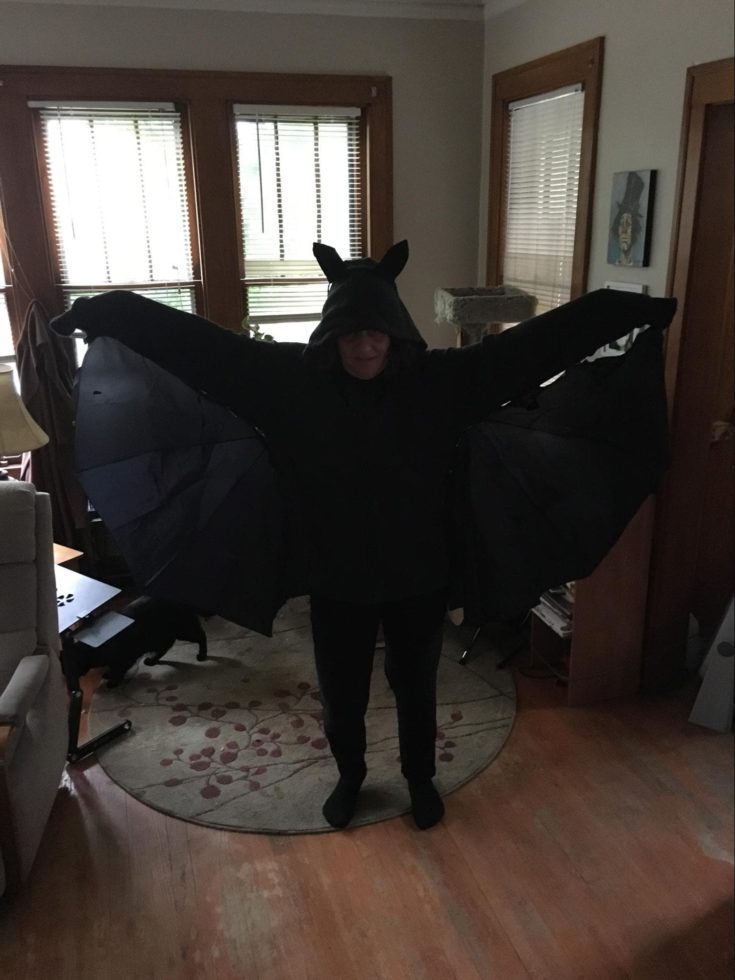
All you need to do at this point is to put the costume on. I left holes in mine to give it a frayed look. Or maybe some of the electrical tape came loose. All I know is that this is going to be one comfortable costume come Halloween.
Bird Mask
When I first read about this DIY costume I grew very excited. It’s been some time since I’ve been able to grab Elmer’s glue, scissors, and glitter and just have a great old fashioned childhood project like this. Which is why this costume is a great choice for anyone out there who has children to keep occupied.
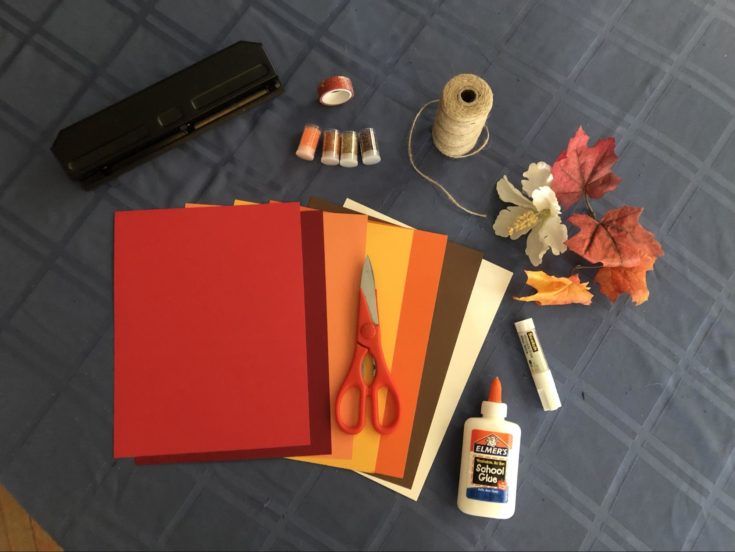
What You Need
- Colored paper (you want a thicker stock for a sturdy mask)
- Scissors
- Pattern Washi tape
- Glue
- String
- Hole punch
- Glitter
Directions
Step One
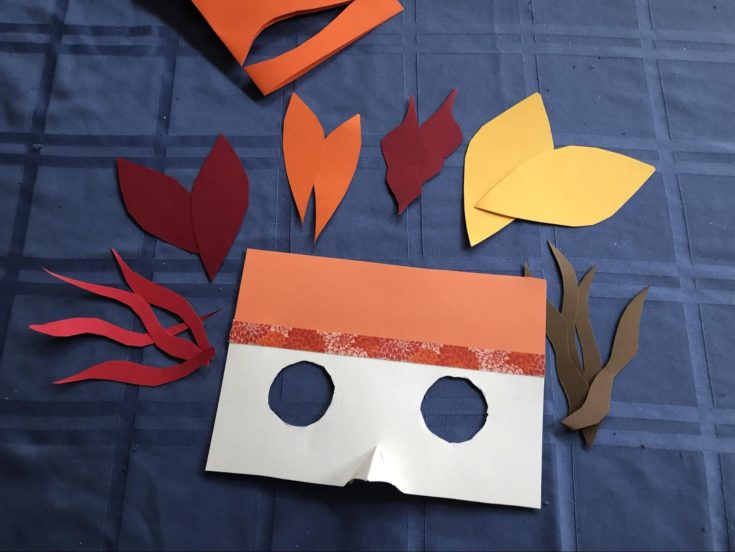
The best place to start with this costume is the base, which will be the part of the mask that will be on your face. I just cut a little more than one-third of the white card stock from the long side. Then I marked spaces where I will attach my nose, cut out my eyes, and attached the feathers I will cut out.
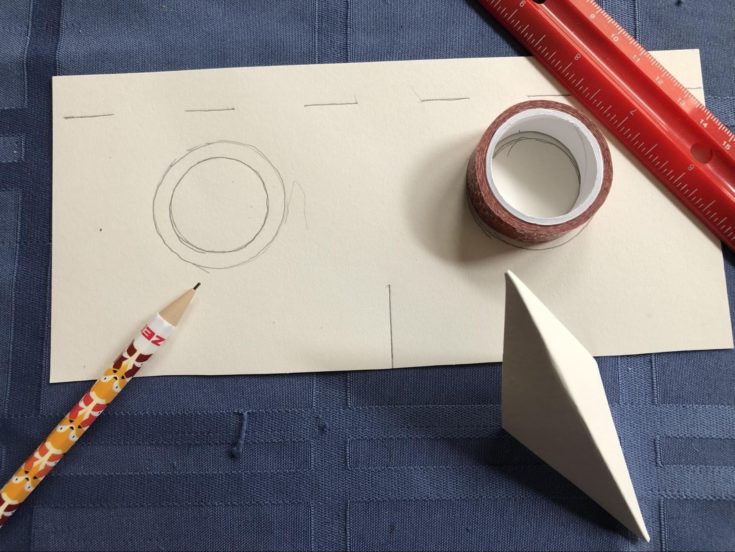
The diamond looking piece in the photo is the nose that you will attach in a moment
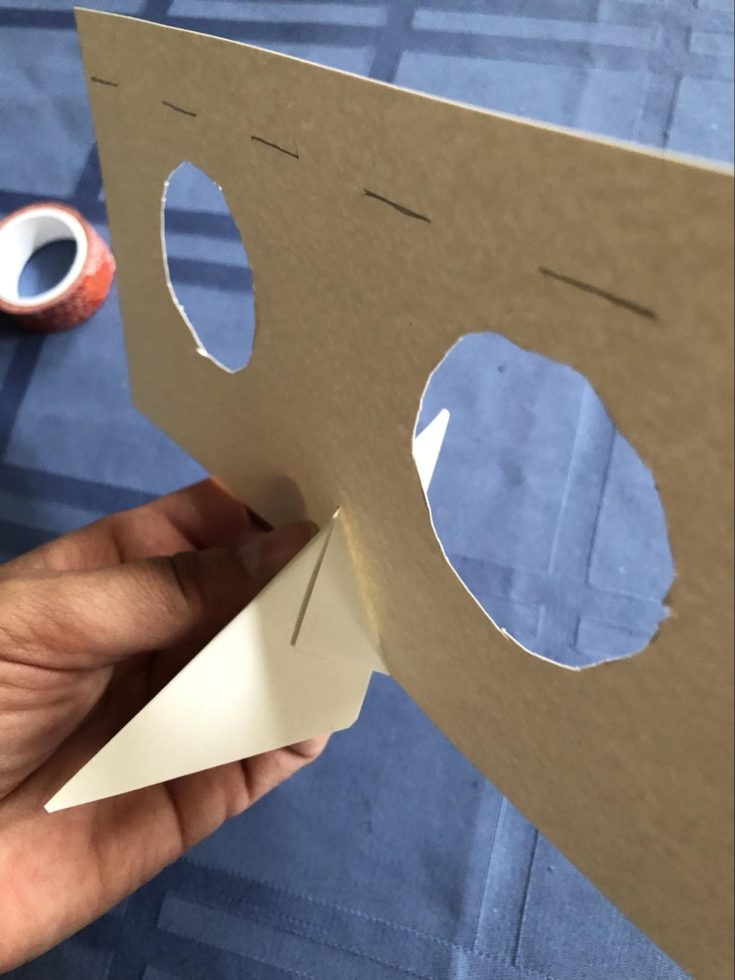
Step Two
Next, we will attach the nose. It’s pretty simple. All you do is cut the line where the nose will be and fold over each side.
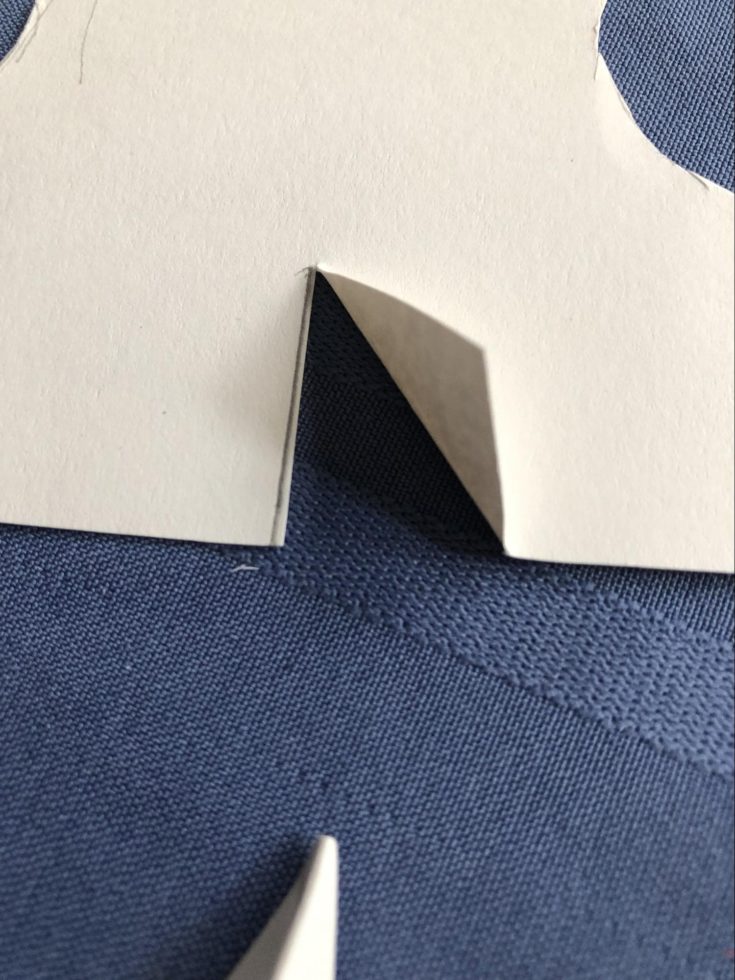
Apply some glue to the flaps that will be resting on your nose piece. Then, insert the nose piece you made and place the glued flaps gently. Give it some time to dry and then use some scissors to cut the back part off.
Step Three
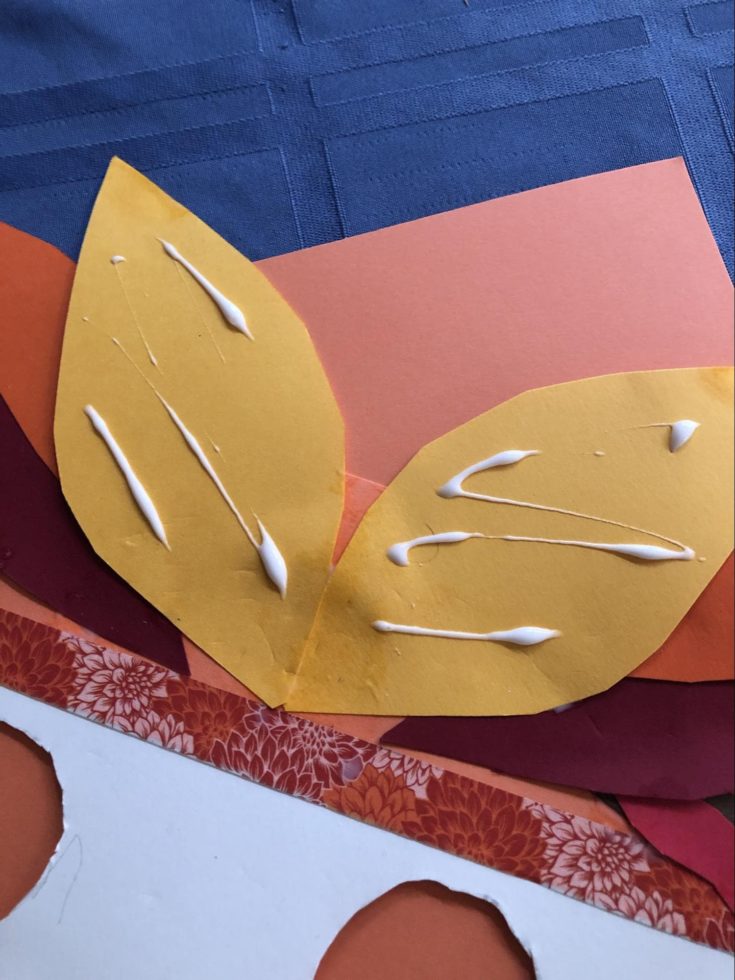
Now that the base of your mask is ready you can start to decorate. I began with cutting a portion of the peach paper and fastening it to the top of the base just below the marks I made. That added rectangular piece is where I will start gluing my feathers.
But before I do I am going to add some pretty Washi tape to it to help it blend well and give the design some depth. Using crayons or colored pencils for beginners would be a great activity for the kids.

Step Four
Start cutting your feathers. If you are like me and need symmetry in your life then the best way to do that is by folding your colored paper in half so that you get two feathers that look the same. That way you can have an even amount on both sides of your face. If non-symmetrical designs don’t give you panic attacks like they do me, then cut them any way you want.
The more feathers you have the more of a headdress you can make.
Step Five
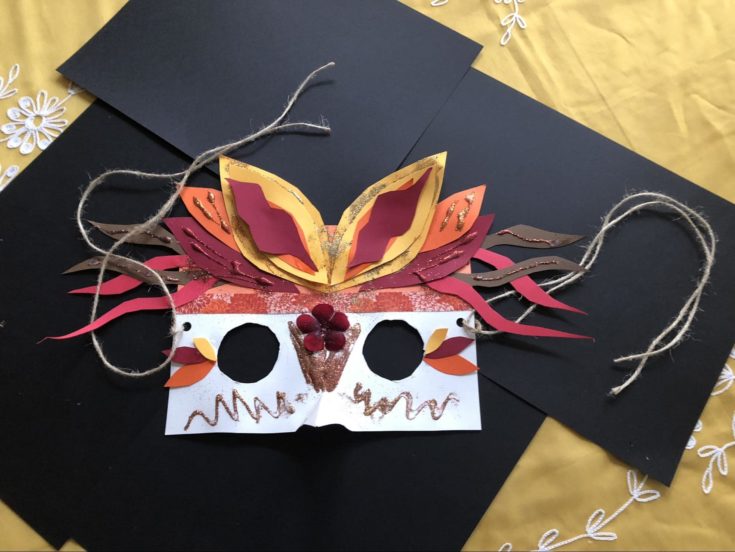
Once you have a good amount of feathers cut you can start gluing them to the base. I started with big yellow ones in front and then started to tuck and glue them around the eyes. This is the time when you can start adding glitter as well, which is always fun but a complete mess!
I tried spreading the glue with my finger and then adding glitter but it didn’t work out as well as if you just make a few lines and sprinkle some on top. This is a good time to remember how your grade school art teacher taught you to use glue and glitter. Make sure there is plenty of paper underneath not only to save the mess, but you can lose a lot of excess glitter otherwise.
Step Six
Personally, step five took a lot of trial and error for me. I used too much glue and the glitter was messy so I had to cover up some mistakes. Luckily I had more paper and covered some of them up. The most important part of this is to let your creative juices flow. Besides, when it comes to art, it’s always fun to try and work your mistakes into the final product.
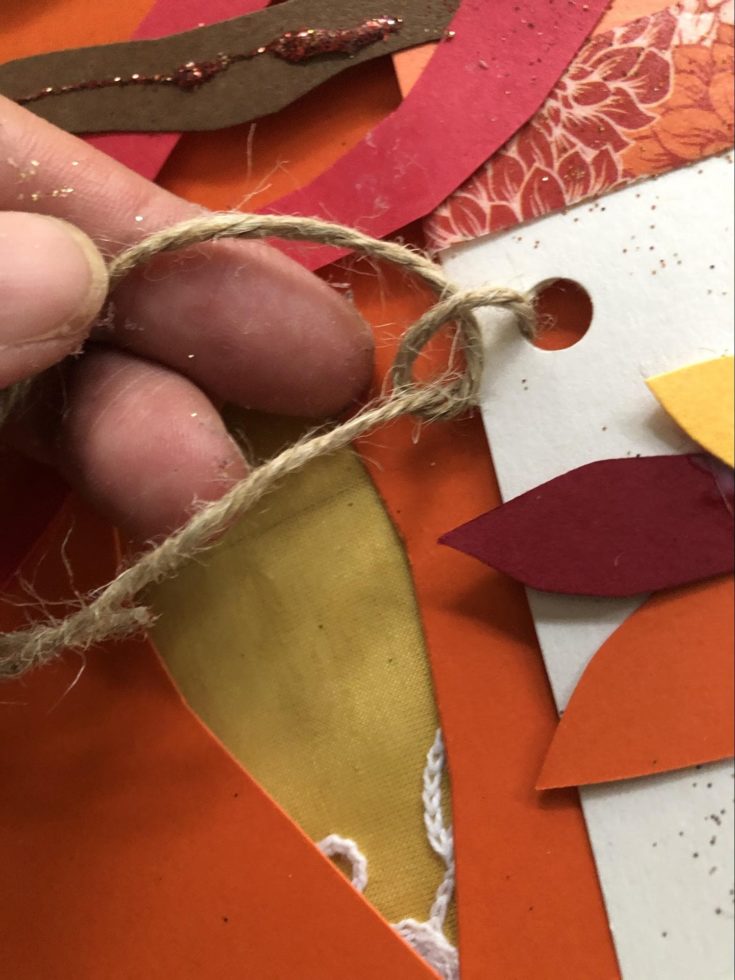
Once you have a finished mask, punch a hole on either side. Cut out two pieces of string that you can put through and long enough to pull around the back of your head to tie. I just tied it by the hole punch to secure it so each side had two strings to tie behind my head.
Once you do your mask is ready to go. Of course, make sure the glue is dry so that you don’t ruin the hard work you’ve put in.
Stickman
Of all the costumes I made for this piece, this one was the most difficult and, I felt, had the best results. When going into it I had my doubts about whether or not it would work but, as you will see, I was pleasantly surprised.
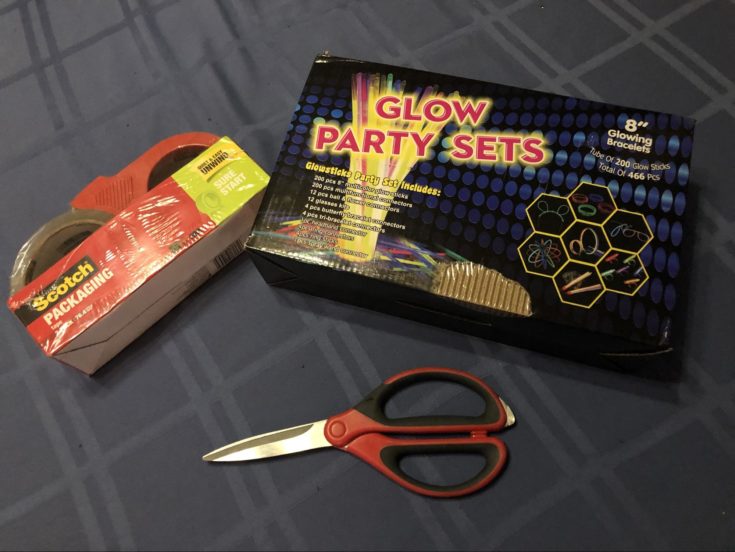
What You Need
- Glow sticks with fasteners
- Scissors
- Clear packing tape
- Black pants
- Black long sleeve shirt
Directions
Step One
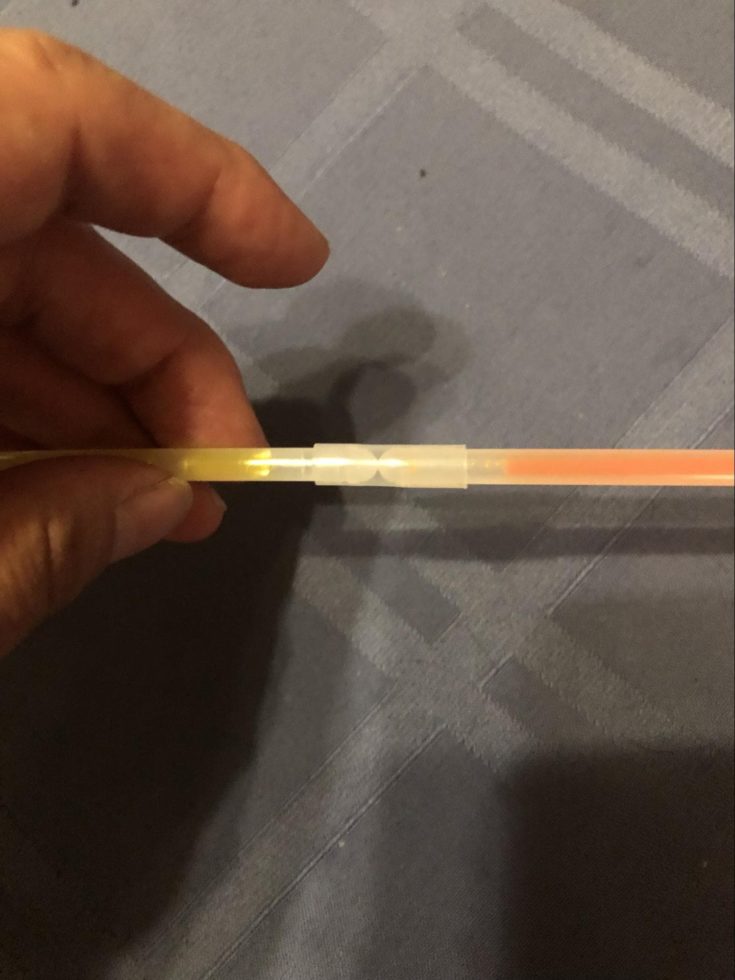
Put on your black clothes and then start taping sticks to yourself. The biggest thing to remember when assembling this costume is to not crack your glow sticks until the very end. They will start cracking when you’re moving around while taping them to yourself and you don’t want to run the risk of them losing their potency too soon.
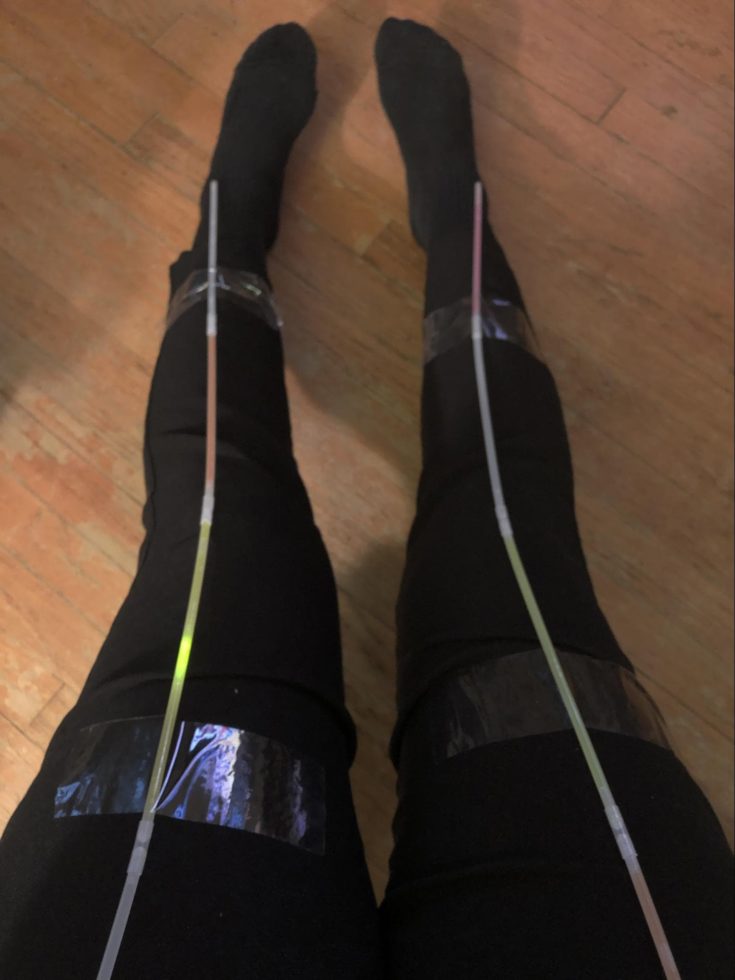
I tried connecting them first but they kept popping off when it taped them to myself. So be sure to get the ends of each stick in the connector the best you can. If they pop out then you just have to put them back in. Be sure to bring your patience when you are making this because the sticks are rigid and challenging to work with.
Step Two
Once you have the body done you can make the head. This is just a circle that you will attach to your colorful neck.
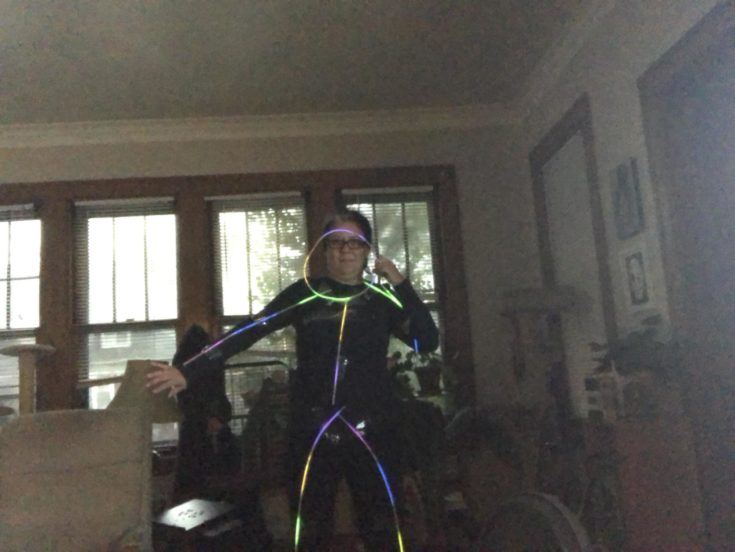
Step Three
Once you have all the pieces in your stickman skeleton in place all you need to do is turn off the lights and wow your friends.
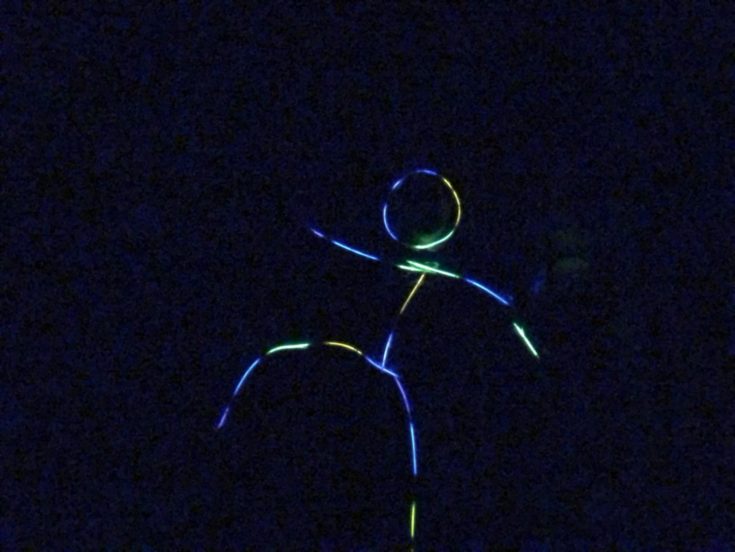
I was surprised at how well this costume worked out. But I have to add that this idea is a bit difficult to get around in and the sticks aren’t too keen on staying in place most of the time. But if you are walking around a dark neighborhood you’re sure to stand out in this DIY costume on Halloween night.
Conclusion
Making costumes is part of the fun of the season. Sure, you can pop over to the local store and shell out a lot of cash for something that you’ll probably see on more people than you want to count. These costumes are unique and might even win you the Best Costume trophy at your party.
Click here for another Halloween craft idea.