If you have a plethora of wine bottles or other beverage bottles laying around, like I do, you probably have some awesome ideas floating around about what to do with them. However, intact, they are somewhat limited in their use, but knowing how to cut them safely opens up a whole new world of crafting ideas.
If you have been wondering how to cut a glass bottle with a glass cutter, this is the article you have been searching for. I’ll be providing my own step by step guide below, including what tools I suggest you use, and what not to do when learning.
What You Need to Cut a Glass Bottle

I believe a solid, strong work surface is a must for cutting glass. I prefer working on the floor to get the pressure I need and suggest laying down cardboard, newspaper, or a tarp to collect any shard of glass that may fall away from your cutting.
Clean Glass Bottles
Make sure you have clean bottles, both inside and out, before getting started. Leftover glue residue from labels, dirt, and dust can interrupt the blades movement and create breaks where you don’t want them. You can use any size bottle you want, but I also suggest practicing on smaller bottles before moving onto larger bottles. Square liquor bottles can be a challenge and may require a special cutter.
Bottle Cutter Frame

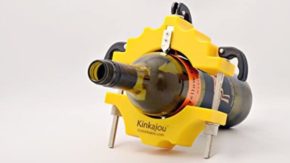
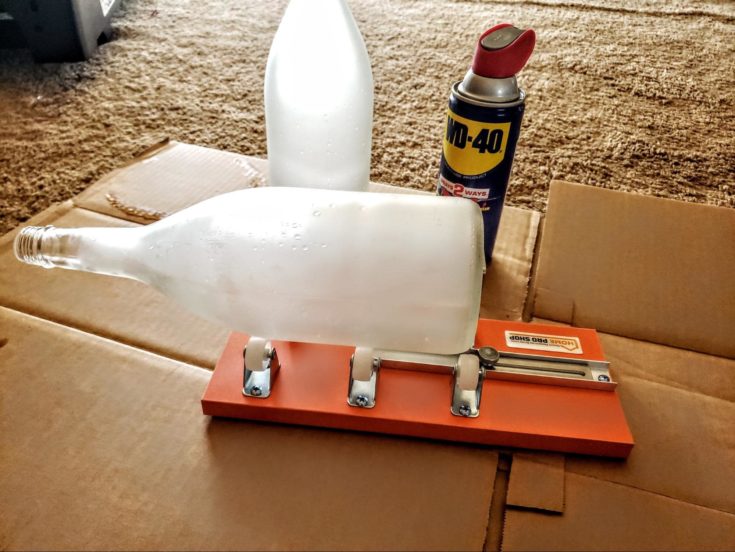
Although it is possible to cut a bottle with a regular glass cutter, an acid-soaked string, or a dremel, you will save yourself a lot of grief and broken bottles if you invest in a glass cutter specifically set up for bottles. These provide an adjustable frame for your bottle to rest on and also allows you to push against as you turn your bottle for an even cut.
Oil Lubricant
I find my cuts are best when I use a lubricating oil of some sort. Although there is a special glass cutting oil, I always turn to my trusty WD-40 (plus there is always some in the garage) to help lubricate the cutting blade and allow it to move smoothly over the glass.
Sandpaper
Both gritty and fine sandpaper works to help smooth out the edges of the bottle once you break it apart.
Hot and Cold Water
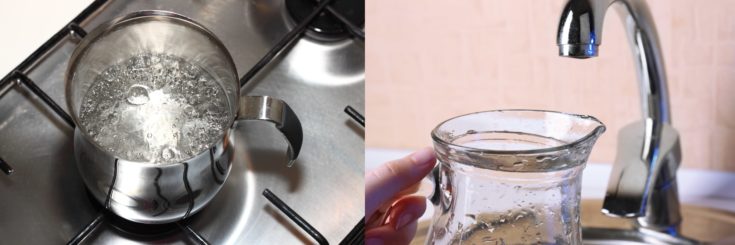
You will want boiling, or near boiling water, as well as cold water. If your tap water runs cold it will be enough, but if you are unsure, fill a water jug and place it in the freezer to cool further. If you have a pan or buckets to use with the water to submerge the cut, you can use those as well. I simply poured the hot and cold water on the glass score but it would have been easier with pans.
Safety Equipment
Always consider the use of safety glasses and gloves when working with glass. Small shards can shoot upwards or break free, plus the cut edges are extremely sharp to work with.
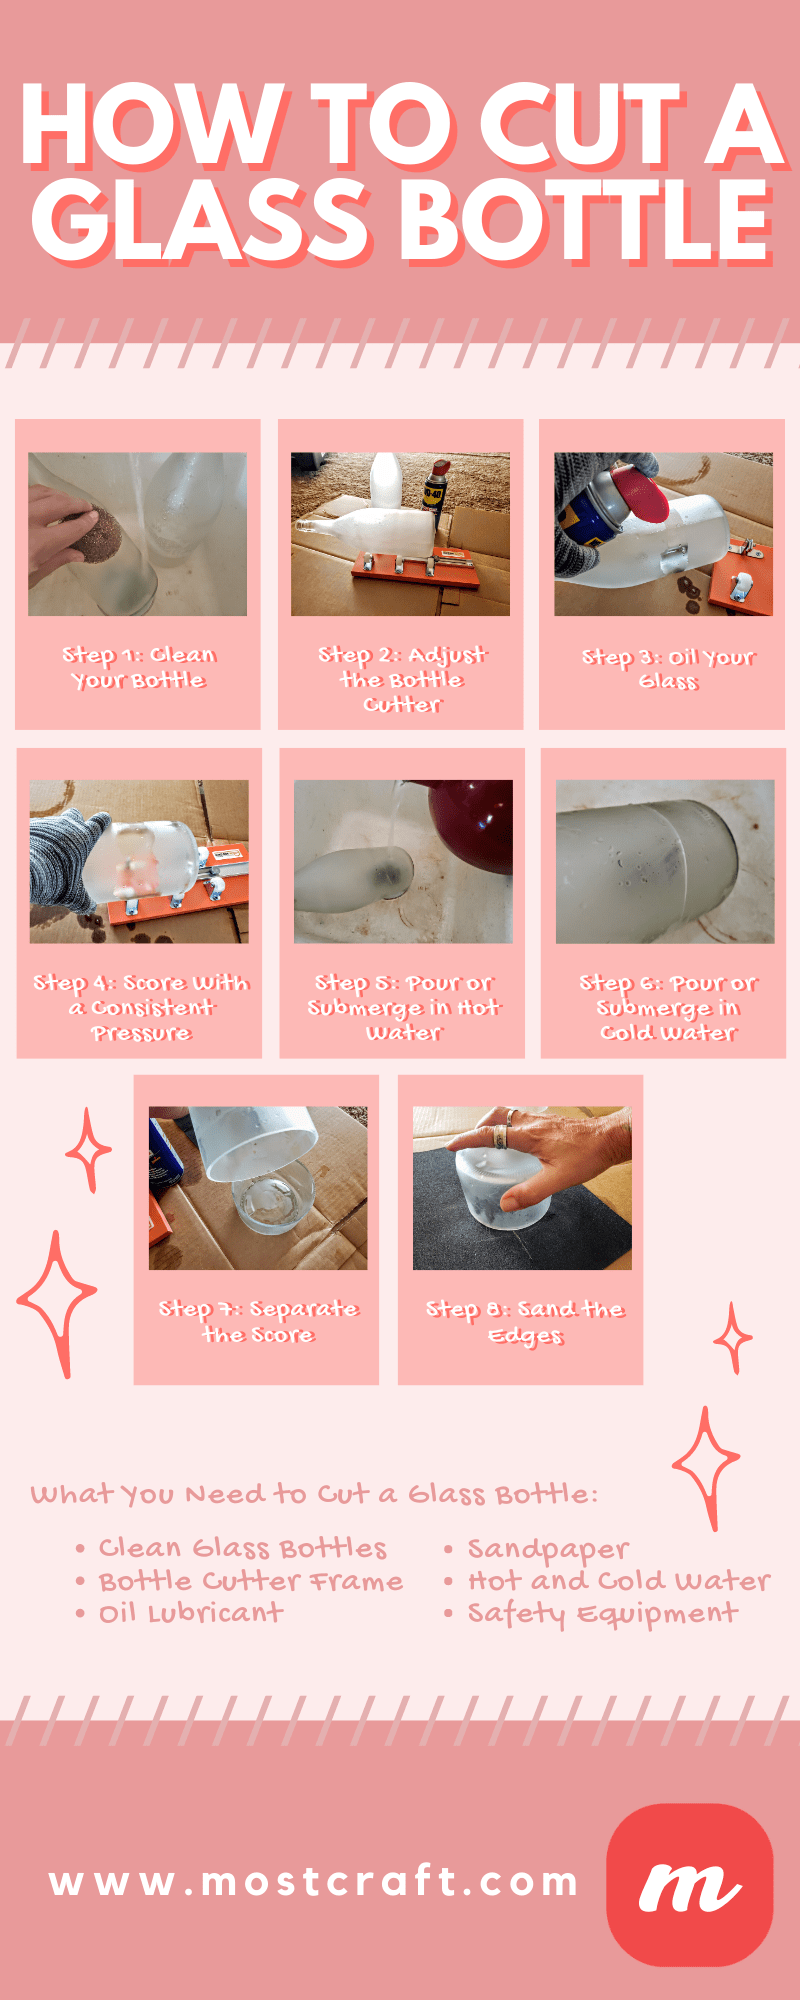
Step 1: Clean Your Bottle
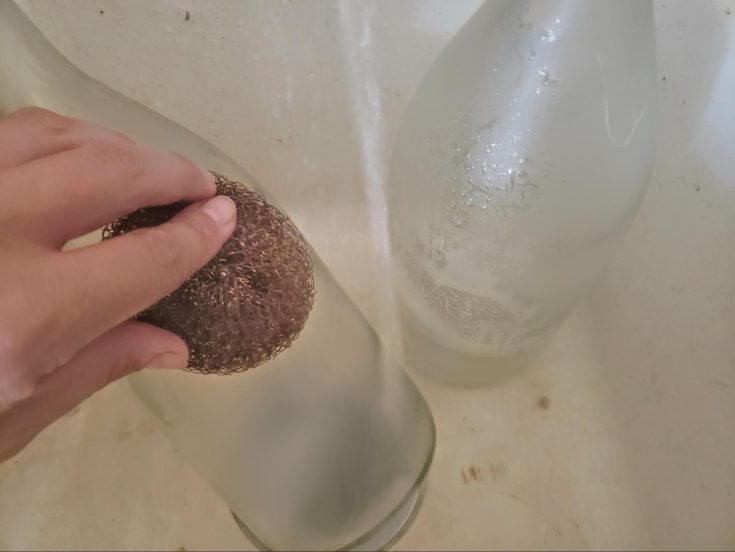
There are various ways to clean and remove labels from bottles. Soaking in hot water with baking soda, using orange oil remover, or even scrubbing it off can all be effective. Sometimes it depends on the type of label as well. The labels in my bottles peeled off easily and only left a slight residue behind which scrubbed off with a little hot water and soap.
Be sure the bottle is well cleaned and dried to avoid any dirt or adhesive from getting in the score while cutting.
Step 2: Adjust the Bottle Cutter
Bottle cutters are fully adjustable and allow you to place your bottle exactly where you want it to cut. Whether you want to cut the top off a glass bottle, the bottom, cut it in half, or cut it into multiple bangles, this is the tool that can make it happen.
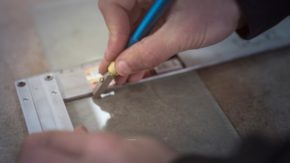
If you are wondering how to cut at an angle, you are better off doing this by hand with a string. Take a look at this tutorial to see how this is done. There are also special glass cutting blades used with a grinder. However, this is not a suggested method as many bottles shatter.
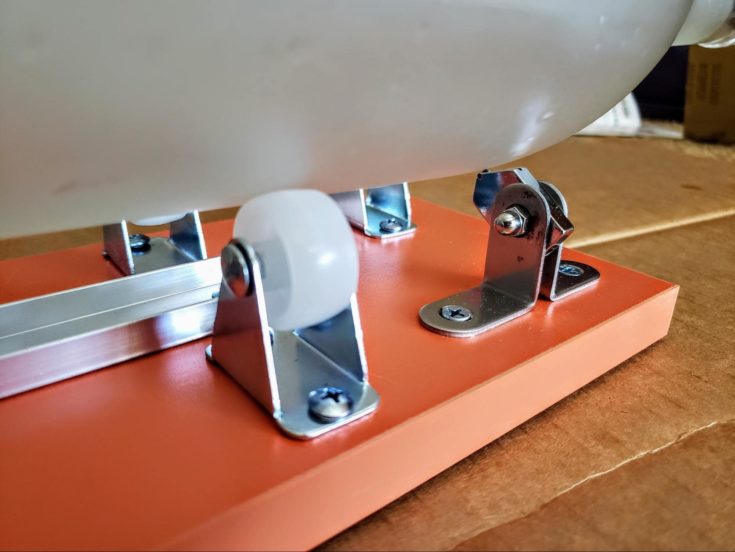
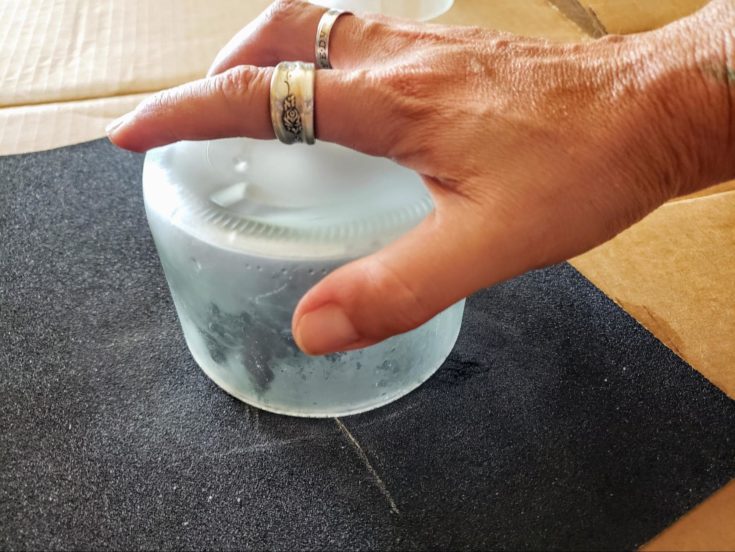
To determine where you want to cut, place your bottle on the cutting board up against the metal cutting wheel. Then loosen the screw that holds the ‘backboard’ in order to set it snug against the bottom of the bottle. Be sure to tighten well as you will push against this as you score the glass to help keep it even.
Step 3: Oil Your Glass
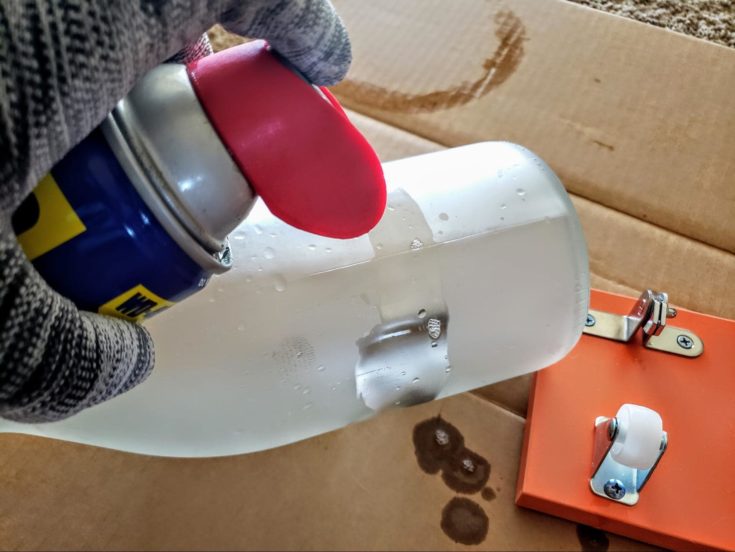
Rotary glass cutters such as this don’t have an oil reservoir to help oil the blade as it cuts. Instead, oil the area of the bottle you plan on cutting, making sure it goes all the way around. I have always found my cut to be much smoother when I do this and am less likely to pick up any dirt or dust in the score.
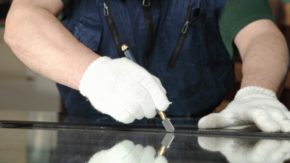
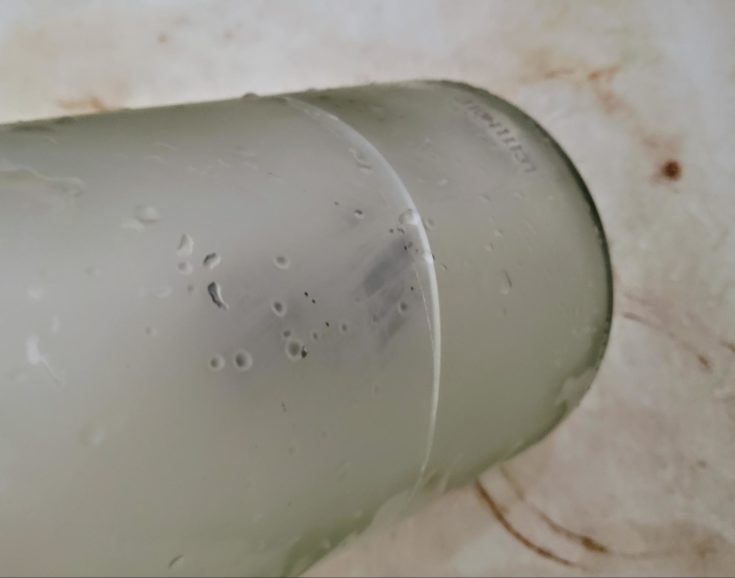
Step 4: Score With a Consistent Pressure
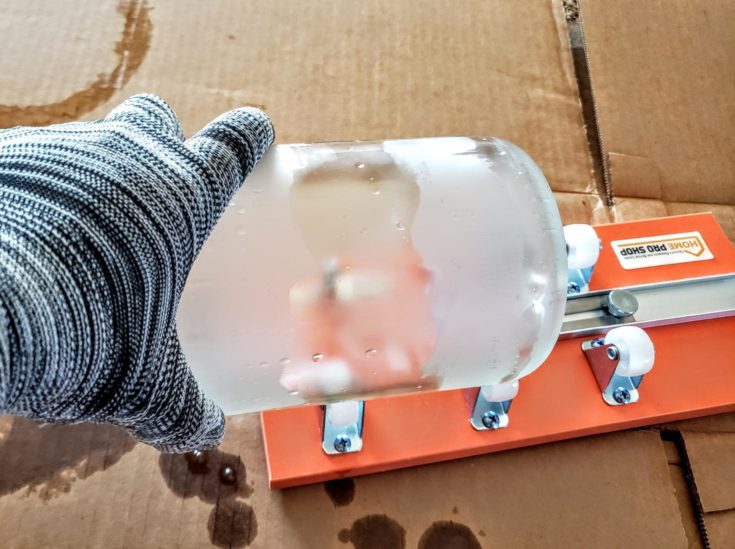
When cutting your glass, you are actually creating a consistent score that will later break. It is VERY important to be consistent with your pressure and to only create ONE line around the bottle. Use BOTH hands to apply pressure down and towards the backboard as you turn (I had to take my hand off for the picture).
You are going to apply approximately 6 pounds of weight to the bottle as you turn it, and you will hear a ripping sound. If it sounds gritty you are pushing too hard, or you are overlapping an existing cut. Usually, a slight adjustment is all you need to lighten up your touch.
I will suggest practicing with small bottles at first before graduating to larger bottles. And no matter what, only create ONE line. It seems to make sense that going over the line more than once would make it break more easily, but all you will do is end up with cracks and uneven breaks.
If you are new to this, you will make mistakes until you have a good feel for the skill. Pay close attention to what mistakes you feel you may make while cutting so you see the results later and can fix them the next time you cut. Don’t worry, it isn’t hard to master, it just takes some recognition of what you are doing.
Step 5: Pour or Submerge in Hot Water
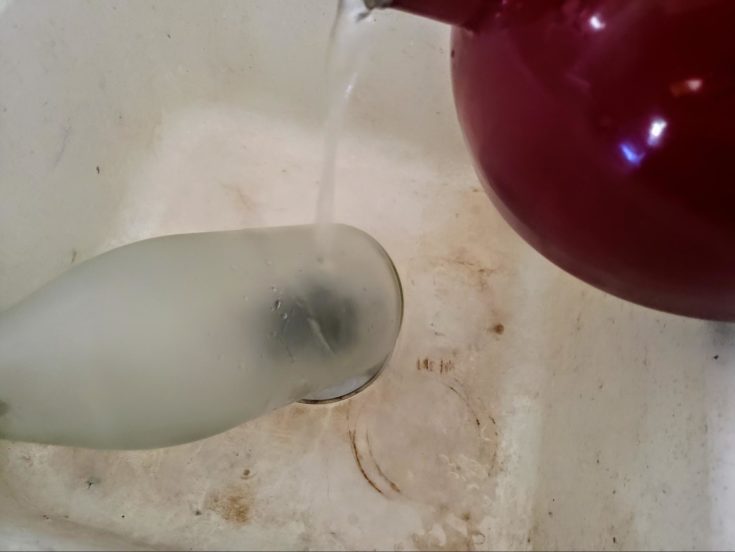
I do strongly suggest you do your breaking over a work sink or in pans in case of glass shards. I poured boiling water over the score, turning it as I poured to ensure it heated up well. You can also simply dunk the bottle in boiling water, hold for a second and then remove to add the cold.
Neither is difficult, but dunking in a pan or bucket is more consistent. I simply didn’t have the room in my work space for this.
Step 6: Pour or Submerge in Cold Water
Immediately pouring cold water over the heated glass will cause your score to begin to separate. You may hear a ‘pop’ as the sides break free from one another. If you do not see the score separating, or it doesn’t go all the way around, simply repeat the hot and cold baths.
Step 7: Separate the Score

Usually, the hot and cold baths will break the bottle free from itself without having to apply any additional pressure. If your glass doesn’t break free without your help, give a gentle tap to the bottle near the score, or take both sides in your hands and twist slightly away from one another.
If it still doesn’t separate, repeat the hot and cold baths again. Sometimes it takes multiple tries and forcing the bottle apart will only break it.
Step 8: Sand the Edges
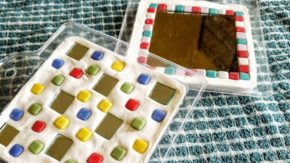
Be careful as the edge of your split bottle will be sharp. To help combat that, simply sand the edges well. This will leave behind a smooth surface that is safe to touch and work with. Even if you aren’t sure what to do with one side of the bottle, don’t get rid of it as they can make great planters and work as key and loose change holders.
Conclusion
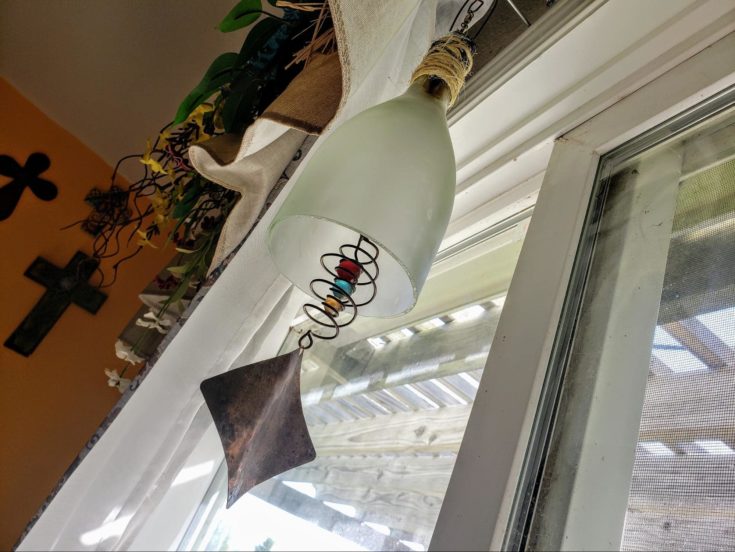
Don’t get dismayed if you break a few bottles through this process. When I first started I broke A LOT- mainly because I overlapped my score and rushed through the process. But once you have it down to a comfortable art, you are left with a wholly unique product that allows you to do all sorts of things.
Obviously, I was on a mission to create some fun windchimes and sun catchers, but there are a ton of different ideas you can use with cut glass. Check out these 47 awesome ideas that utilize old bottles, and feel free to share your own inspirational tips and tricks with us below!
And, as always, please share!