Are you now the proud owner of a new sewing machine? Don’t be intimidated by the looks of it: while sewing machines may seem like complicated gizmos, they aren’t that hard to understand with a little bit of practice. If you want a quick guide on how to use a sewing machine, here are some tips to help you get started.
What You’ll Need
When you’re on your new journey into the wonderful land of sewing, you won’t really need that many things, unless you already have a specific sewing project in mind that you want to go with, in which case the list of must-have items will differ depending on the craft project in question. This particular article shows how to use a sewing machine for beginners. If you want to learn the basics of how to use a sewing machine, you will need:
- The actual sewing machine
- Spools of thread
- Some fabric to play around with (preferably not something too thick, so avoid denim and leather).
- MUST-HAVE: The machine’s instruction manual.
Note: There are so many different models like mini sewing machines, handheld, and so on. The manual for each is important to keep. The instruction manual is like the Bible when you’re trying to learn how to use and how to load a sewing machine. It is a clear guideline that will show you the name and placement of each and every part of the machine, teaching you the role and proper maintenance of the mechanisms. While we can give you some general guidelines, every machine model is different from another, which means that the parts on your particular machine might be located somewhere else.
Step-by-Step Instructions: how to learn to use a sewing machine the easiest way
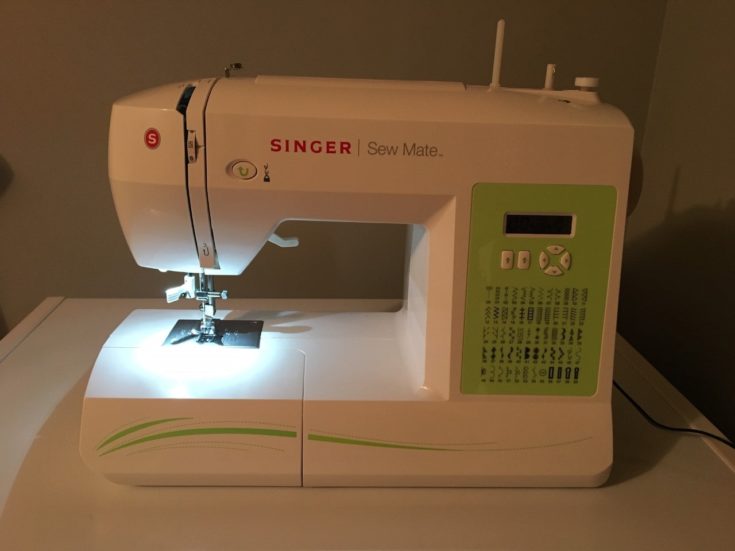
Step #1: Learning the parts
- You can’t really operate a new sewing machine if you’re not sure what the components do and how you have to manipulate them in order to sew a piece of fabric. You will have to start off by identifying the location of the power switch, will help turn the machine on and off.
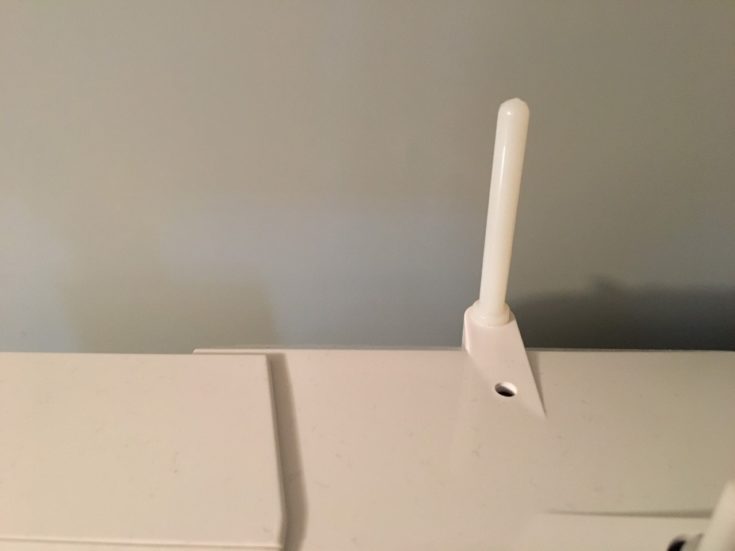
- Then you need to know where the spool pin is (generally located on the top of the sewing machine). This is where you’ll place your spool of thread.
- The thread guide is the next component you have to identify. This is a thread guide that connects the spool to the bobbin winder. It is generally located on the top of the sewing machine, mostly on the left side.
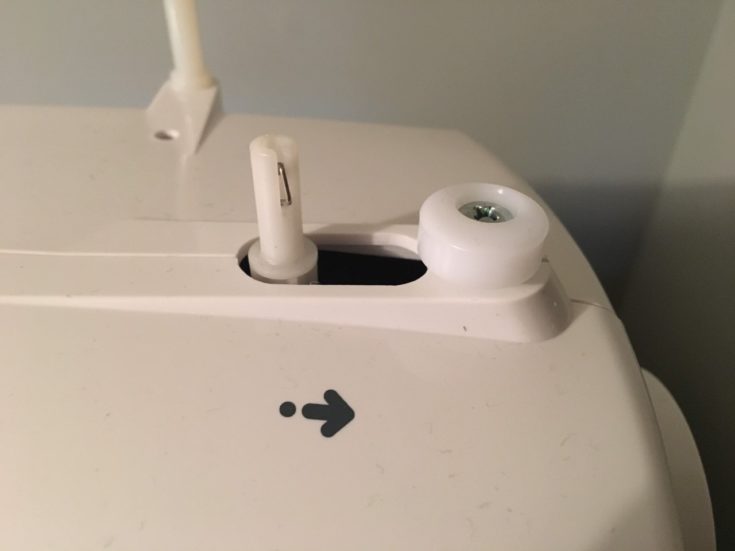
- The bobbin winder should be at the right of the spool pin. You should be able to find a metal or plastic pin that’s accompanied by a horizontal wheel. These two are the bobbin winder and the winder stopper. Both of these works together in order to make sure there is actually a thread on your bobbin before you start sewing.
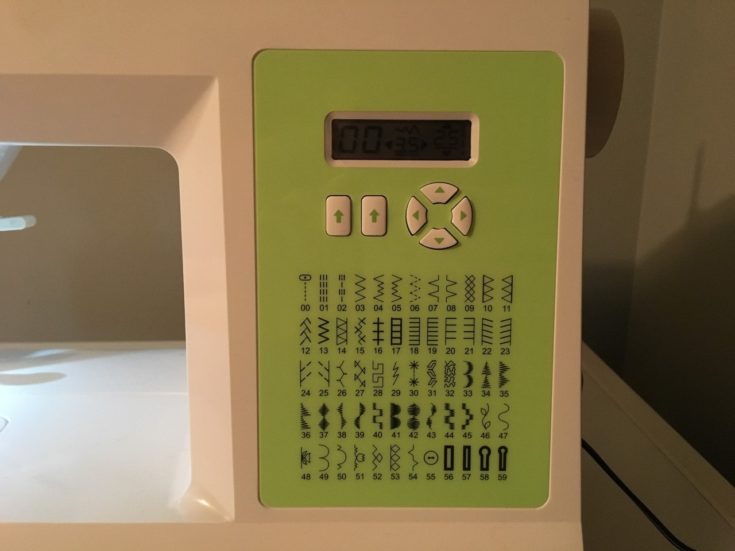
- Depending on the type of machine that you own, you will have to locate the position of the stitch adjustment buttons. These can take many forms, but it depends on whether you have an industrial, manual sewing machine, or a computerized/electric sewing machine. These buttons serve as stitch selectors, lengths of stitch adjustments, and stitch direction.
- The thread take-up lever is also important because the thread from the spool has to go around this component.
- The tension dial will help you safely control the tension of the thread while you’re sewing. You will most likely find it near the take-up lever.
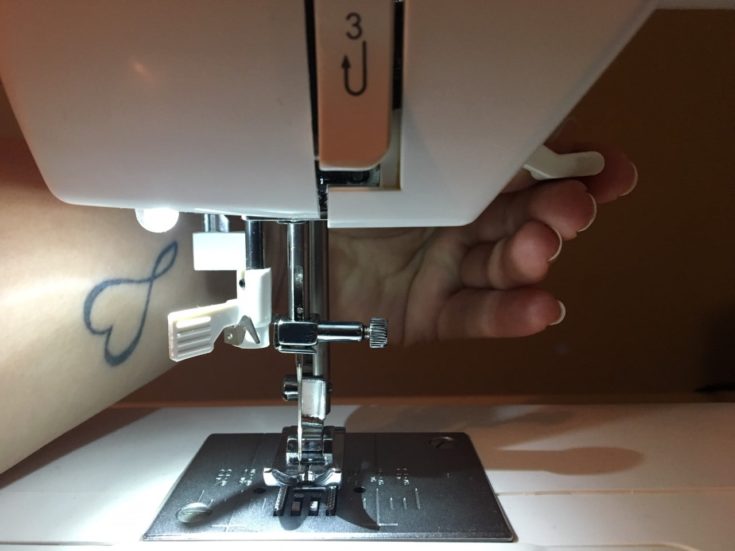
- The presser foot is yet another important component that will hold the fabric in place while you’re sewing. This presser foot is connected to a lever that can raise and lower it.
- The feed dog is located underneath the presser foot and it’s easy to identify if you look for two metal rows. This will move the fabric through the machine while you’re sewing.
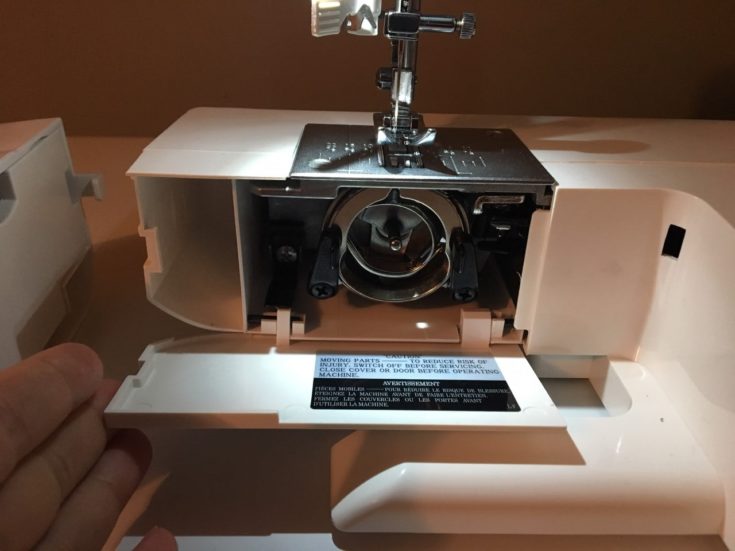
- Last, but not least, you have to locate the bobbin cover and bobbin release. The bobbin’s role is to provide your sewing machine with a little bit of thread that goes on the bottom side of the fabric you’re working with. Hidden underneath the metal plate of the machine’s needle you can locate the bobbin cover, which will uncover the bobbin that’s used for fabric backing.
Step #2: Setting up the machine
- You want to make sure that you’re using the machine on a perfectly flat surface. If you decide to work sitting on a chair or not is totally up to you, as some people are more comfortable when they’re standing. Just make sure that you position the machine to have the needle on your left side.
- Put your needle in its designated slot. The instruction manual of your machine should come in handy just about now, with all the steps you need to take in order to make that happen.
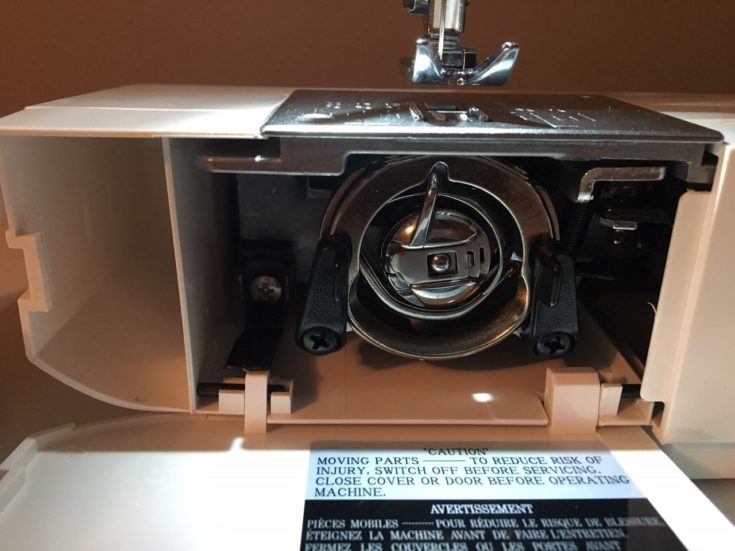
- The next step requires winding and inserting the bobbin. Keep in mind that machines have both a top thread, as well as a lower bobbin. Once again, the details for this step should be written inside the machine’s manual.
- The thread on the top spool goes in the needle, but not before you unwind it. You will have to take the thread, pull it through the thread guide, and then around the take-up lever. Depending on the type of machine you have, you should be guided through this step by a bunch of arrows and numbers printed on the machine.
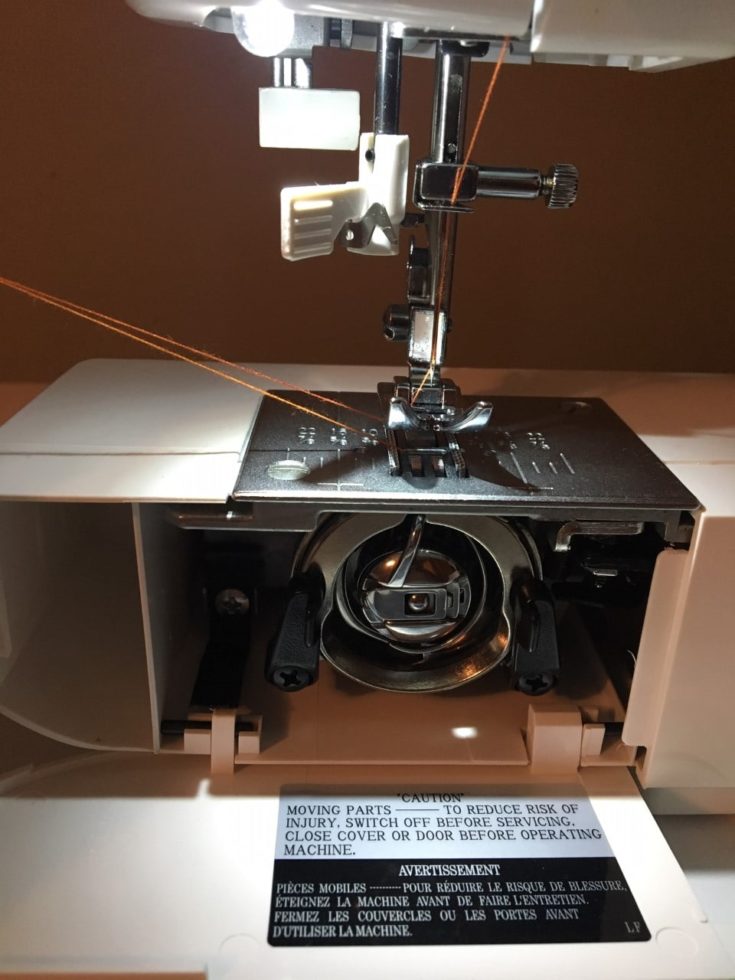
- Now you’ll need to get both threads out. This step is a bit more complicated than others, so pay close attention. Check the instruction manual to see how this is done for your particular machine model.
- When the thread and needle are in place (read how to change the needle here), you can now plug the machine into the power socket and start using it.
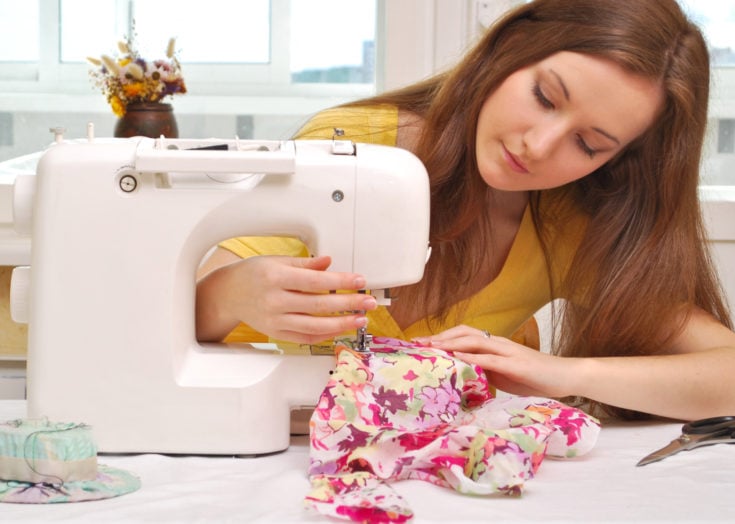
Step #3: Sewing
- Consult your manual to see how you can select a medium and a straight stitch length.
- Take the piece of fabric you have prepared for practice, and remember to choose a simple material.
- Line up the piece of fabric you’re going to use under the needle.
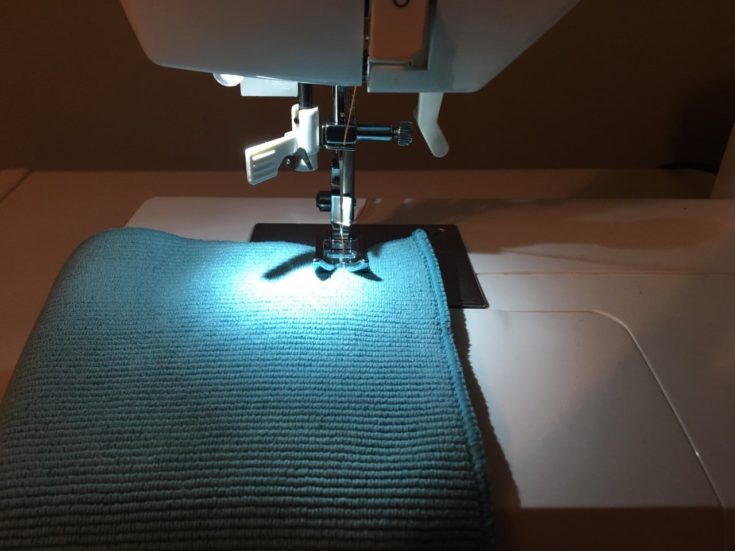
- Using the designated lever, lower the presser foot to hold the fabric in place.
- Grab the loose end on both of the thread you’ll be using. You will have to hold them for the first few stitches in order to prevent them from retreating into the piece of fabric you’re working with.
- If your machine has a foot pedal, you can press it.
- Try to get used to the reverse lever or button on your machine, it will be useful when you want to change the feeding direction.
- Use your right hand to operate the handwheel, and move the needle to the highest position.
- When you’re done stitching, you will have to cut the thread by using scissors. However, most machines now have a thread cutter integrate on the presser foot host.
Conclusion
Sewing does seem like a complicated process at first, but it’s something that you get used to quite fast. You will have to practice sewing through different kinds of fabric before you can move to more complicated projects. To avoid frustration, start by practicing different types of stitches and fabric, and you’ll get the hang of it in no time!