Jars are hip for much more than storage. They can be used for flower arrangements in rustic wedding themes or to replace the traditional pumpkin for scary faces on Halloween. A fun way to make use of those extra jars you have lying around your home, pantry, or craft area is to create jar halloween luminaries.
Halloween is a great time to start this project because you can use them without fear of rotting or squirrels ruining all your hard work. Speaking of that, think of how long it takes to carve a pumpkin not to mention the mess that comes along with it. We say, this year, grab the following things and buy your pumpkin seeds at the store instead.
How To Make Lanterns Out Of Mason Jars
This is a simple enterprise and the whole family can get involved. All you need are the following things.
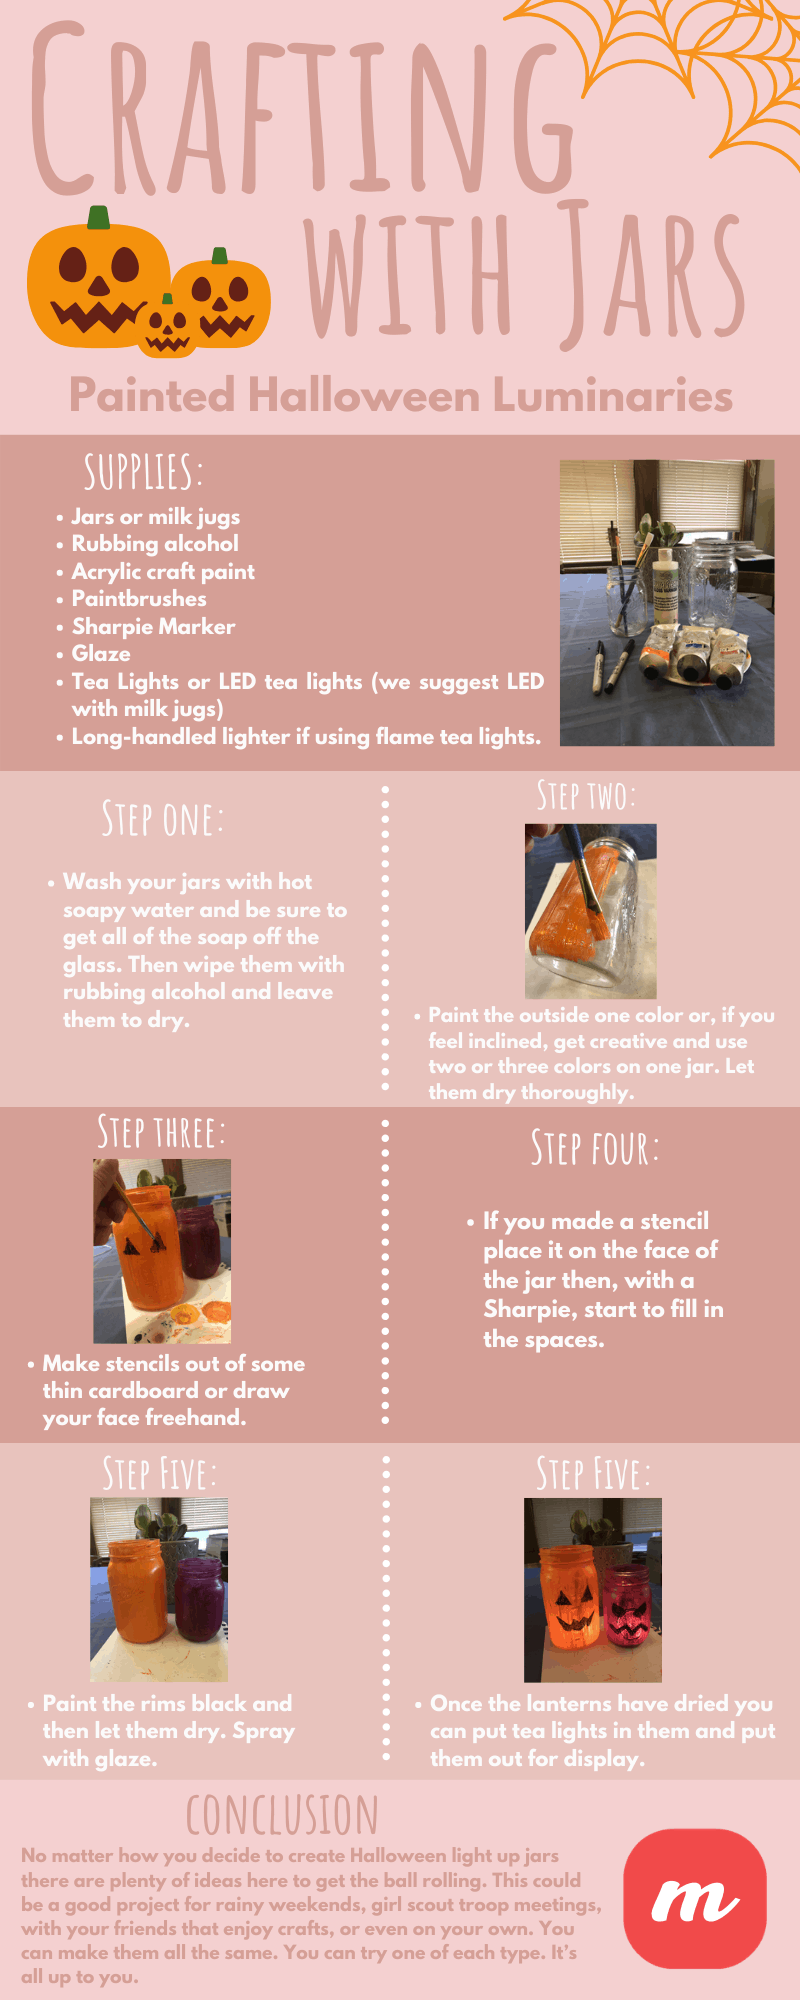
Supplies
- Jars or milk jugs
- Rubbing alcohol
- Acrylic craft paint
- Paintbrushes
- Sharpie Marker
- Glaze
- Tea Lights or LED tea lights (we suggest LED with milk jugs)
- Long-handled lighter if using flame tea lights.
Instructions
Step One
Wash your jars with hot soapy water and be sure to get all of the soap off the glass. Then wipe them with rubbing alcohol and leave them to dry.
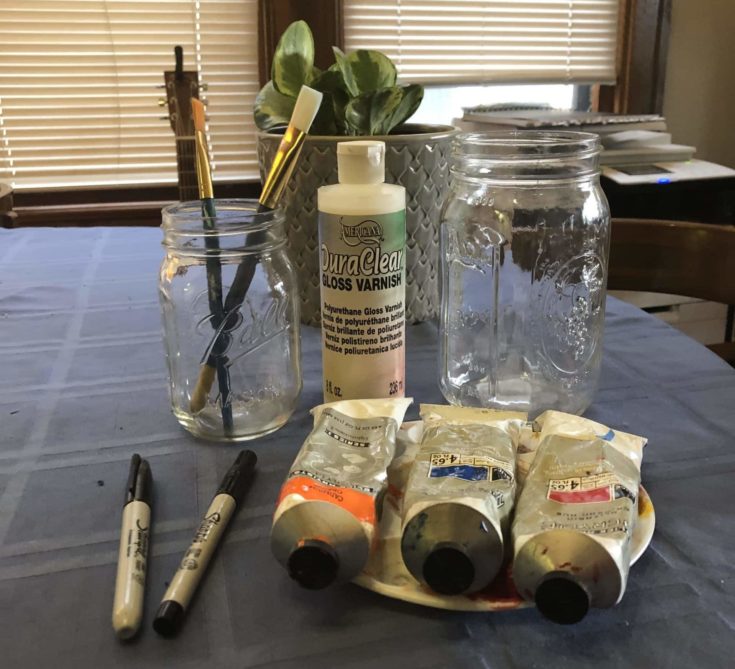
Step Two
With clean hands get the dry jars and start to paint them. It’s important to eliminate the oils from your fingers or the paint might have issues sticking to the glass. Paint the outside one color or, if you feel inclined, get creative and use two or three colors on one jar.
It’s important to paint on the OUTSIDE of the to get the full effect. Also, one layer should suffice. Anything thicker would inhibit the light from shining through. Let them dry thoroughly.
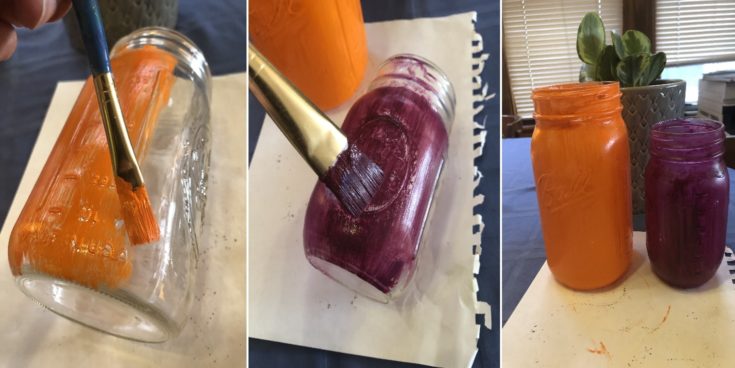
Step Three
Make stencils out of some thin cardboard or draw your face freehand. Stencils are fun to create and you can find a ton of templates on the internet. I prefer to just draw and skip that step because I love little imperfections in homemade creations. It’s a part of their charm.
Step Four
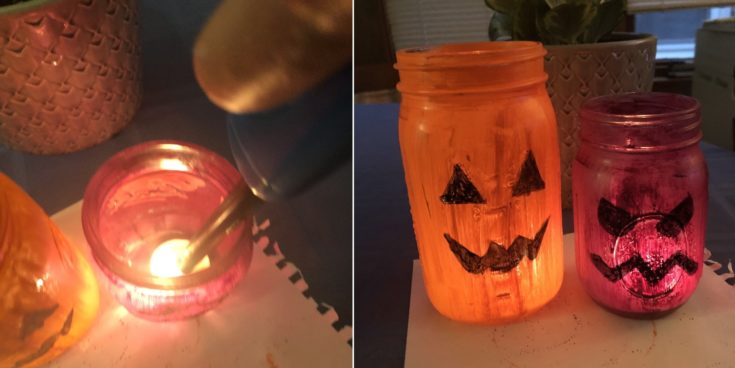
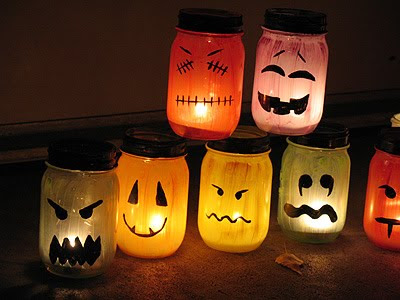
If you made a stencil place it on the face of the jar then, with a Sharpie, start to fill in the spaces. Freehand drawers can just start drawing. While Halloween jack o lanterns tend to be carved faces there’s no need to stick with a theme. Let your creative juices flow!
(Note: My Sharpies weren’t working too well on the paint so I used black acrylic paint instead)
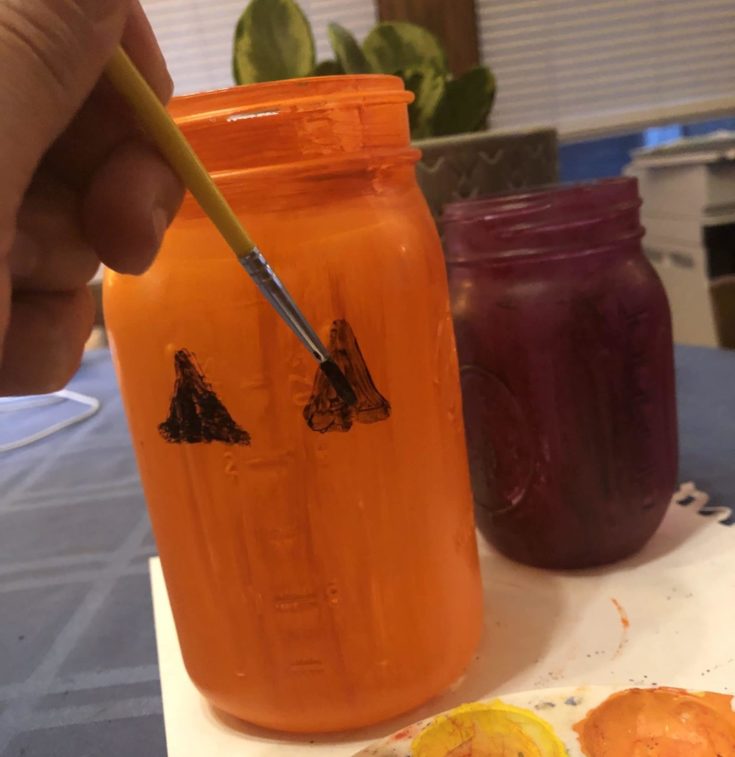
Step Five
Paint the rims black and then let them dry. Spray with glaze. Two coats should suffice. I would wait twenty minutes between the first and second coat. Then let them dry for a few hours.
Step Six
Once the lanterns have dried you can put tea lights in them and put them out for display. If you are using milk jugs or plastic lanterns you want to use LED lights. Not only will they melt from a flame the fumes can be toxic.
Different Designs
Just as there isn’t only one way to do anything this job is no different. We have put together a list of designs that you might find interesting and are sure to get you thinking about how you can personalize this task to your liking.
1. Don’t Forget The Hat!
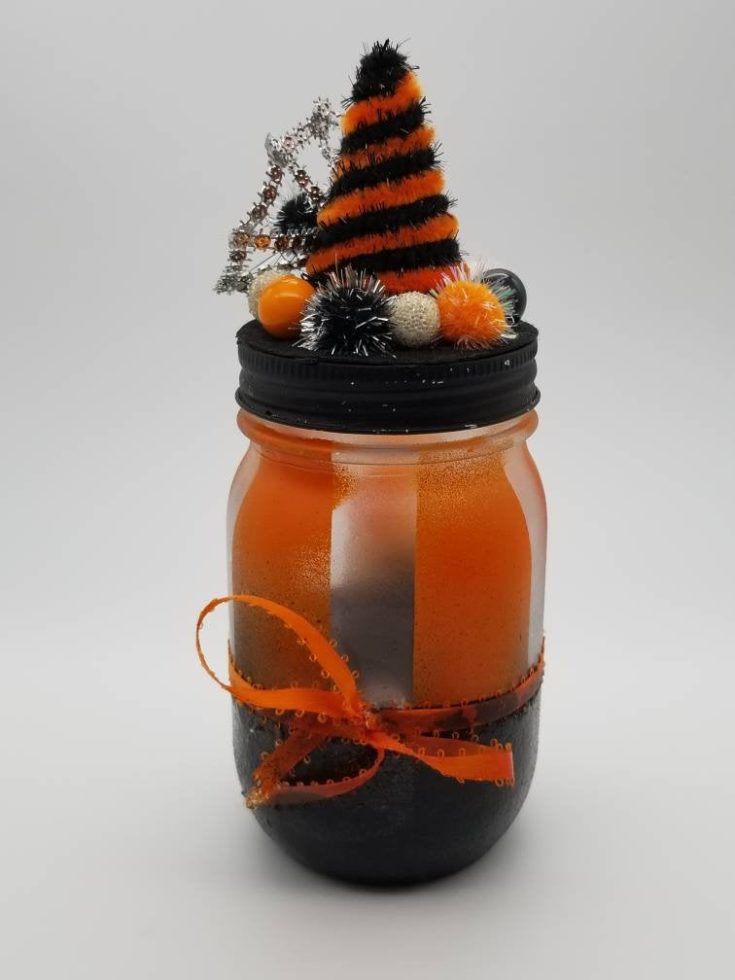
This design has taken the Halloween theme to the next level by creating a hat out of the lid. As you can see, this design requires you to make a candle out of the jar. This would add a bit of labor to our example but candle making is fun. You should give it a try.
The hat shouldn’t be too difficult. All you need is a thick piece of black paper, a few selected cuts in the right place, some bling and a glue gun and a witches hat should be no problem. Make sure to get a couple of pieces in case you make mistakes.
2. Paint the Inside
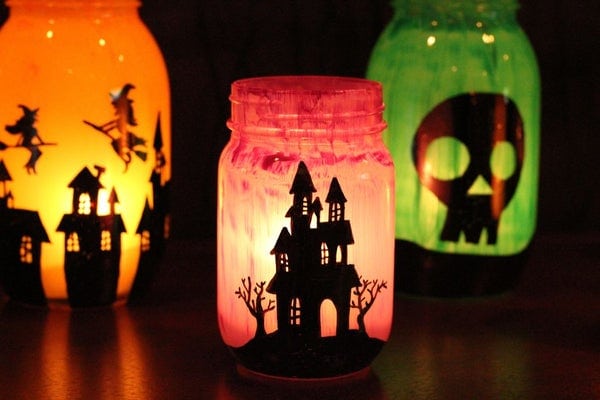
Here we have an idea that contradicts something I said earlier and goes beyond the idea of faces, which we suggested as well. The only difference with this idea is that they paint the inside with the color, then they use intricate stencils for the designs.
You can draw images on thick paper or cardboard to create stencils. An Exacto knife will come in handy when you are making those small cuts. Then you can trace the stencil with a thin marker and go back in to fill it all later with the bold. You may have noticed the lack of a lid, this is because they are using a real candle. LED lights won’t go out when deprived of oxygen.
3. Flip It

Next, we have an idea that turns the light around on us. Instead of painting the Ball jar and then placing a black image over it, this project requires you to put stickers on the jar and then spray paint them. First, you must go over it with a primer and then you can cover it with the color of your choice. Then you remove the sticker, insert the candle, and let it glow.
The idea here is to let the image be illuminated and the paint is thick enough so no light shines through the rest of the jar. You can use some random Halloween stickers you find at the store or make your own with some vinyl cut out. Glitter spray paint is a fun option with this type of composition.
4. Faces of Halloween
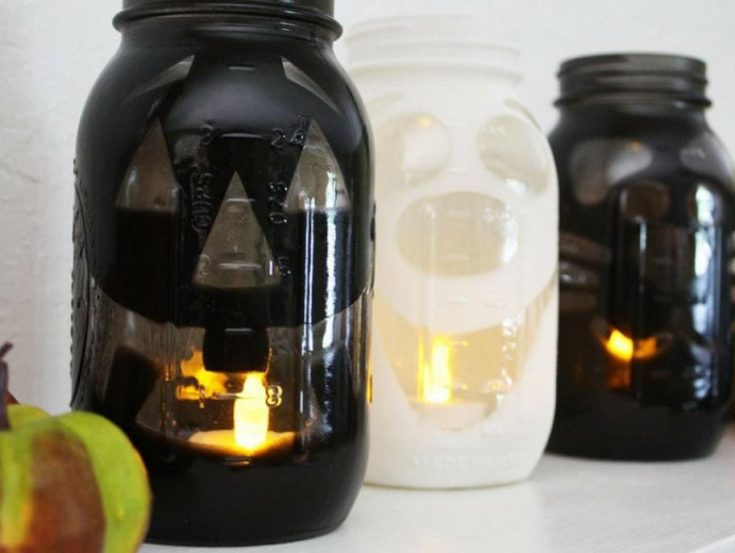
This DIY Halloween luminarie idea takes a hint from the last one but incorporates the true lantern ideology when it comes to illumination. Traditionally, we have been carving scary faces into pumpkins on October thirty-first and this layout goes back to those roots. Just take stickers and make eyes, a nose, and mouth. If you are making an animal face don’t forget the whiskers.
Black spray paint is what this creator did, and there wasn’t any primer used so the overall harmony of the piece is much different than our last example. You don’t have to stick with black spray paint, although it does give the jar a scary effect. These styles can be fun or frightening, that’s your call to make.
5. More Faces
Our next idea is very similar to a lot of the designs that we have listed for you here. That’s because, when a method has been proven to work, there is little need to venture too far from that track. That doesn’t mean you can’t find a way to make these illuminated Halloween mason jars your own.
Paint is a great tool when you are using tea lights, as you can see in this example. But, if you are using LED lights, your options have opened up immensely. For example, you can use colored tissue paper instead of paint to create a different effect.
6. Darkness Sets In
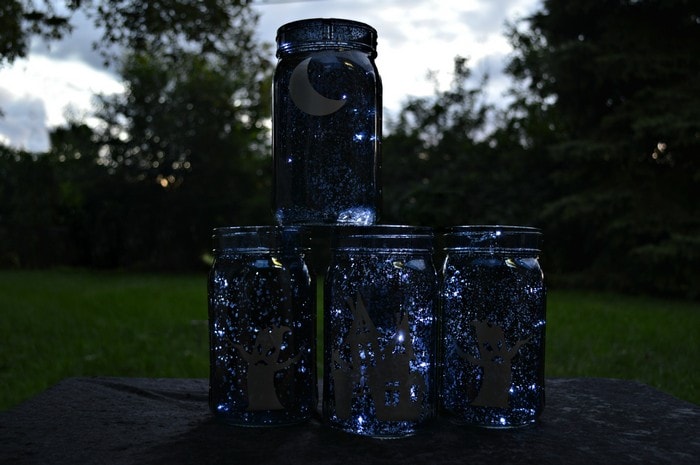
For this idea, you need to get special mason jars. Black mercury glass ones to be exact, some silver adhesive vinyl, a cutting device to create your stencils, a thin strand of battery-powered LED lights or tea lights. You can create images of ghosts, ghouls, monsters, witches, and scary castles to put on the outside.
When you use the strand lights opposed to the tealight the image you see is far different. Instead of one light glimmering from the bottom of the jar, it looks like a starry night behind whatever you put on the outside. This effect will make any warlock look horrifying.
7. Metallic A Lantern
Our final example uses a base of black with a sticker skull cutout and a final coat of metallic paint. The type she uses is called color shift but you can use any kind you want, just make sure the type you are using will stick to glass otherwise you have a rough go of it.
What I love about this design is the fact you don’t need an LED or tea light to illuminate it. If you get the right metallic paint it lights up without one.
Conclusion
No matter how you decide to create Halloween light up jars there are plenty of ideas here to get the ball rolling. This could be a good project for rainy weekends, girl scout troop meetings, with your friends that enjoy crafts, or even on your own. You can make them all the same. You can try one of each type. It’s all up to you.
If you enjoyed this post feel free to share it with your DIY friends and family or share it to your social media pages. You can also leave us a comment in the section below.